8.9.1 Overview
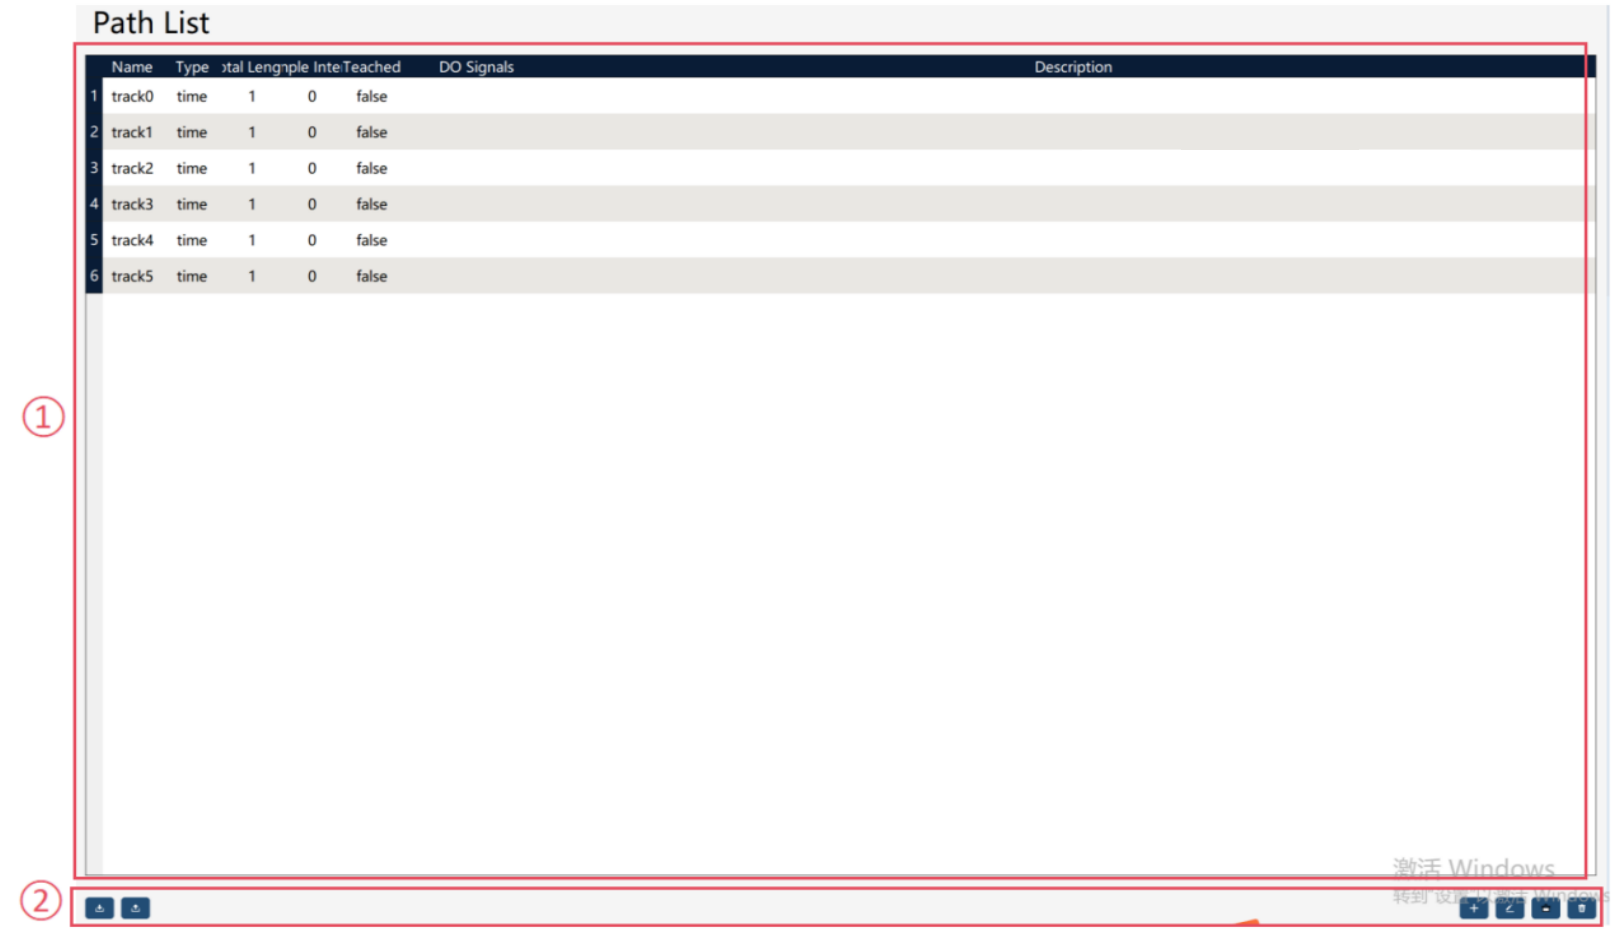
The path list is used to record the trajectories of the drag teaching and perform operations such as trajectory playback.
① |
Path list, which displays relevant attributes, including: name, type, total length, sampling interval, whether to include trajectory, DO signal, and description. |
② |
Function button area: |


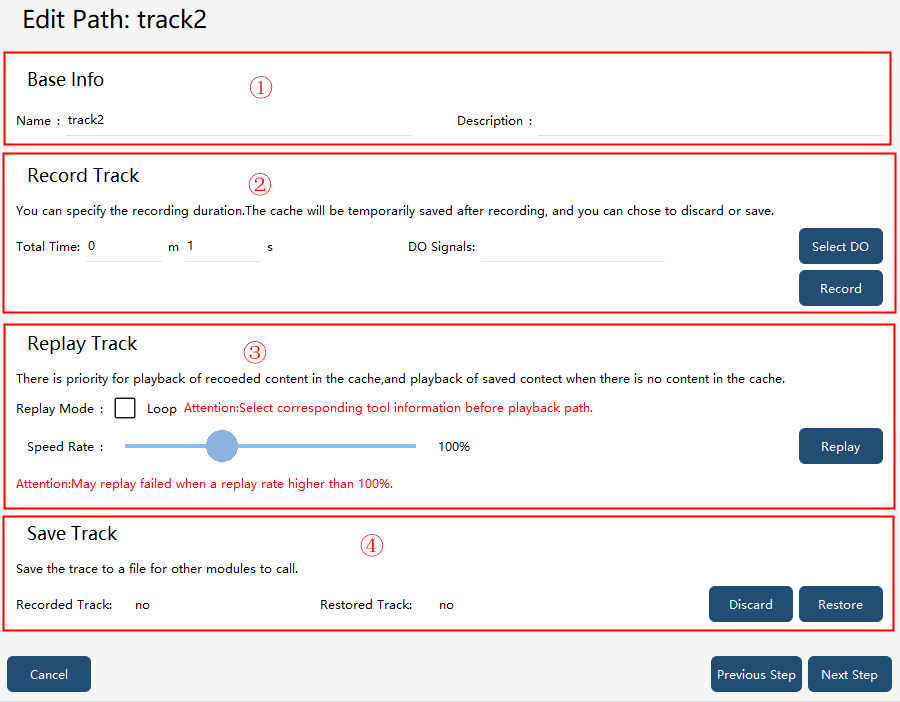
Path editing page:
① |
Basic information, for setting path name and description. |
② |
Path recording. If you need to record DO signals, you click the "Select DO" button and choose the DO signal in the pop-up dialog box. Each DO signal can also be mapped to a DI signal. In this case, changes in the DI signal will be recorded during path recording, and during subsequent playback, the output of the DO signal will be based on the recorded DI signal. If no DI signal is associated, changes in the DO signal will be directly recorded. At this time, the DO signal output can be manually set on the "Status Monitoring" - "IO Signal" interface. Total duration: Total recording time |
③ |
Playback, for play backing the recorded paths. You can set whether it runs in a loop, the running rate, etc. You can click the "Playback" button to play back the recorded path and confirm whether the recorded path is consistent with the expected one. |
④ |
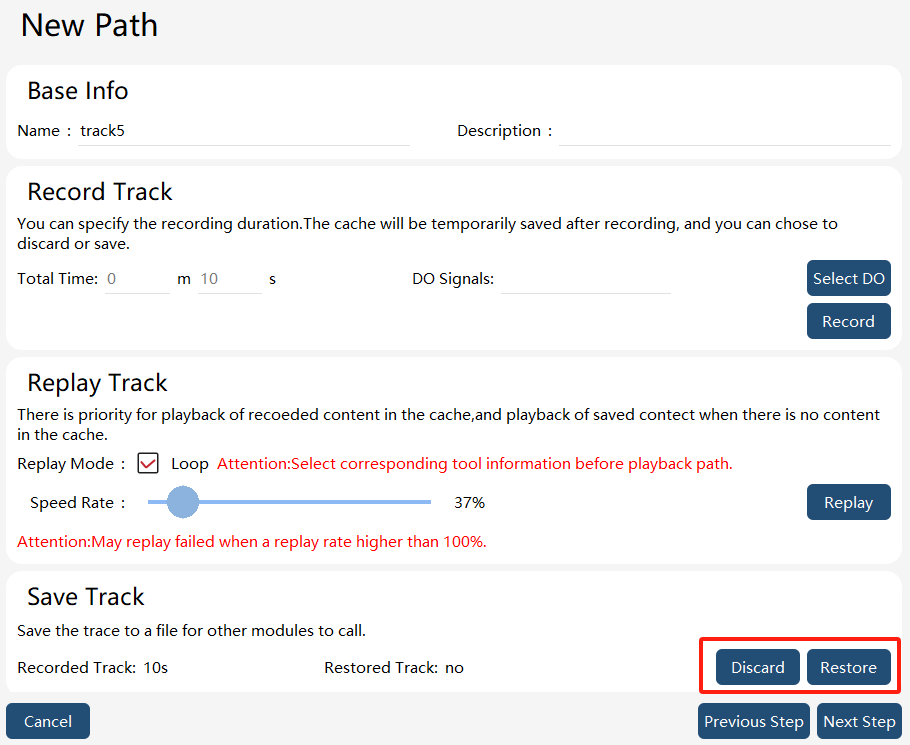
The trajectories can be saved in the cache region for subsequent use. Discard button: Discard this recording |
8.9.2 Operation examples
Operation |
Graphical Representation |
Explanation |
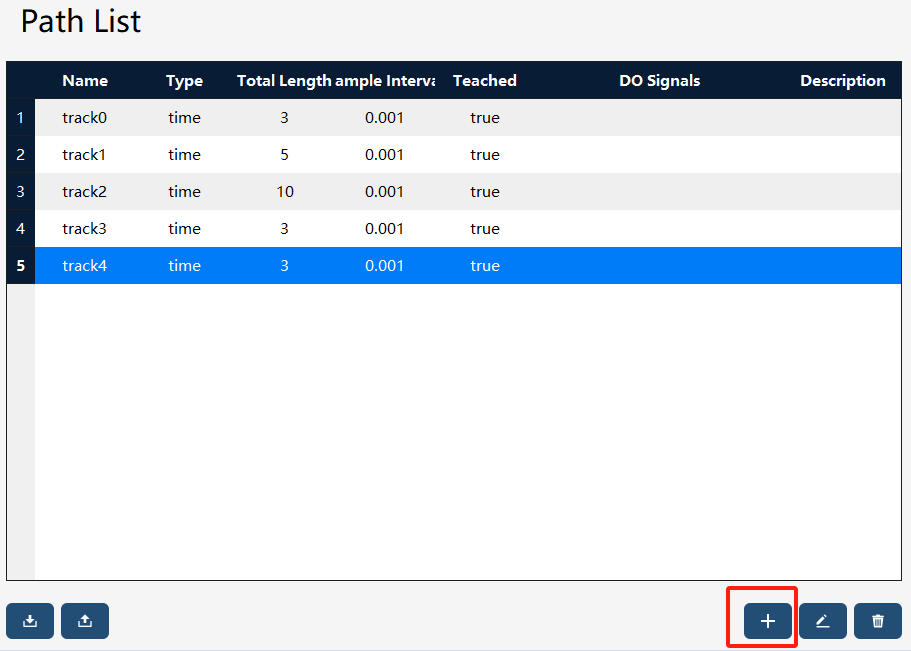
1. Turn on the drag mode. Click the "+" button in the lower right corner to create a new path. |
|
This operation can also be performed by pressing the end-effector buttons of the robot. |
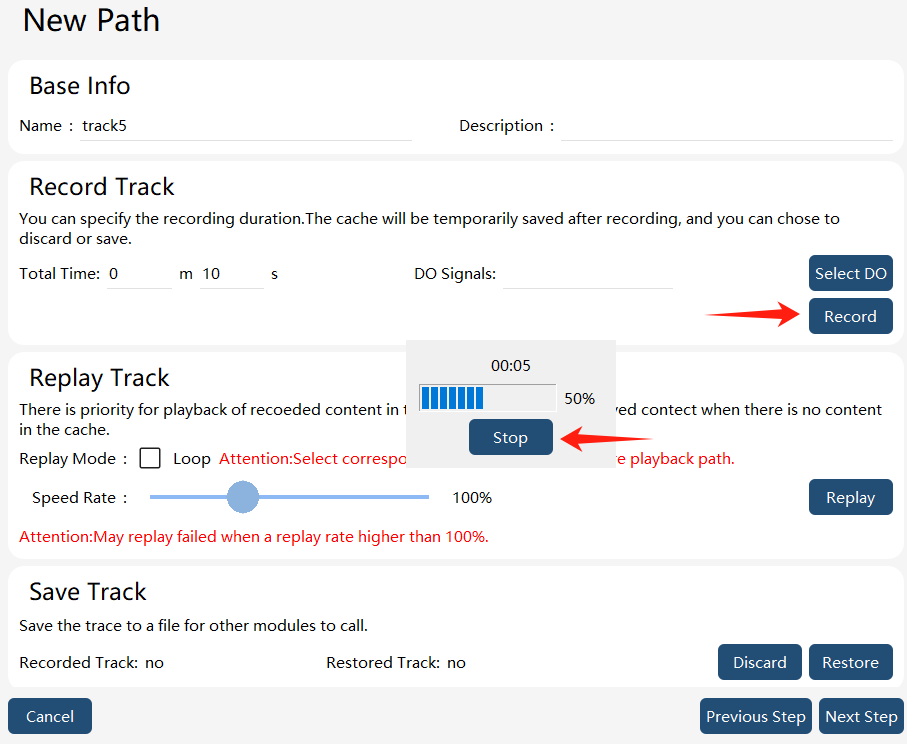
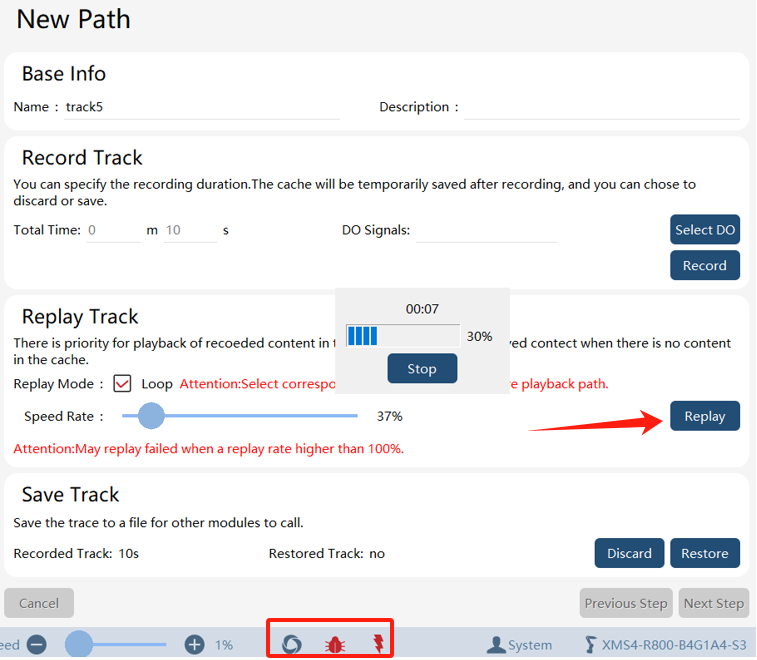
2. Set the recording duration, and after pressing the "Record" button, drag the end-effector to record the trajectory until the timing ends or the "Stop" button is clicked. |
|
Attention: Please stop dragging before the end of the recording time, otherwise, the path recording will fail. |
3. Turn off the drag enable button and switch to auto mode. Click the power-on button to power on the robot. Set the replay speed rate and replay mode, and click the "Replay" button to view the trajectory playback. |
|
|
4. Confirm the trajectory after the trajectory playback is finished. Click the "Restore" button to save the recorded trajectory as a file successfully. |
|
8.9.3 Path export/import
8.9.3.1 Path export
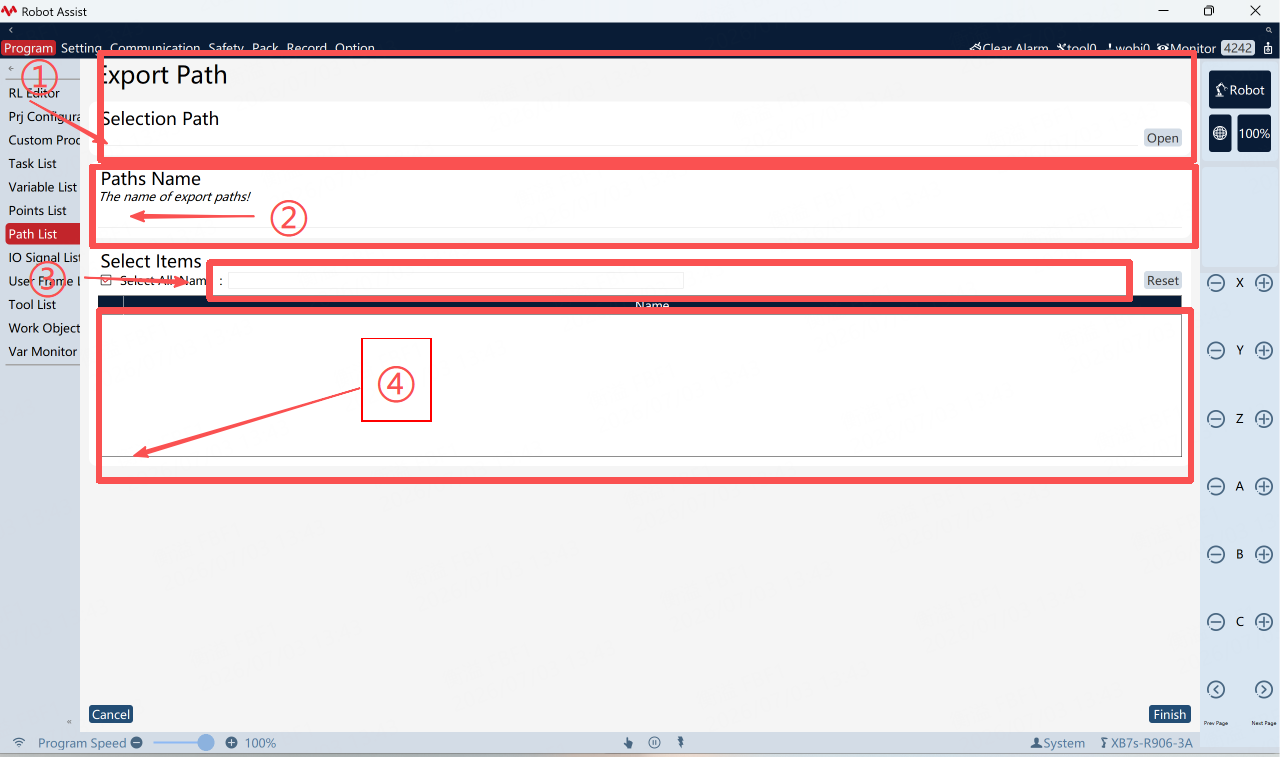
On the path list page, click the button at the bottom left to enter the path export interface.
① |
Path export target file (including path) |
② |
Input box of path set name |
③ |
Path filter box |
④ |
Path export selection list |
⑤ |
Path export button |
Export steps: First, input or select the path for the path export target file in ①, input the name of the path set to be exported in ②, and filter by name in ③, if necessary. Then, check the paths to be exported in ④. Finally, click the button in ⑤ to execute the export, and the exported path file will be generated in the path specified in ①.
8.9.3.2 Path import
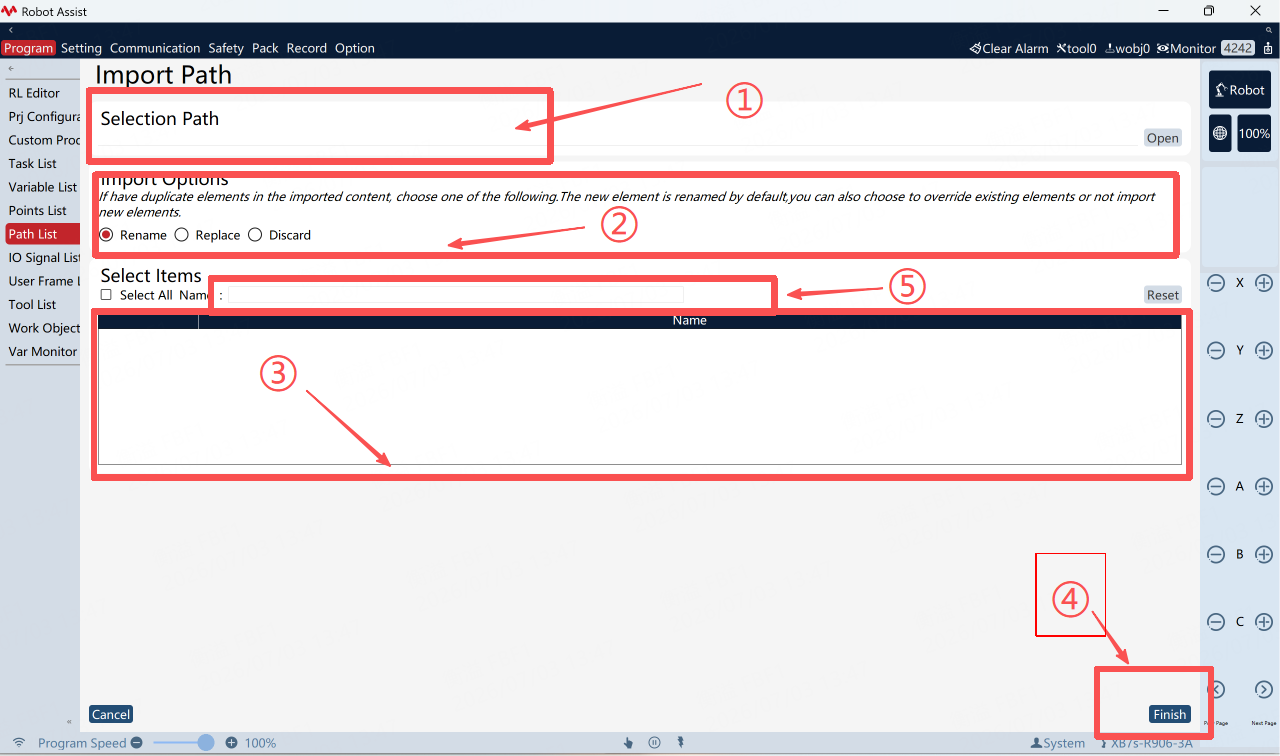
On the path list page, click the button at the bottom left to enter the path import interface.
① |
Path import file |
② |
Path import option, which is the strategy for handling entry conflict |
③ |
Path import entry |
④ |
Path import button |
⑤ |
Filter box |
Import steps: First, select the path file to be imported in ①, and filter the path by name in ⑤, if necessary. Then, select the conflict handling strategy in ② and the paths to be imported in ③. Finally, click the "Finish" button in ④ to execute the import, and the selected paths will be imported locally.