Overview
The point list is used to manage the robot points involved in projects in a unified manner. The points used in the RL program need to be configured in the point list before they can be used in the program.
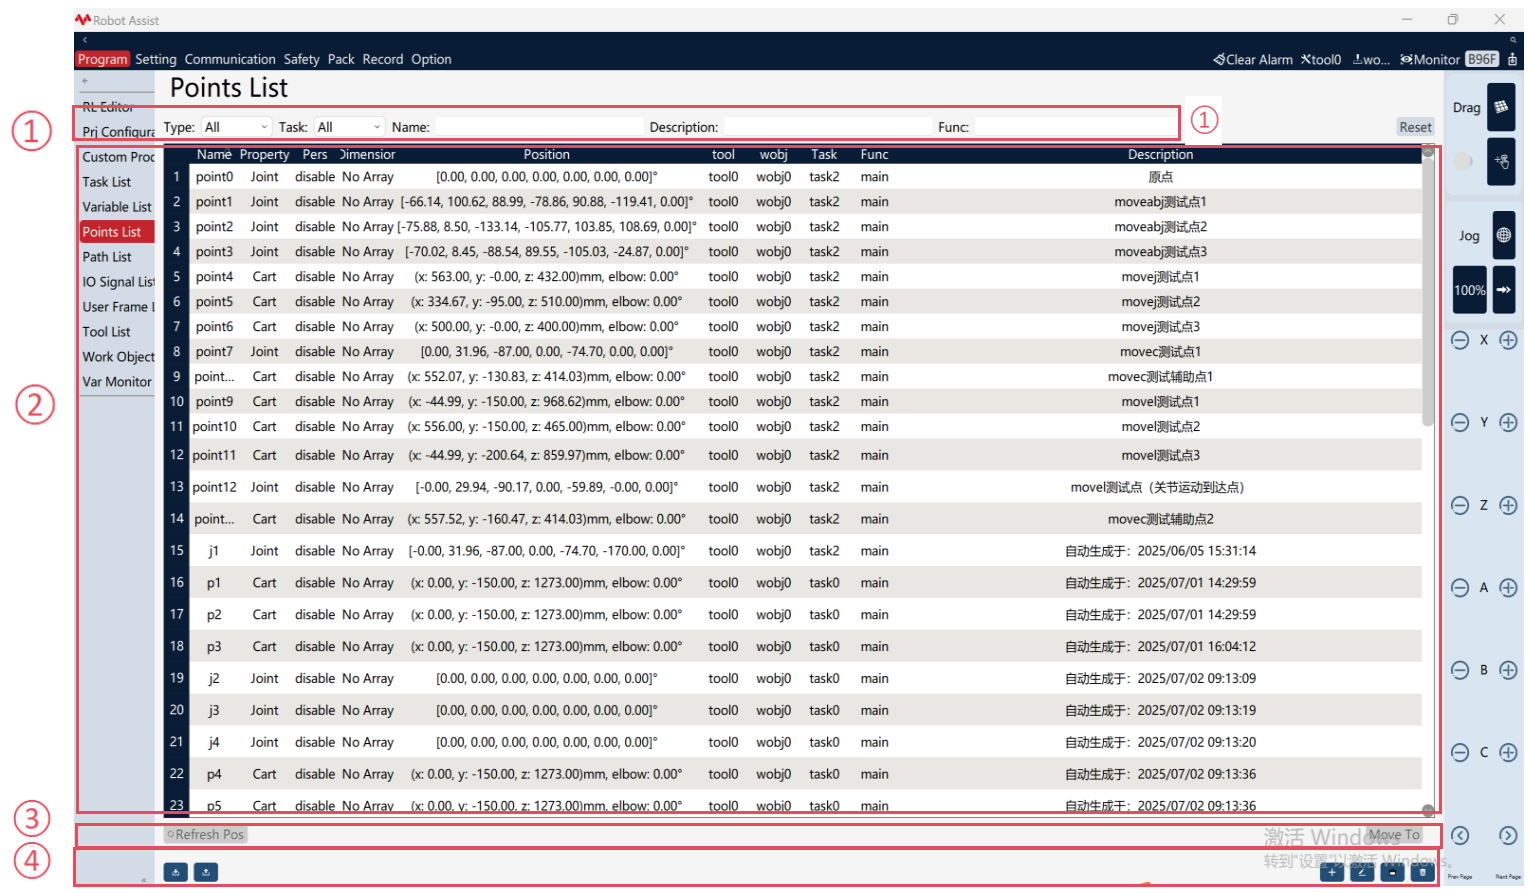
① |
Point filter: Allow you to filter which points are displayed in the list below. You can filter points by type, task, name, description, and function. |
② |
Point display: Show the attributes of each point, including name, attribute, persistence, position, tool frame, work object frame, task, function, etc. |
③ |
Point editing, use the "Update Position" button to update the point coordinates to the current point position of the robot; Click the "Select invalid points" button to select all the unused points in the RL editor within the current filtering range. The button on the right is used to move the robot to this point position: Clicking the "Move to" button will open the motion window. For Cartesian-type points, you can click the MoveL or MoveJ button: The robot will move to this point position in a straight line or through joint space motion; and for joint-type points, you can click the MoveAbsJ button: The robot will move to this point position through joint motion. |
④ |
Function button area: |


Point editing page:
Cartesian space point:
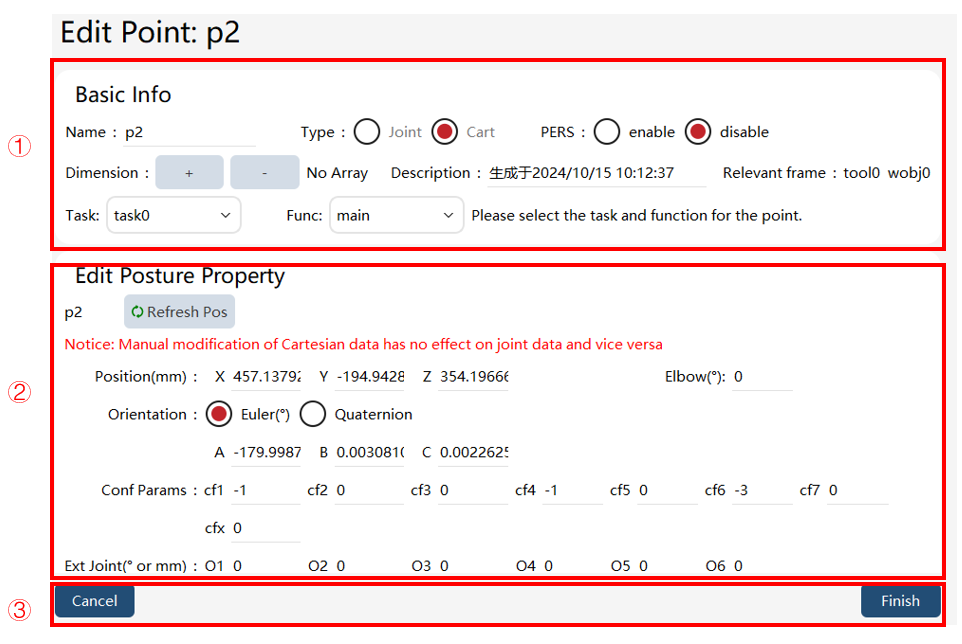
① |
Basic information, including point name, description, persistence, dimensions, task, and function. |
② |
Pose information. The point type is not modifiable. Clicking the "Update Position" button will update the point to the current pose, or you can change it manually. Manual modifications to Cartesian data will not affect joint data, and vice versa. Conf parameters: These parameters can be modified for the corresponding point position. |
③ |
Clicking "Cancel" returns to the point list interface without saving any changes; clicking the "Complete" button saves the current changes and returns to the point list. |
Joint space point:
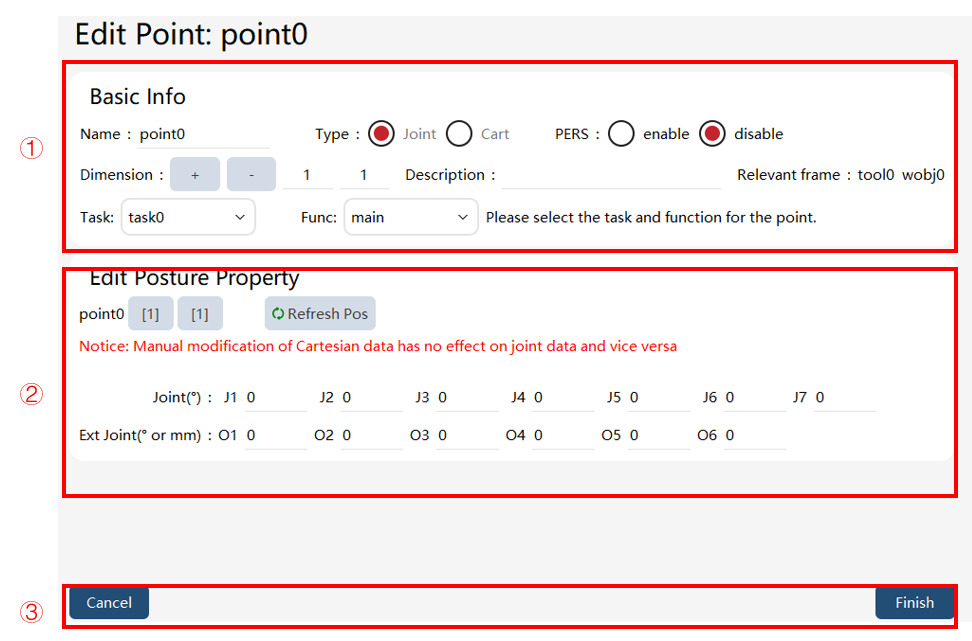
① |
Basic information, including point name, description, persistence, dimensions, associated frames, task, and function; clicking the dimension add or delete buttons can modify the point’s dimensions. |
② |
In the pose information, when the array is multi-dimensional, different dimensions can be selected to modify their contents. Clicking the "Update Position" button will update the point to the pose of the currently selected dimension, or you can change it manually. For points of Cartesian type, manually modifying the data does not change the joint data, and vice versa. |
③ |
Clicking "Cancel" returns to the point list interface without saving any changes; clicking the "Complete" button saves the current changes. |
Operation examples
Point creation/editing
Operation |
Graphical Representation |
Explanation |
1. Creating/editing |
|
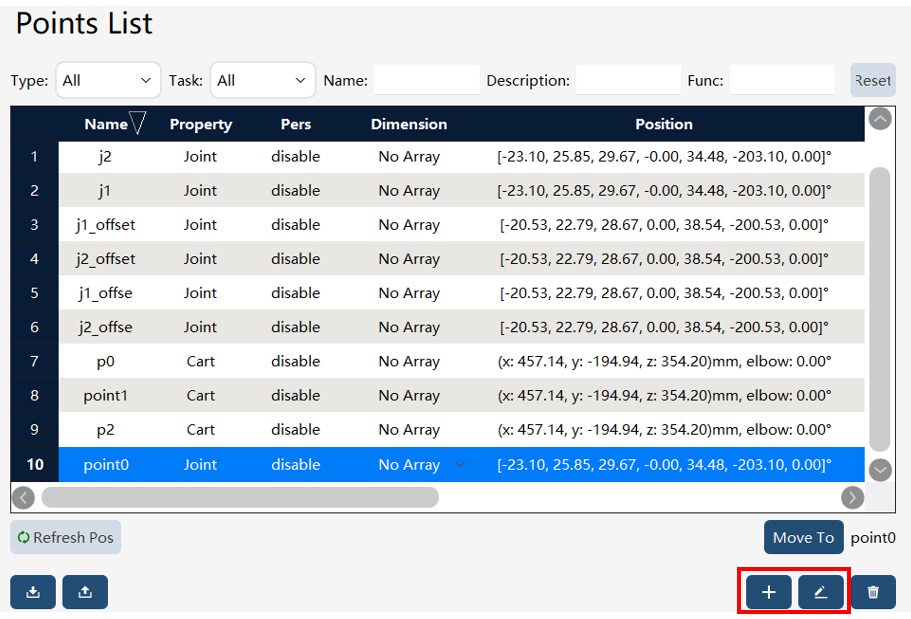
Click the |
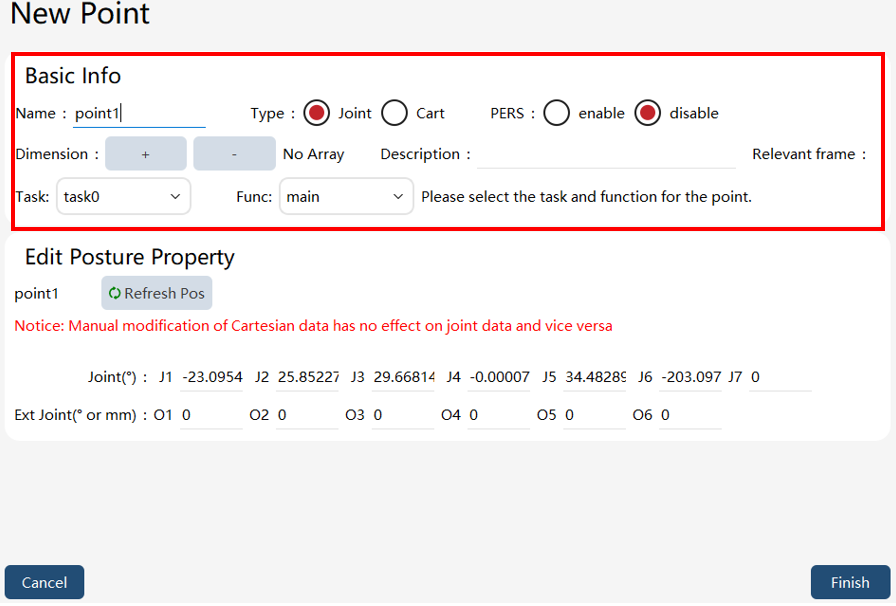
2. Basic information editing |
|
When creating or editing a point, you can select the name, type, point description (optional), persistence, dimensions (optional), task, function, etc. Users can set the point’s dimensions using the dimension add and delete buttons. |
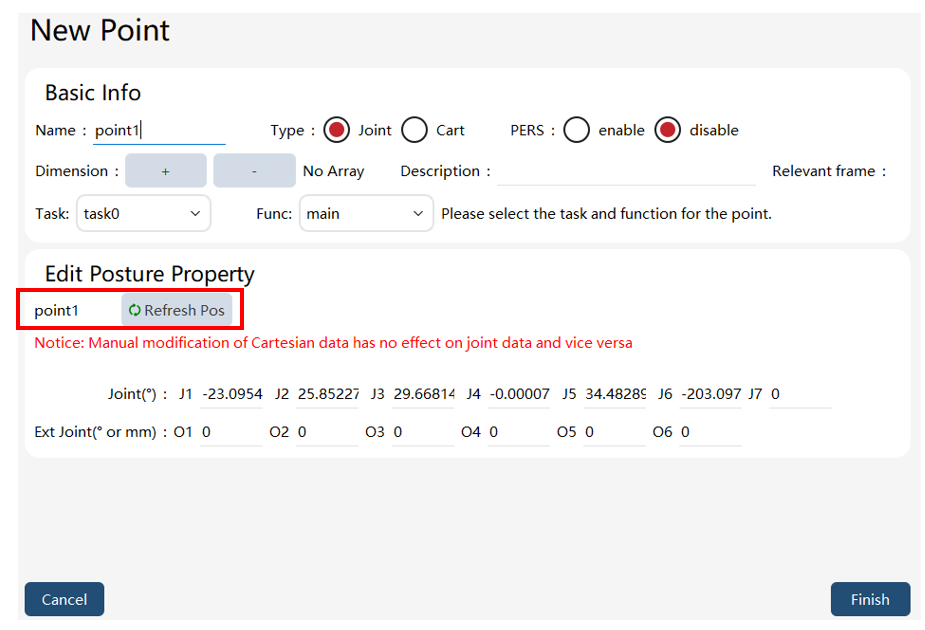
3. Pose information editing |
|
Select the type of point and obtain the current pose of the robot through "Update Position". If the point is a new point, the current pose will be obtained by default. |
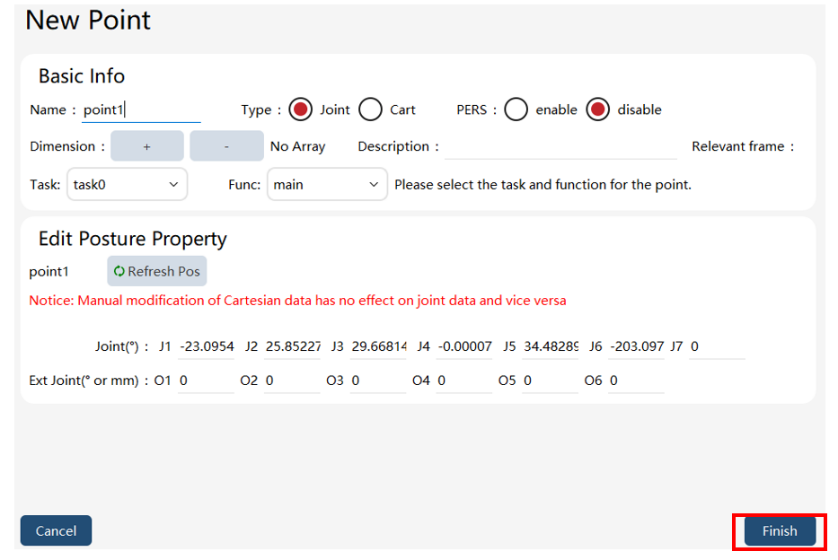
4. Complete |
|
Click the "Complete" button to save the current information. |
8.8.2.2 Point "Move to"
Operation |
Graphical Representation |
Explanation |
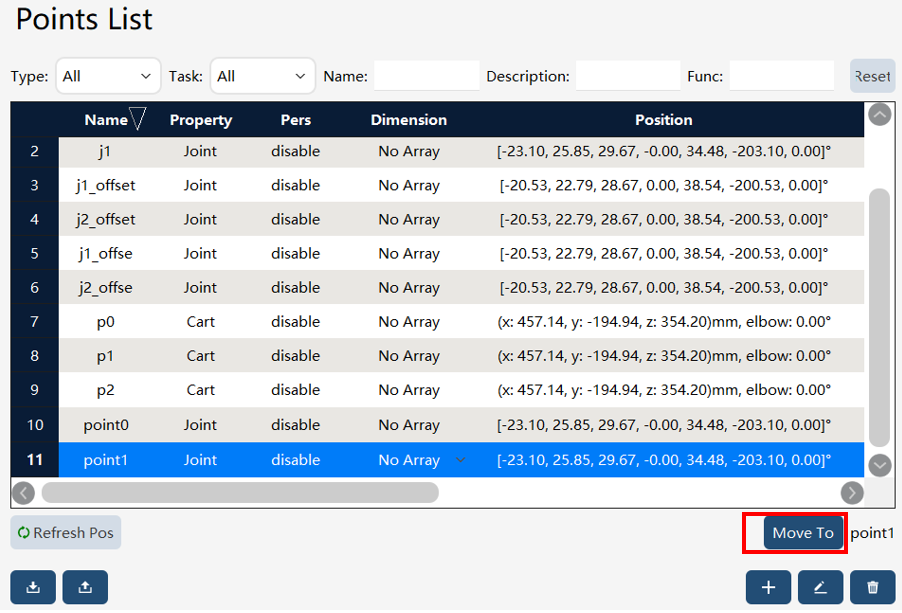
1. Select the corresponding point and click the "Move to" button |
|
|
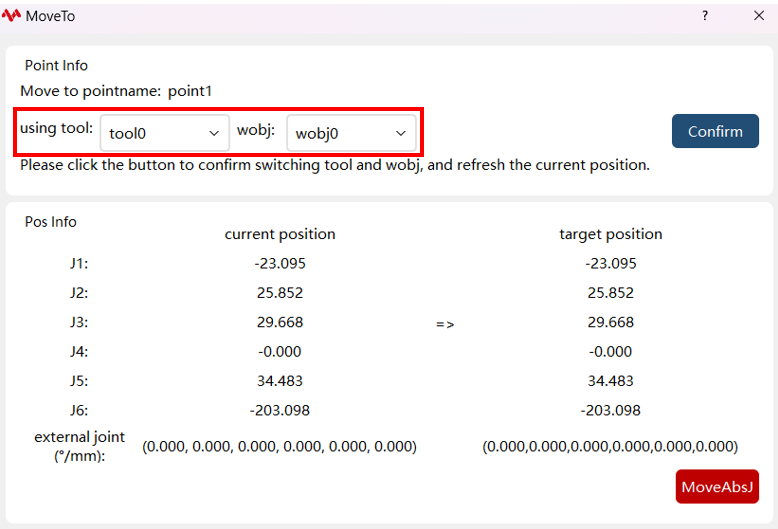
2. Select the tool and work object for point motion |
|
The "Move to" button can only be clicked without clicking the "Confirm" button if the selected tool and work object match those in the point information. If they do not match, the "Move to" button is grayed out and cannot be used directly; motion requires clicking the "Confirm" button first. |
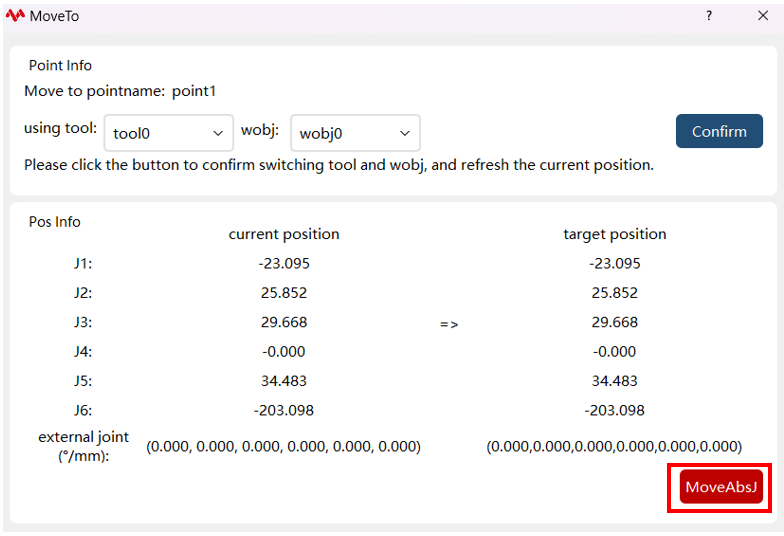
3. Perform the "Move to" operation |
|
For joint-type points, only MoveAbsJ motion is allowed. For Cartesian-type points, only MoveJ and MoveL motions are allowed. |
8.8.2.3 Point sorting
Operation |
Graphical Representation |
Explanation |
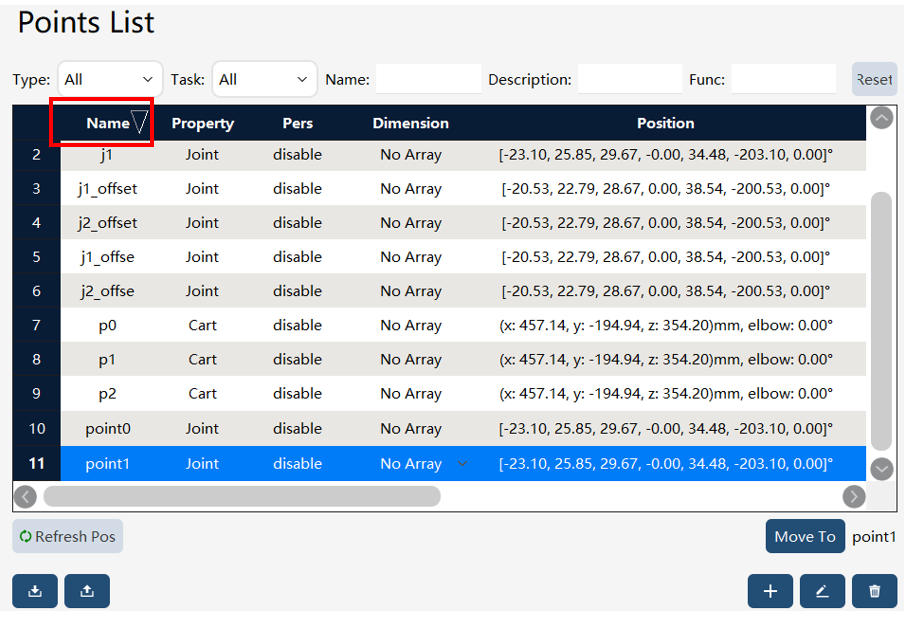
1. Upon the first entry to the point list interface, the sorting indicator is displayed by default on the right side of the name |
|
A downward arrow indicates descending order, and an upward arrow indicates ascending order |
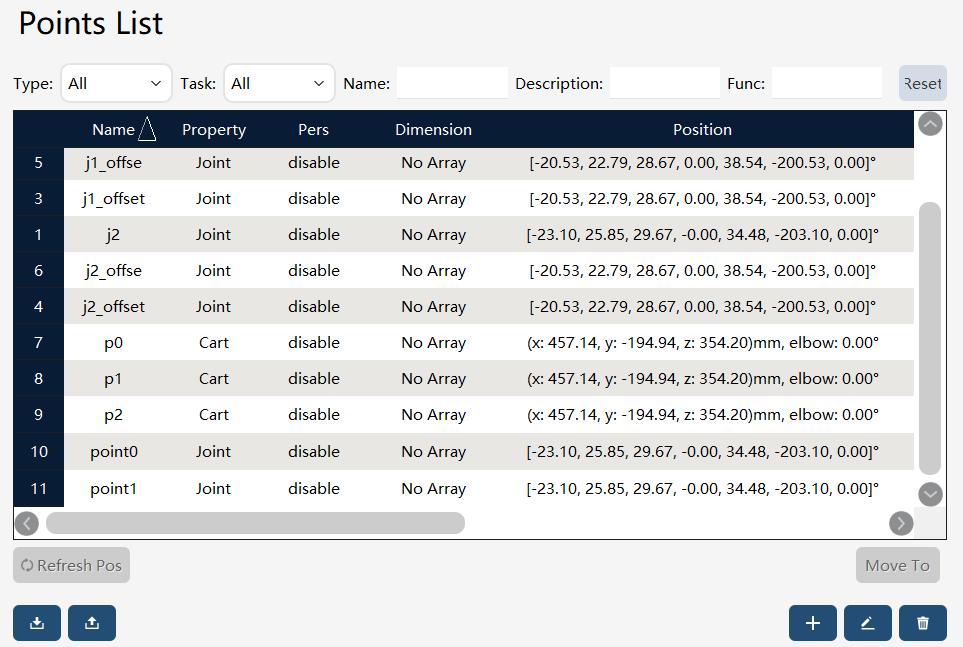
2. Click to sort |
|
The point list will be sorted according to the current sorting symbol. Note: The initial descending symbol when first entering the interface does not indicate that the point list is sorted in descending order until the sorting function has been used. |
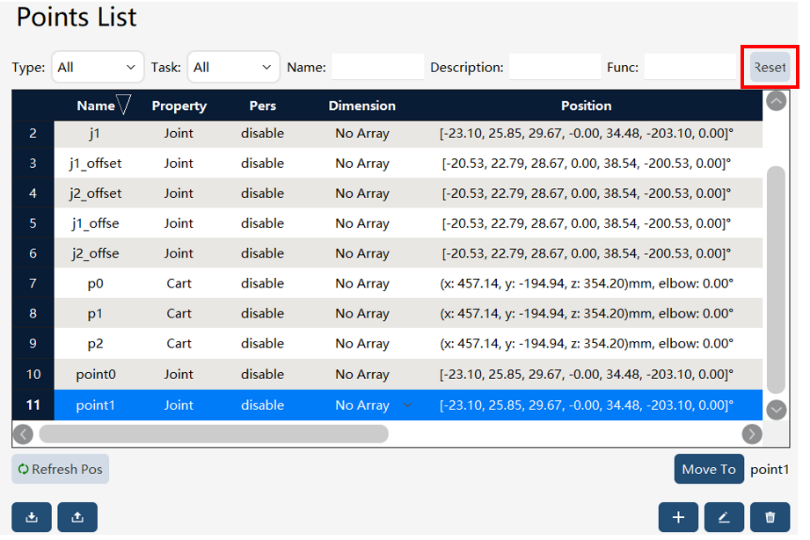
3. Reset the sorting |
|
Clicking "Reset" will restore the point list to its state before any sorting was applied. |
8.8.2.4 Batch deletion of points
Operation |
Graphical Representation |
Explanation |
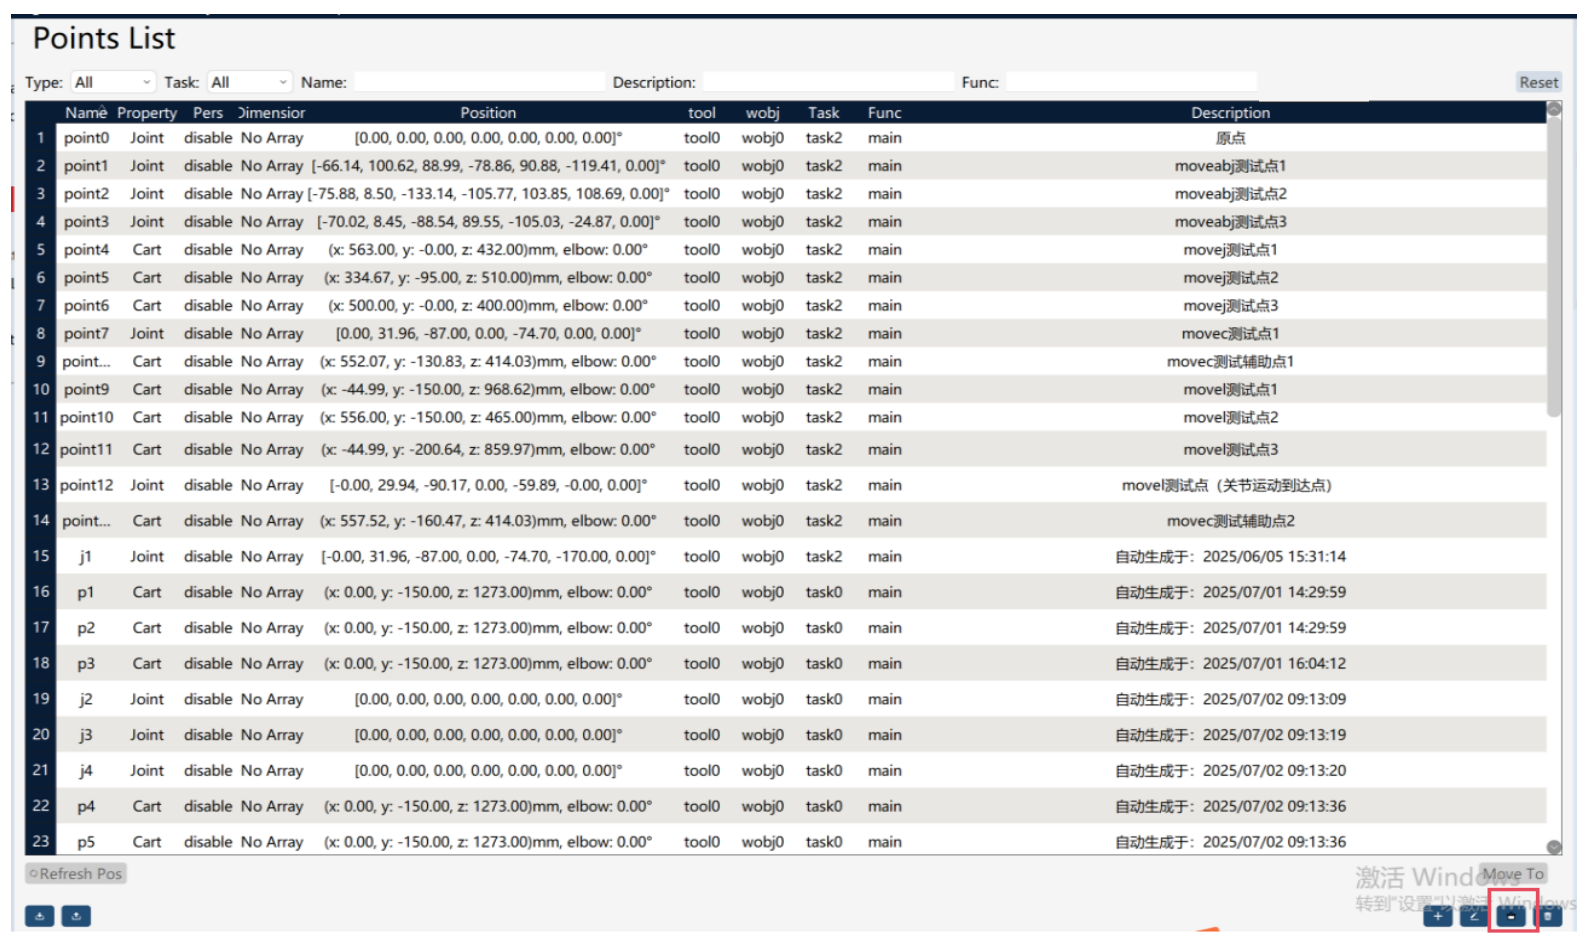
1. Click the Multi-select button |
|
Click the multi-select button to enter multi-selection mode. |
2. Select points to be deleted |
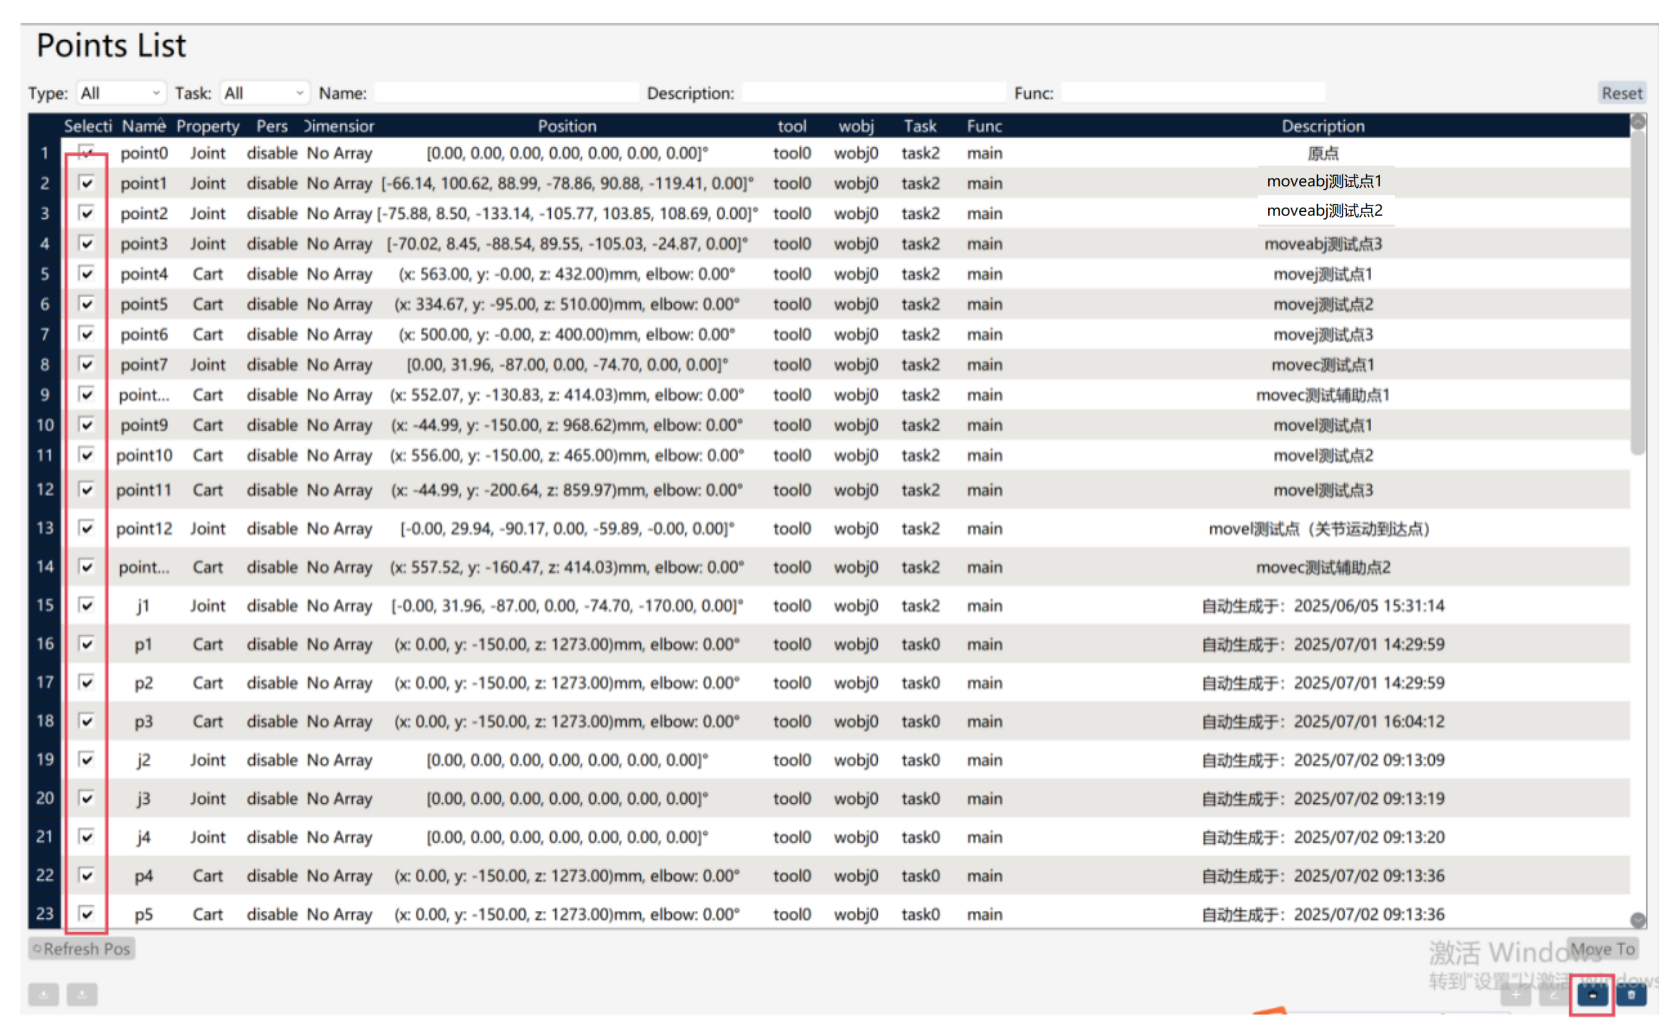
|
Check the box before each point to select, or use "Select All" to choose all points. |
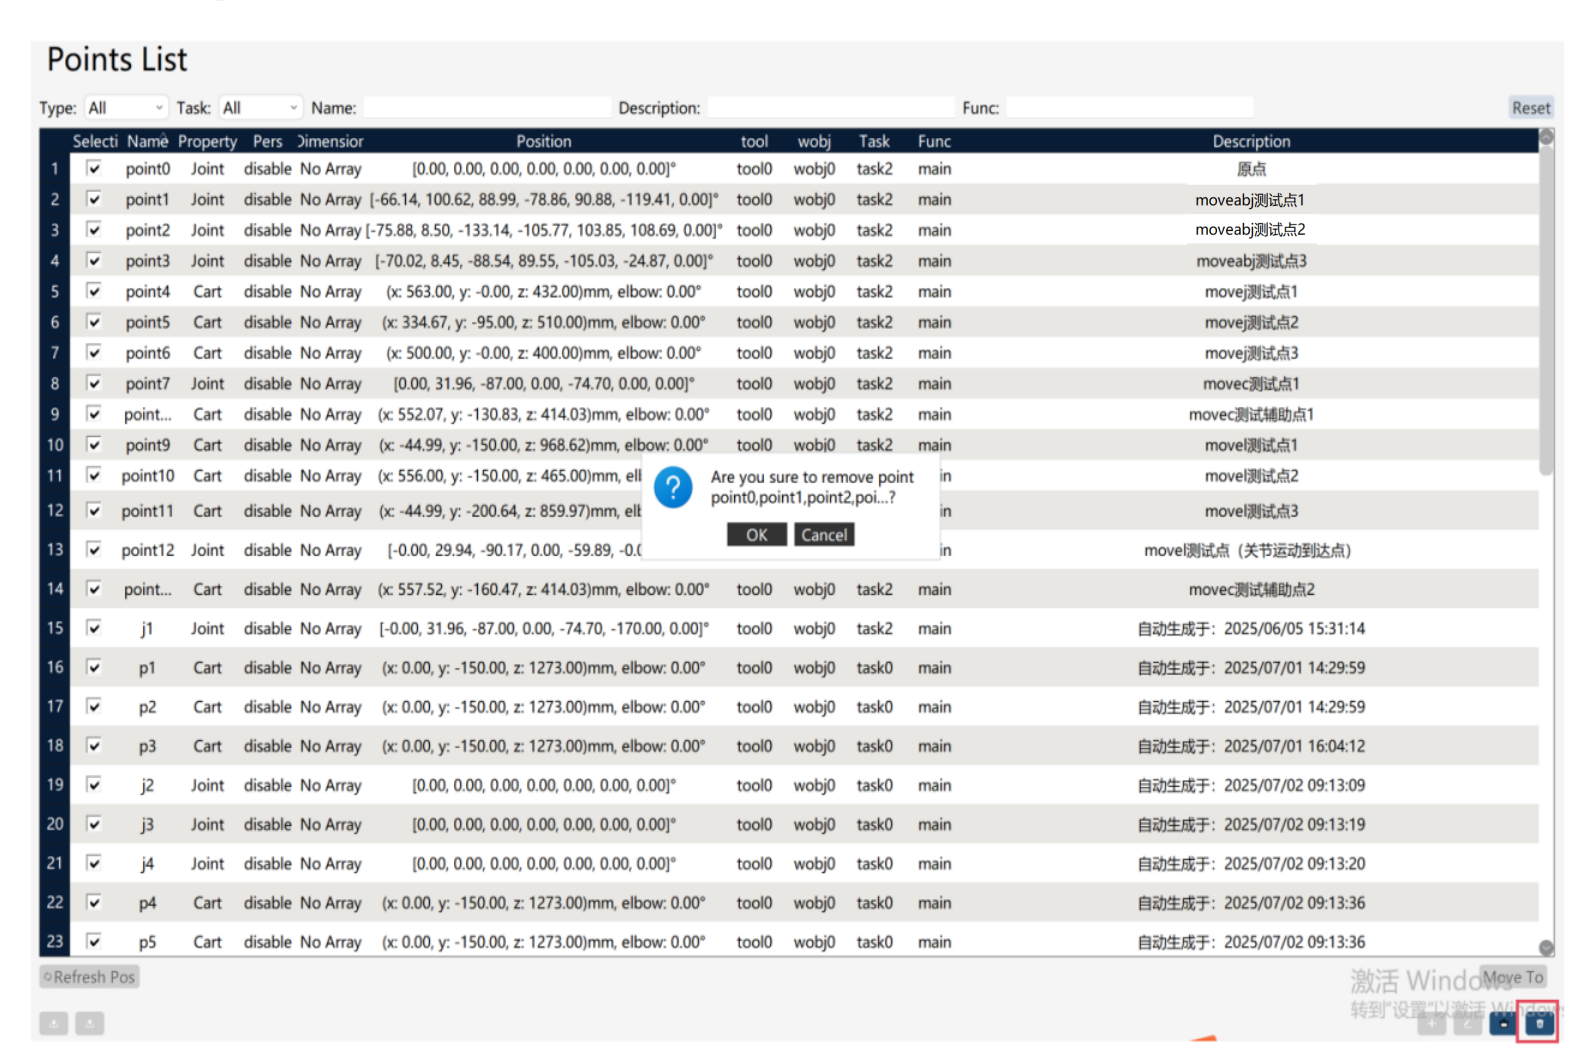
3. Delete the selected points |
|
Click the Delete button and confirm by clicking "OK" in the confirmation dialog box to delete the selected points. |
8.8.3 Point export/import
8.8.3.1 Point export
On the point list page, click the button at the bottom left to enter the point export interface.
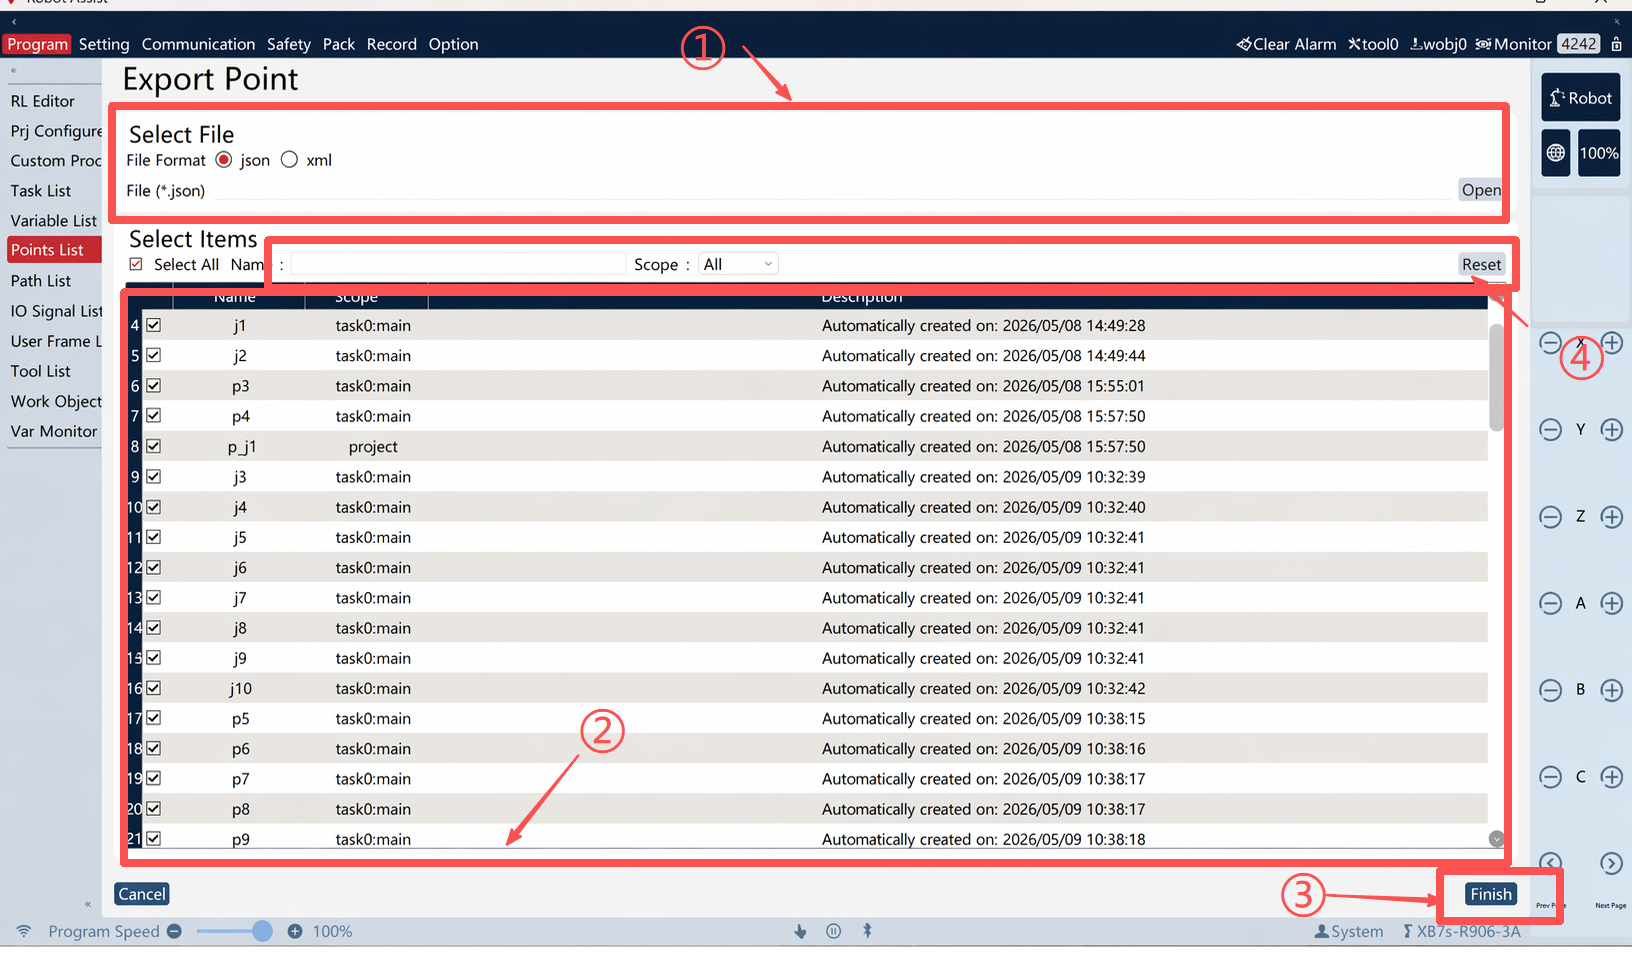
① |
Point export target file (including path) |
② |
Point export selection list |
③ |
Point export button |
④ |
Point filter box |
④Export steps: First, input or select the path for the point export target file in ①, and filter the point by name in ④, if necessary. Then, check the points to be exported in ②. Finally, click the button in ③ to execute the export, and the exported point file will be generated in the path specified in ①.
8.8.3.2 Point import
On the point list page, click the button at the bottom left to enter the point import interface.
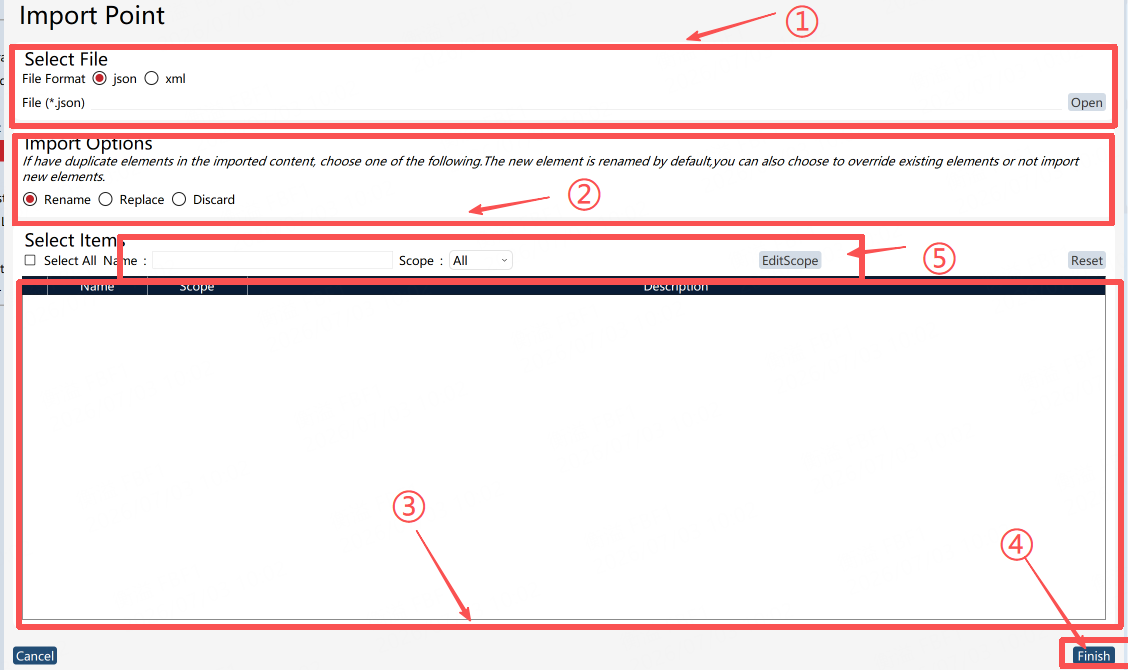
① |
Point import file |
② |
Point import option, which is the strategy for handling entry conflict |
③ |
Point import entry |
④ |
Point import button |
⑤ |
Point filter box |
Import steps: First, select the point file to be imported in ①. Then, select the conflict handling strategy for points in ② and the points to be imported in ③. Finally, click the button in ④ to execute the import, and the selected points will be imported locally.