Project configuration
The Project Configuration interface is used for the relevant configuration of the current project.
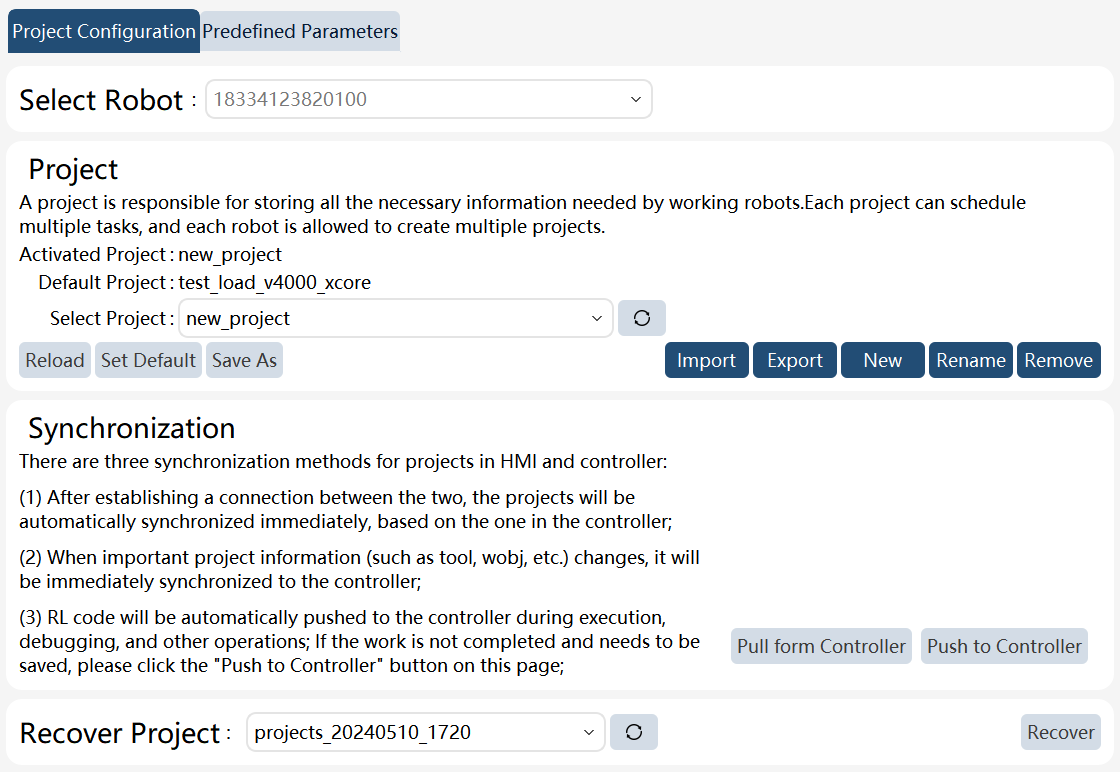
Robot selection
When the RobotAssist software is running on the PC side and the robot is not connected, if you want to edit the RL project offline, you can select a previously connected robot here, and the system will switch and display the project data of the robot.
When the RobotAssist software is connected to a robot, the currently connected robot is shown here.
Project
Reload: Reload the selected project.
Compared to previous versions, Version 3.1 has implemented adjustments to the RL programming language syntax. The main changes are as follows:
-
All functions and register commands must be enclosed in parentheses () when called;
-
Every expression must be terminated with a semicolon ;
For example, in older versions, the program code may be written like this:
MoveL p1, v3000, z50, tool0
int a = 200
ConfL off
Whereas in Version 3.1, it shall be modified to the following format:
MoveL(p1,v3000, z50, tool0);
int a = 200;
ConfL(off);
Upon upgrading to Version 3.1, when you click "Reload" in the "Project Configuration" interface or click the "PPToMain" button in the "Program Editing" interface, the system will automatically detect and display a prompt to guide you through the project upgrade process.
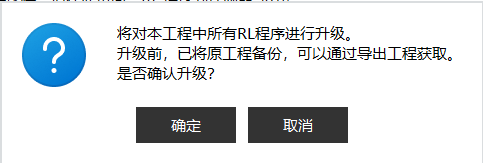
Please note that once the upgrade is complete, if you need to revert to a previous version, you can export the current project in the 3.1 format. The exported ZIP file will include "ProjectName_old1.zip, " which is a backup of your project before the upgrade. Be sure to keep this backup file properly stored for future needs.
Set as default: Set the selected project as the default project, which can be automatically loaded when the robot is started up.
Save as: Save as a selected project and push it to the controller.
Import: Open the Import Project page and select parameters such as the project system and project path to be imported.
Export: Open the Export Project page where you can select the project you wish to export and specify the export path. The system supports exporting projects in the following formats: xCorev2.2 (and earlier), xCore3.0, and xCore3.1 formats.
New: You can click it to create a new project. The project name can only be a collection of letters, numbers, and an underscore.
Rename: Rename the currently selected project.
Delete: Delete the currently selected project.
|
Files cannot be recovered once deleted! |
Synchronization
There are three ways to synchronize the project files in HMI with those in the controller:
-
After the connection between the two is established, their project files will be automatically synchronized immediately, with the project files in the controller taking precedence;
-
When the important information of a project (such as tool and work object) changes, this change will be synchronized to the controller immediately;
-
The RL code will be automatically pushed to the controller whenimage::en/image234.png[width=700,align=center] performing operations such as operation debugging. If the work is not completed and you need to save it, you can click the "Push to Controller" button on this page.
"Load from Controller" button: The teach pendant will re-synchronize and load the projects from the controller, and this operation will directly overwrite all current projects in the teach pendant.
"Push to Controller" button: The teach pendant will synchronize its current projects to the controller. If the program is modified during debugging, click this button, and the pointer hot update will be enabled, and the current program modifications will take effect in the controller.
Restore project
When the project is modified, the controller will back it up periodically. In the drop-down list, select a backup project named by time and click "Restore" to restore the backup project. Click image::en/image235.png[width=700,align=center]to refresh the backup project list.
Project upgrade
Normally, you do not need to manually use the "Project upgrade" function in the "Project Configuration" interface. However, in certain special scenarios where the upgrade cannot be performed by clicking "Reload" or the "PPToMain" button, you may manually trigger the upgrade process by clicking this function button.
Please note that once the upgrade is complete, if you need to revert to a previous version, you can export the current project in the 3.1 format. The exported ZIP file will include "ProjectName_old1.zip, " which is a backup of your project before the upgrade. Be sure to keep this backup file properly stored for future needs.
Shutdown recovery
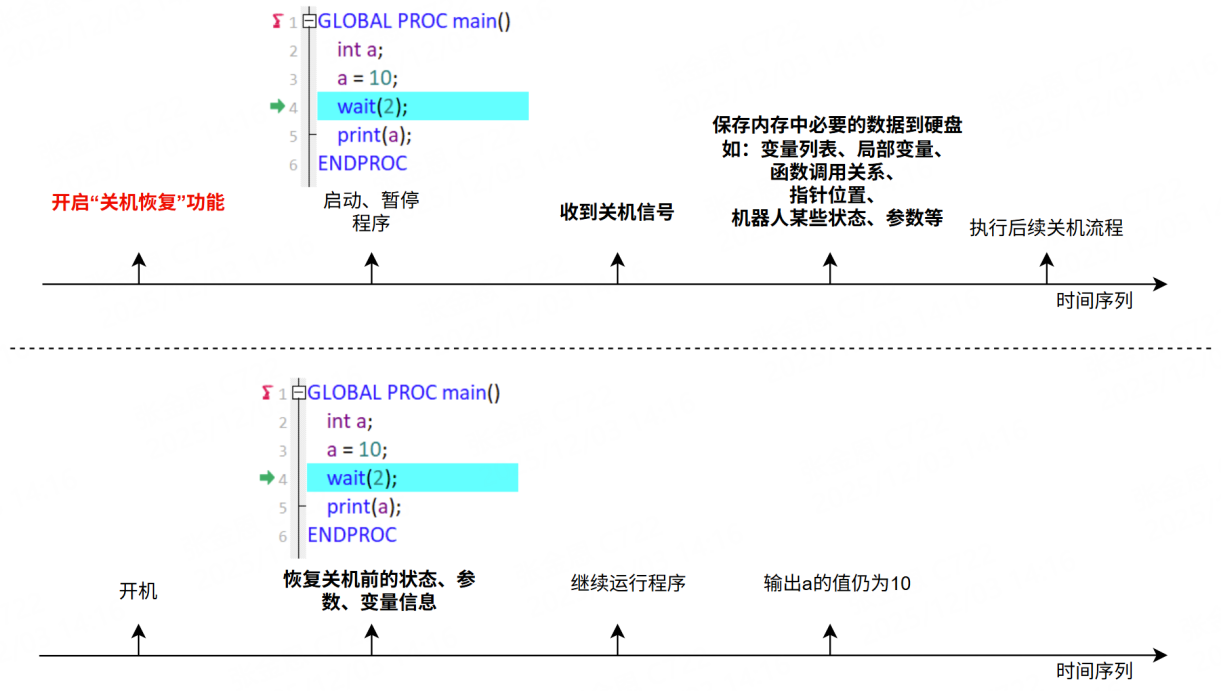
After the "shutdown recovery" is enabled, if a normal shutdown occurs during the RL program running, the controller will automatically recover the status before the shutdown after powering on again.
As of version 3.2, this function supports the recovery of variable data, pointer data, function call relationships, and some robot status parameters.
A simple illustration of the shutdown recovery is as follows:
Normal shutdown available for data recovery:
-
In the Teach Pendant, enter the Controller settings → Basic settings, and click the "Restart/Shutdown" button to shut down.
-
Press the "POWER" button on the control cab to shut down.
-
For the models equipped with the UPS safeboard, an unexpected power outage occurs.
Except as aforesaid, the data recovery is barely available after an abnormal shutdown (e.g., forced power-off, system errors, etc.). At this point, re-execute the "pptomain" and run the program.
This function only recovers the parameters corresponding to the following commands:
Command name |
MotionSup |
MotionSupPlus |
MotionSupJointTrq |
ConfL |
ConfJ |
SpeedRefresh |
HomeSet |
Home |
HomeSpeed |
MotionWaitAtFinePoint |
IgnoreOverride |
SingAreaLockAxis4 |
SingAreaJointWay |
SingAreaWrist |
SetRobotJointsMaxAcc |
SetRobotJointsMaxJerk |
SetTransmissionOverloadParams |
SetAccRampTime |
SetStopAccRampTime |
MotionSupJointTrq |
SetMaxMotionJerk |
VibSuppression |
Notes:
-
The demo mode will not be restored after powering on again.
-
The values of IO and registers will not be saved during shutdown, and the actual physical values will be read after powering on again.
-
When this function is enabled, the system will prioritize loading the project that was running at the time of shutdown (e.g., project A) during the boot recovery and ignore the settings of the default project (e.g., project B).
Function limitations in the current version:
-
No trajectory recovery: If the program executes a trajectory (e.g., A → B → C) before shutdown, the lookahead pointer had already scanned the point C command, and the shutdown occurs during the A → B path (assuming it stopped at point D), the program will continue to plan the path from point D to point C, and will not recover the A → B path upon startup again.
-
No status recovery of communication devices: It is impossible to recover the status of communication devices operated, such as Sockets and serial ports, before shutdown. The connection needs to be reinitialized.
-
No interruption recovery: If an interrupt function is being executed during shutdown, the related interrupt functions will not be recovered upon startup again and need to be reconfigured.
-
No recovery of the trajectory recorded through commands: It is impossible to recover the trajectory recorded through commands such as PathRecStart and PathRecStop.
Predefined parameters
The predefined parameters include the basic frame parameters, as well as a train of standard speed and turn zone parameters, and these variables are used as parameters for the RL command. You can view the physical meanings of the variables on this page, but they are not allowed to be edited currently.
In the Programming tab -> Project Configuration -> Predefined parameters page, you can view the predefined parameters provided by the controller.
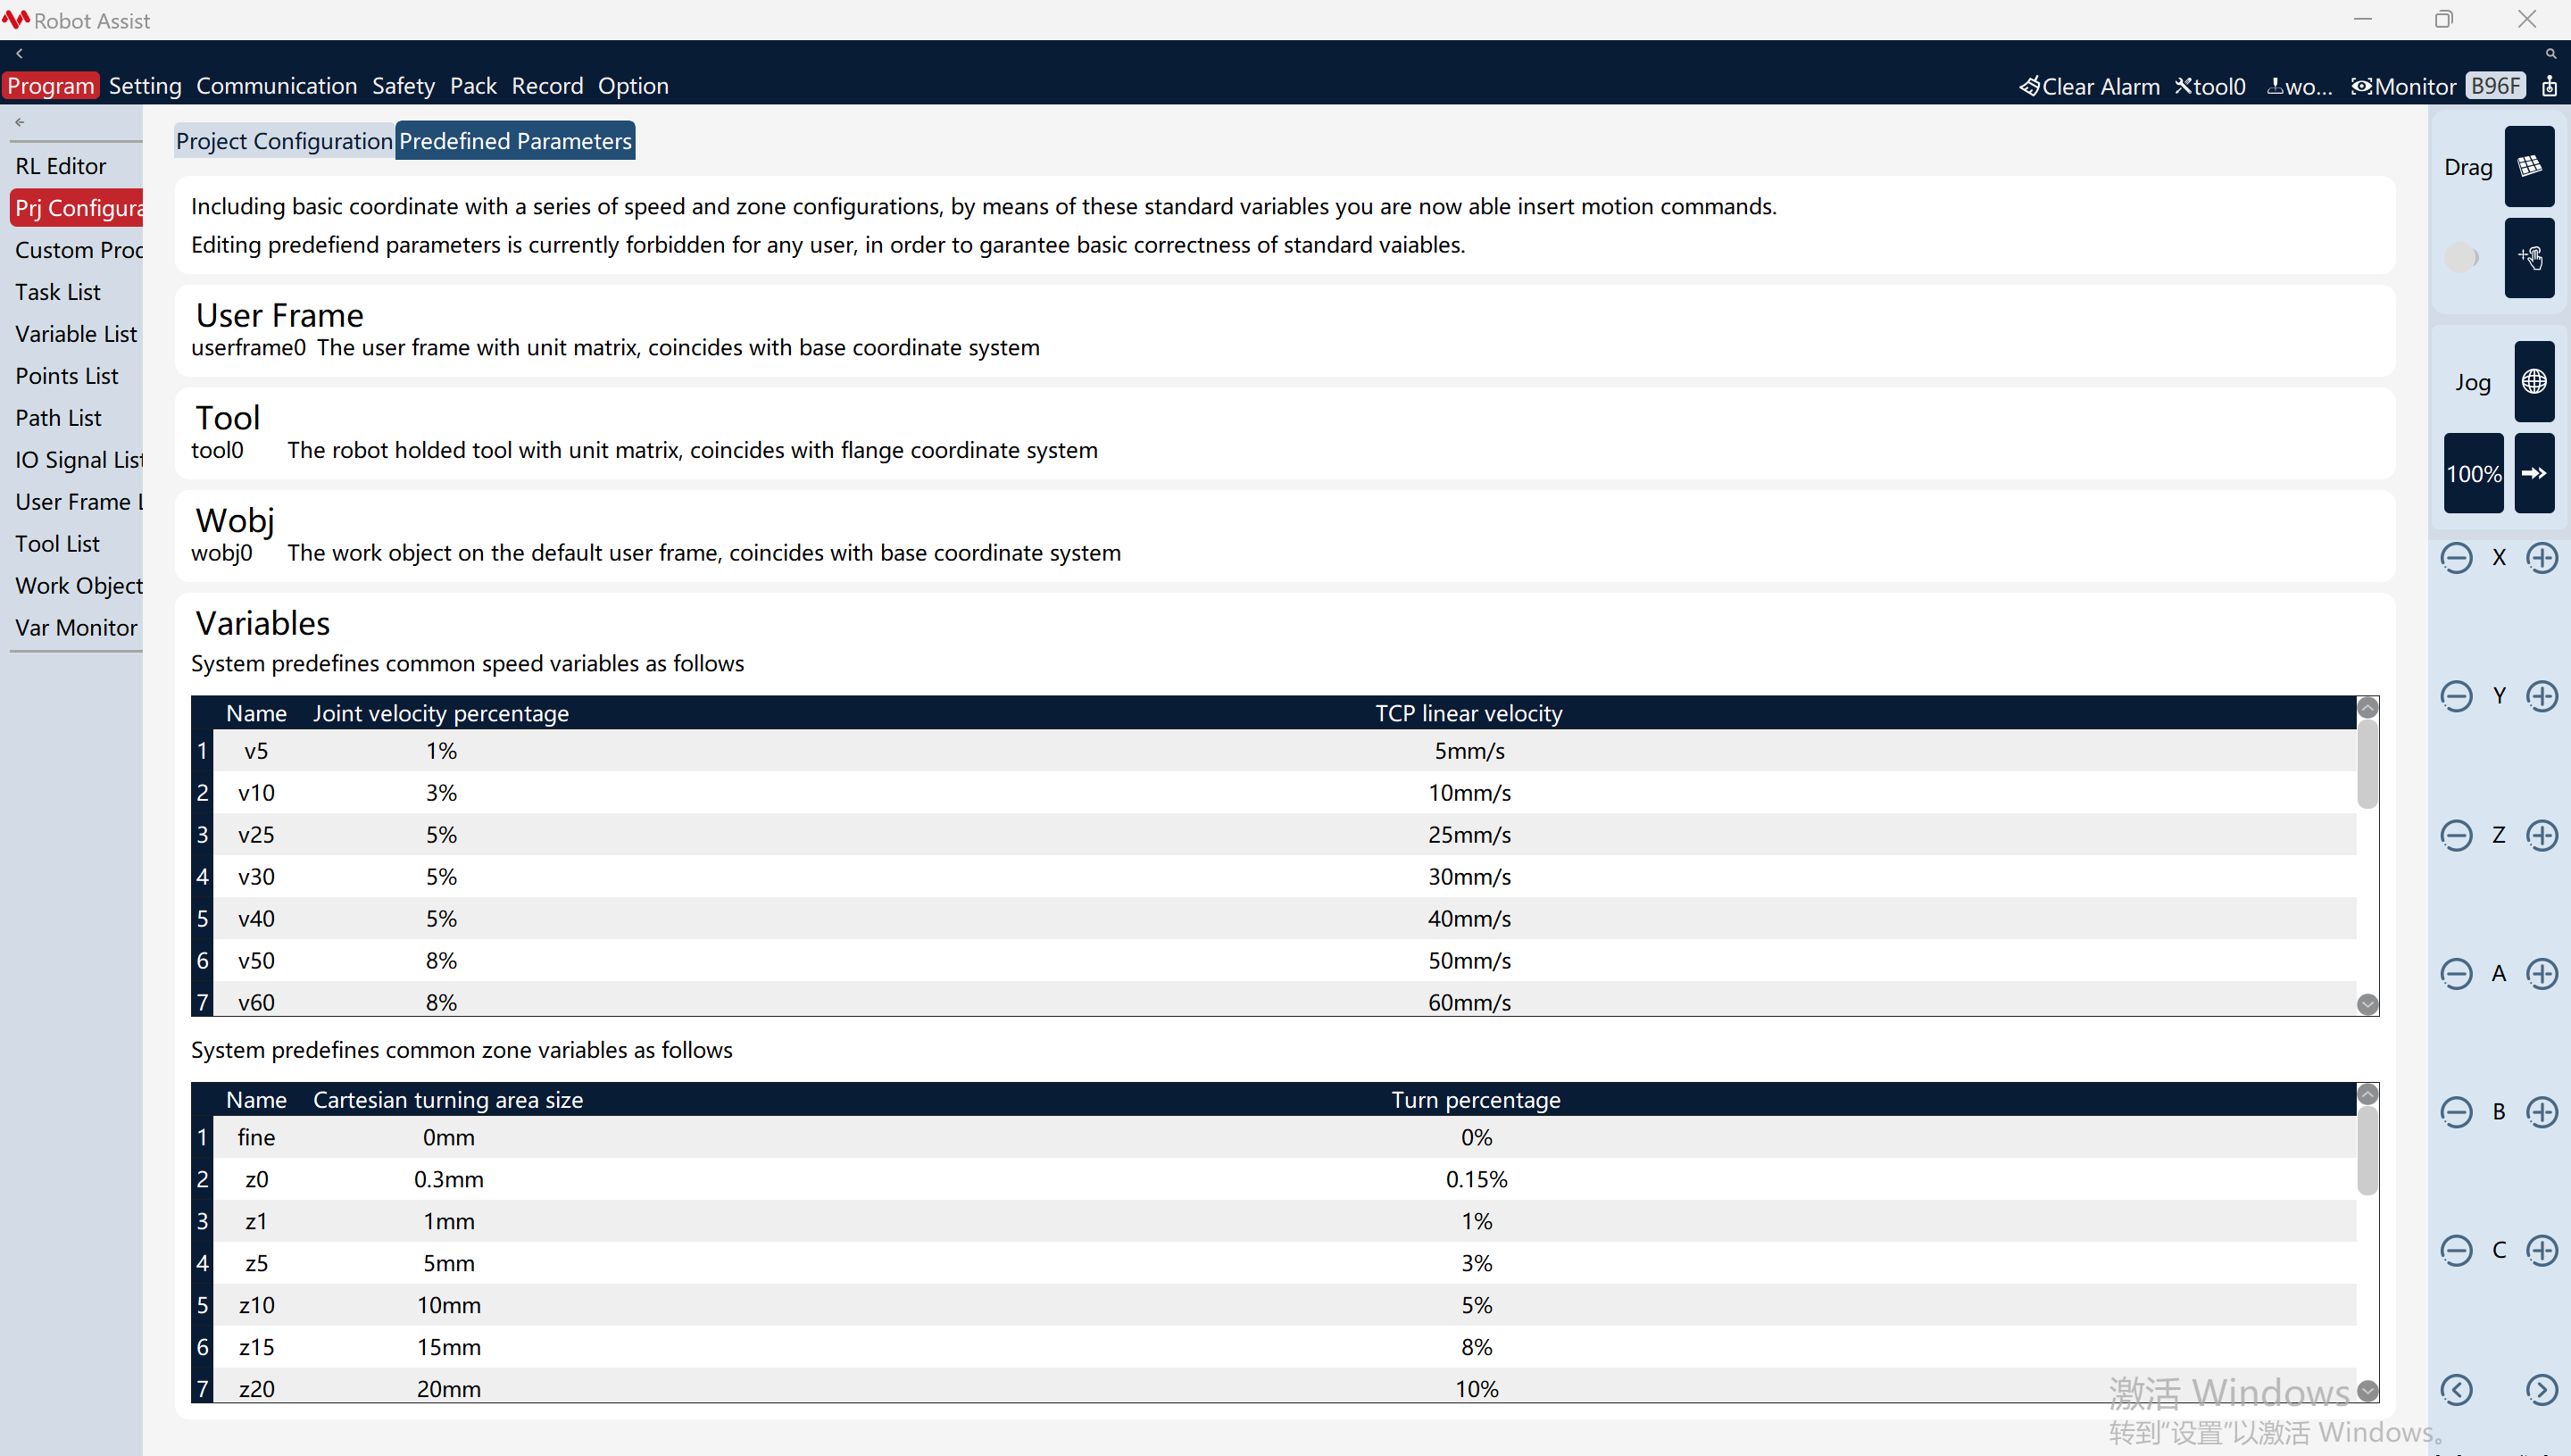
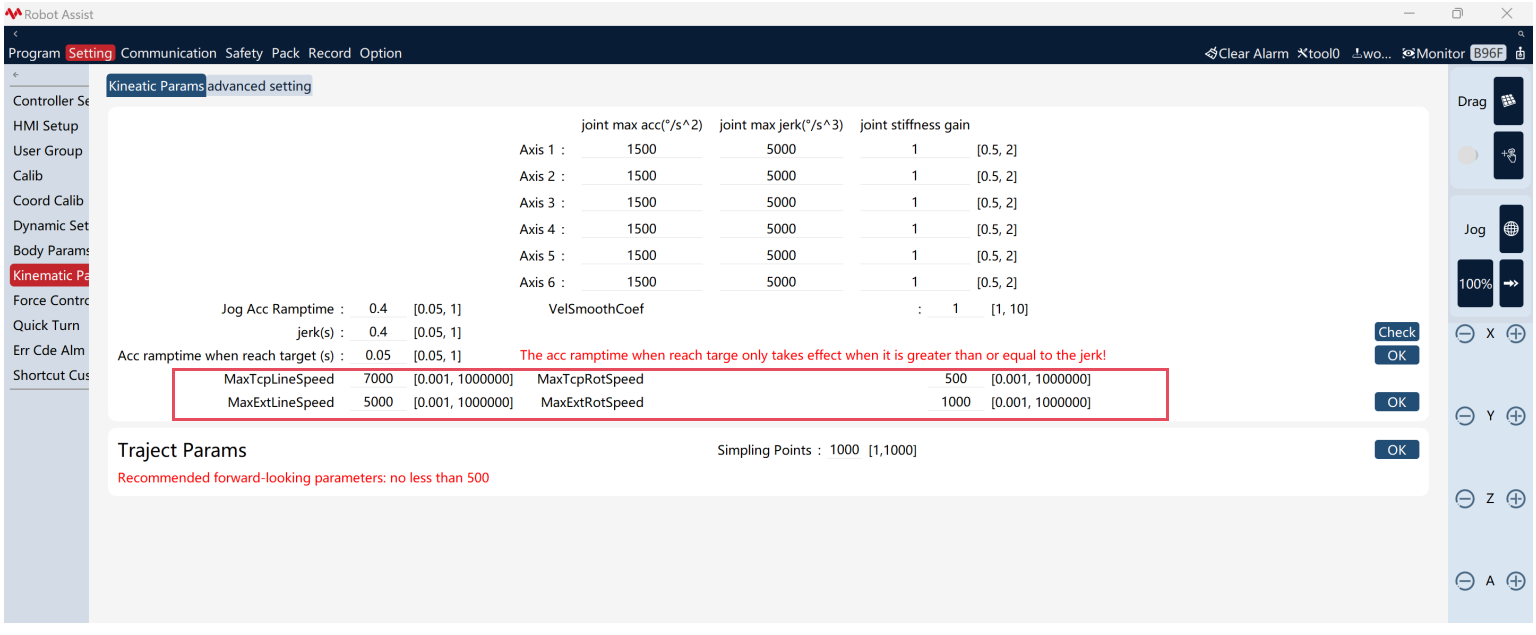
In the Settings tab -> Motion Parameters -> Motion Parameters page, you will find the configuration options for the predefined parameter vmax, including the maximum TCP velocities and maximum external axis velocities. vmax is the only predefined parameter that can be configured by the user.
Project switch list
In the project switch list, the existing project on the left can be added to the right switch list. The projects added to the switch list can be switched according to the project ID in the switch list using the register binding function code. The corresponding ID can be manually modified.
The filtering is available by name and ID. You can click the middle arrow to add the project to the switch list. Modifying the ID and deleting will be automatically synchronized to the controller.
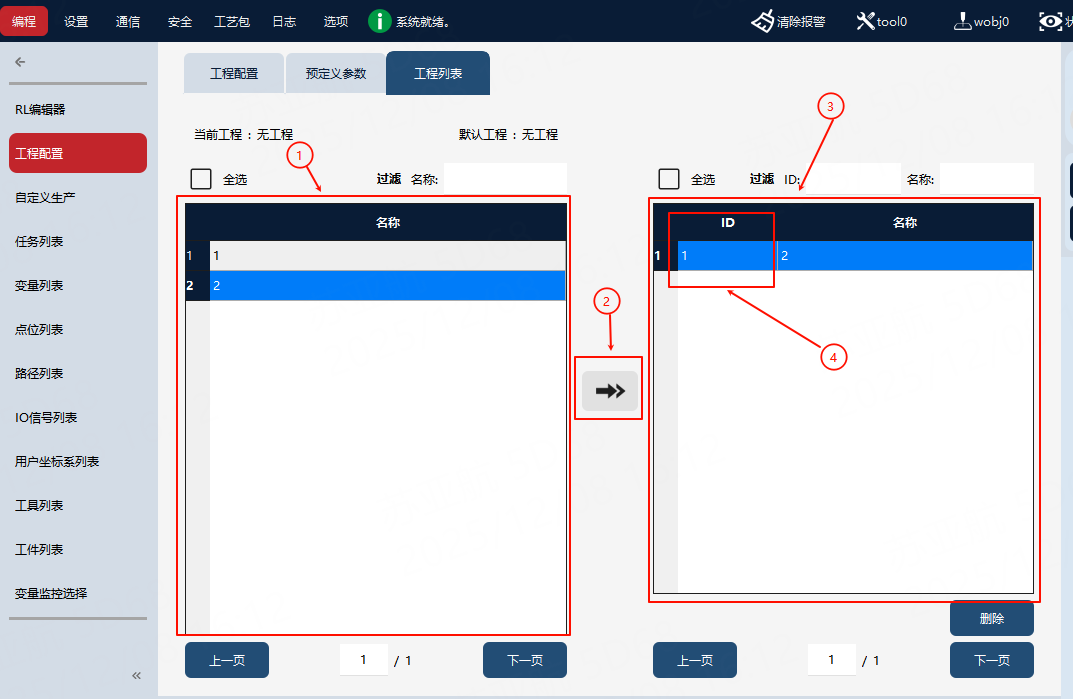
① |
Project list, showing all existing projects. |
② |
Add button. Click this button to add the project to the right project switch list. |
③ |
Project switch list. The projects added to this list can be switched by binding function codes through registers. |
④ |
Switch the project ID. This ID serves as the parameter for switching projects using registers, which can be manually modified through double-clicking. After modification, it will take effect automatically. |
Project export/import
Project export
On the project configuration page, click the "Export" button to enter the project export interface.
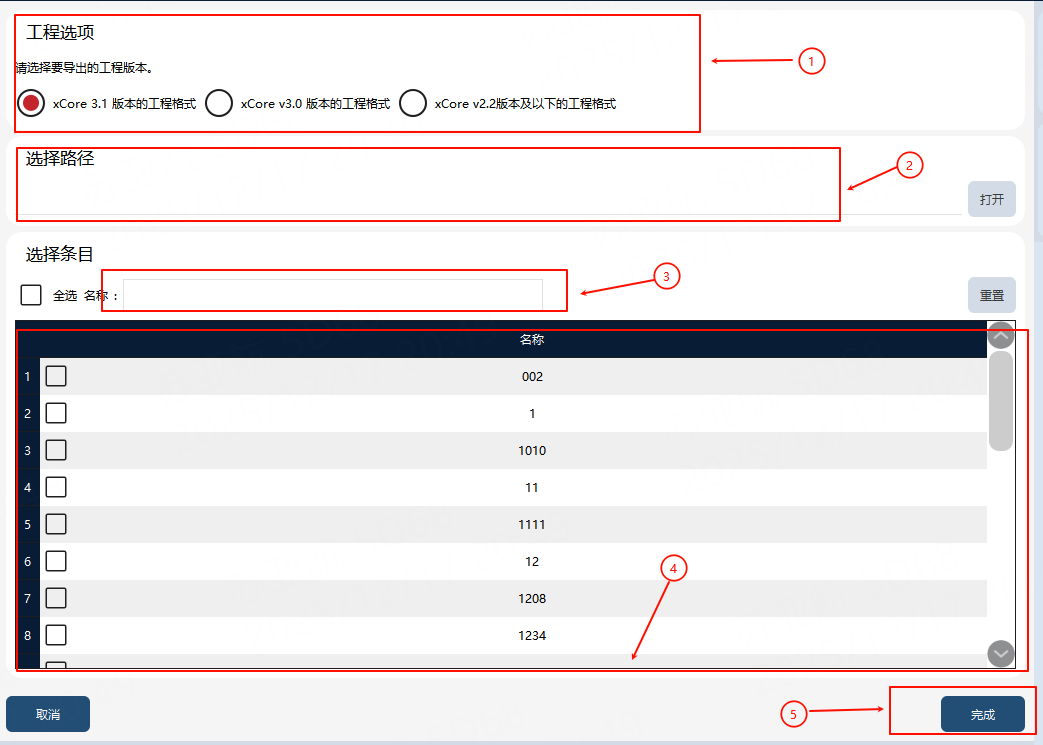
① |
Project export option |
② |
Project export path |
③ |
Filter box |
④ |
Project list |
⑤ |
Project export button |
Export steps: First, select the project version in ②, select the path for the project export target file in ①, and filter by name in ③, if necessary. Then, check the entries to be exported in ④. Finally, click the "Finish" button in ⑤ to execute the export, and the exported file will be generated in the path specified in ②.
Project import
On the project configuration page, click the "Import" button to enter the project import interface.
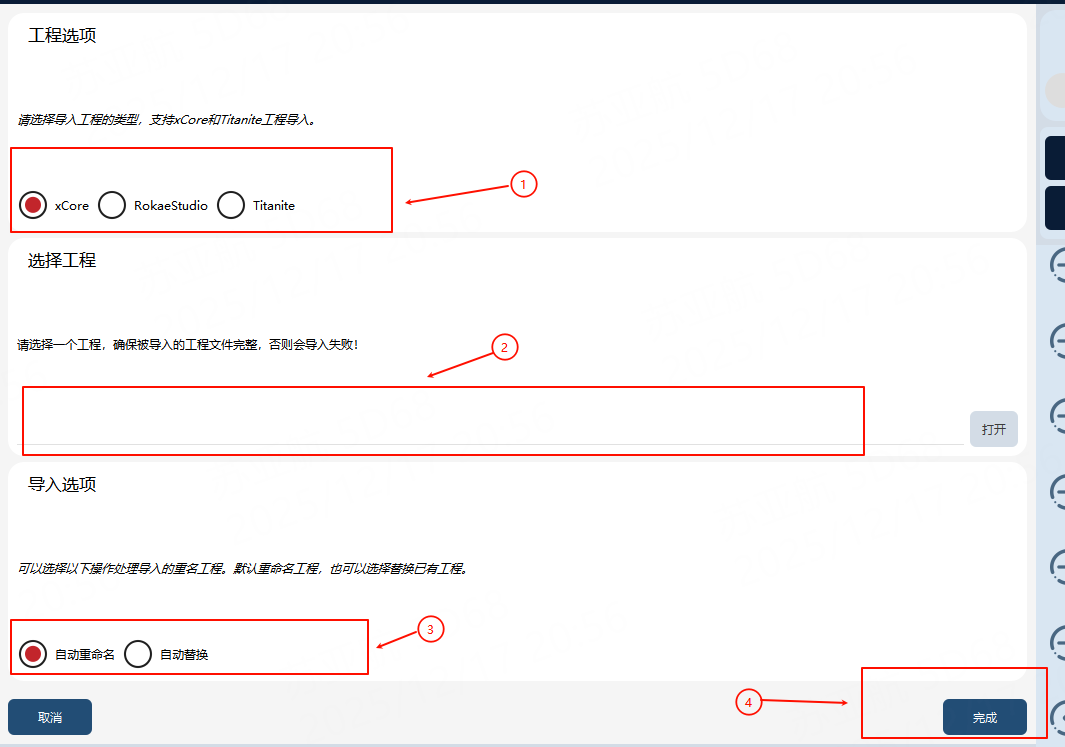
① |
Import project version |
② |
Project path selection |
③ |
Project import option |
④ |
Project import button |
Import steps: First, select the project version in ① and the project path in ②. Then, select the conflict handling strategy for imported entries in ③. Finally, click the "Finish" button in ④ to execute the import, and the project will be imported locally.