Task list
The xCore control system supports multitasking.
Through multitasking, the "parallelism" of multiple robot programs can be realized. Typical application scenarios are shown below:
-
Monitor continuously one certain signal even if the Main program stops operating (it is similar to the background PLC function, but its response speed is much lower);
-
While the robot executes the main program of motion, it performs data reception, transmission, and other data processing with external devices, without being restricted by the execution logic of the main program;
-
Receive some inputs through the teach pendant while working;
The "Task List" in the xCore system provides a management interface for parallel processing tasks. Users can view the attributes of existing tasks, create new tasks, edit tasks, and delete tasks on this interface.
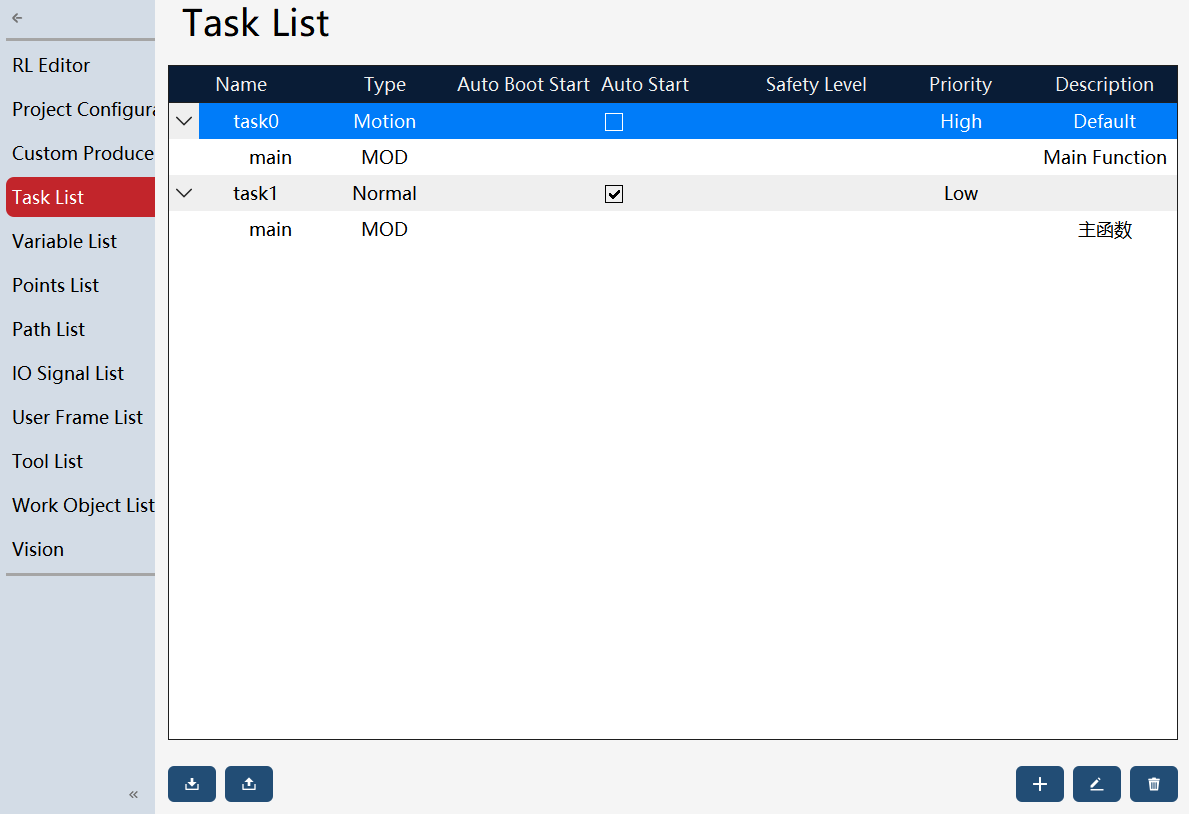
Task attributes
When creating or editing a task, it is necessary to set the task attributes.
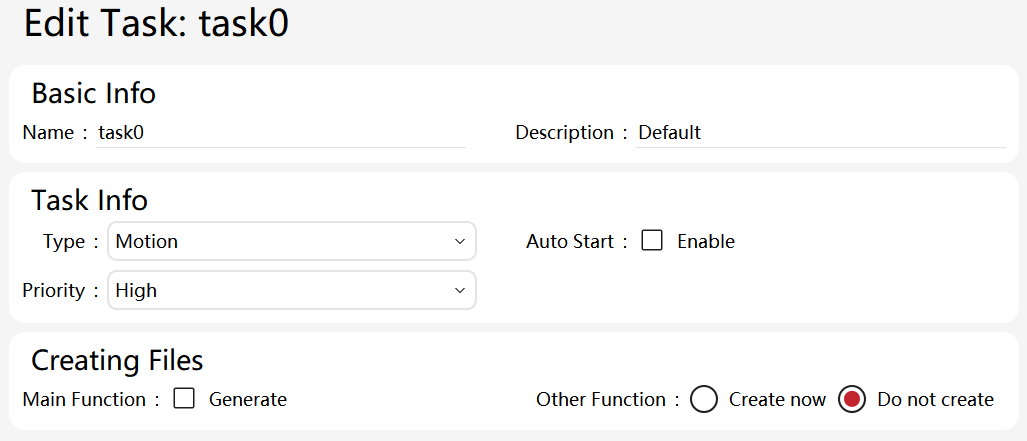
Task attributes |
Description |
Task name |
The task name must be unique among all tasks, it should only be composed of alphanumeric characters and underscores. Its initial character shall not be a number and the maximum length of the task name is 20 characters. |
Description |
Describe the role of the task to assist users in understanding. |
Task type |
It includes routine tasks, motion tasks, semi-static tasks, visual tasks (used along with xVision). Among them, a motion task refers to the control of the robot’s motion using RL commands. Only one motion task can run in a single project. |
Autostart |
It is used along with the Production mode. When selected, the program starts to re-execute when the system is restarted. It will not be stopped by the teach pendant or emergency stop under normal conditions. |
Priority |
Set the task priorities. |
Create file |
When the main function generation is checked, the main function will be generated automatically after task creation. The same applies to other functions. |
Regular tasks and motion tasks
New task
You need to create a new project before creating the first task. If you already have a project and want to add a new task, you don’t need to repeat creating a new project.
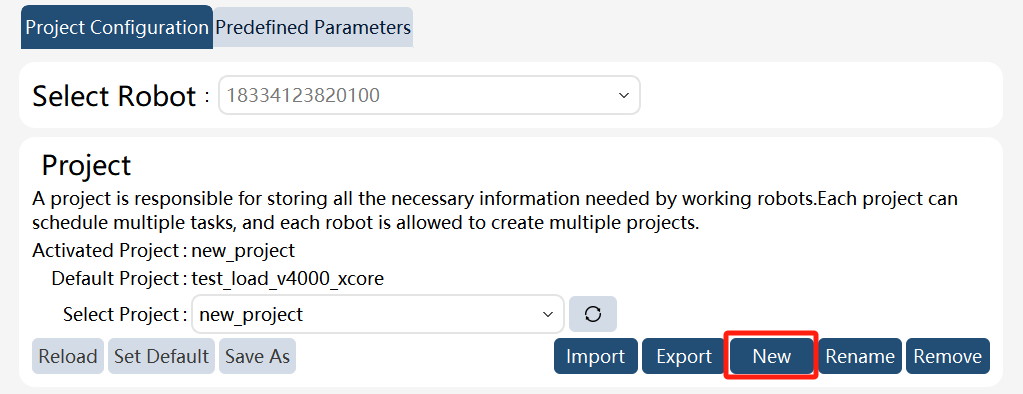
New project
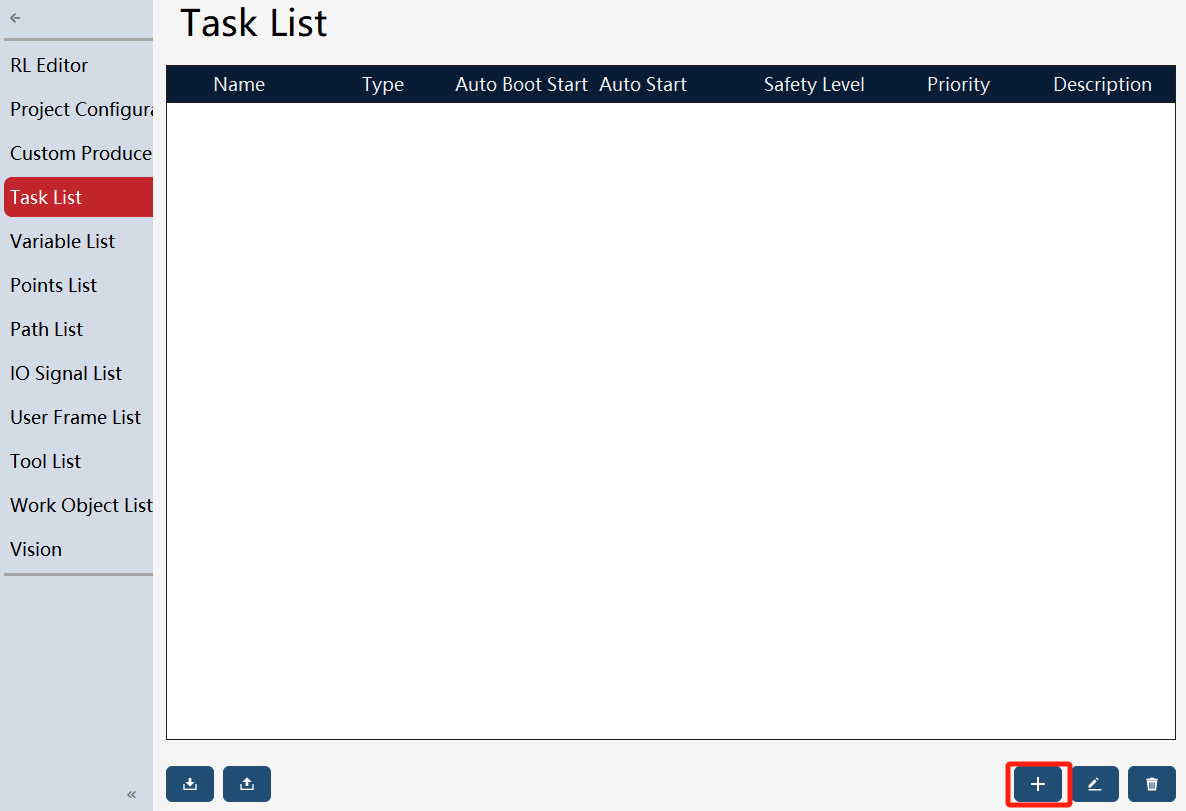
New task
After creating a new task, you can edit the attributes of the task.
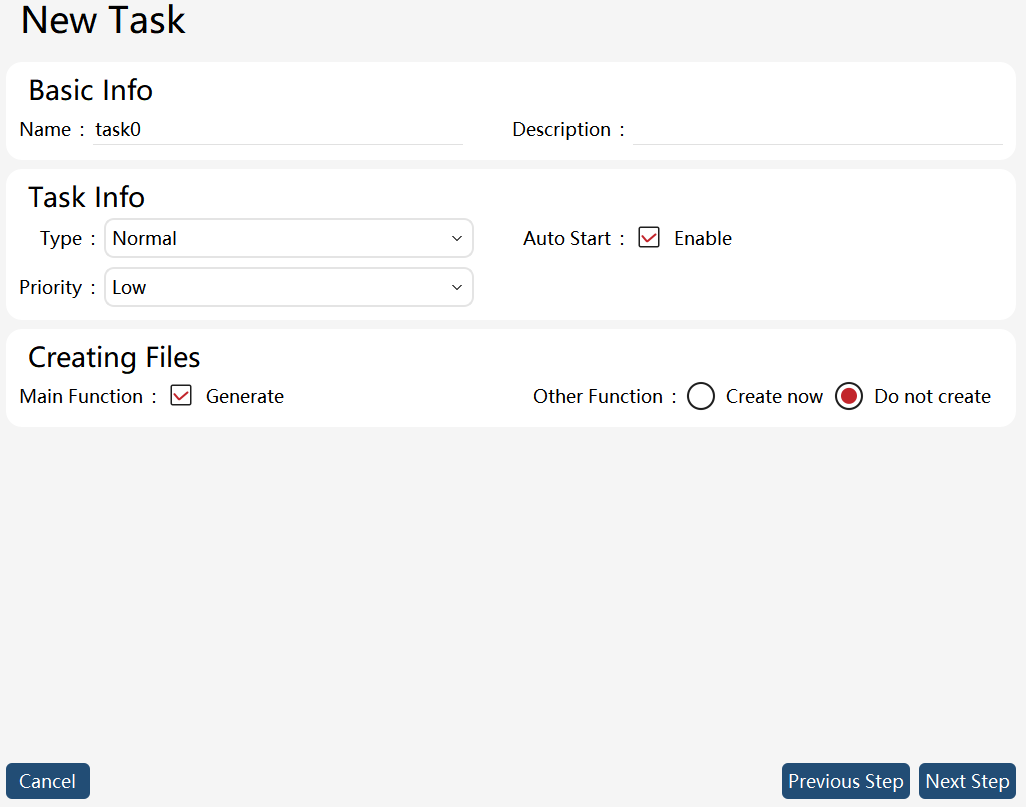
Task attribute editing
Note:
-
10 tasks are supported.
-
A maximum of one motion task can run at a time.
-
Changes in the task type, task entry function, and whether it is a motion task attribute take effect immediately.
New program module
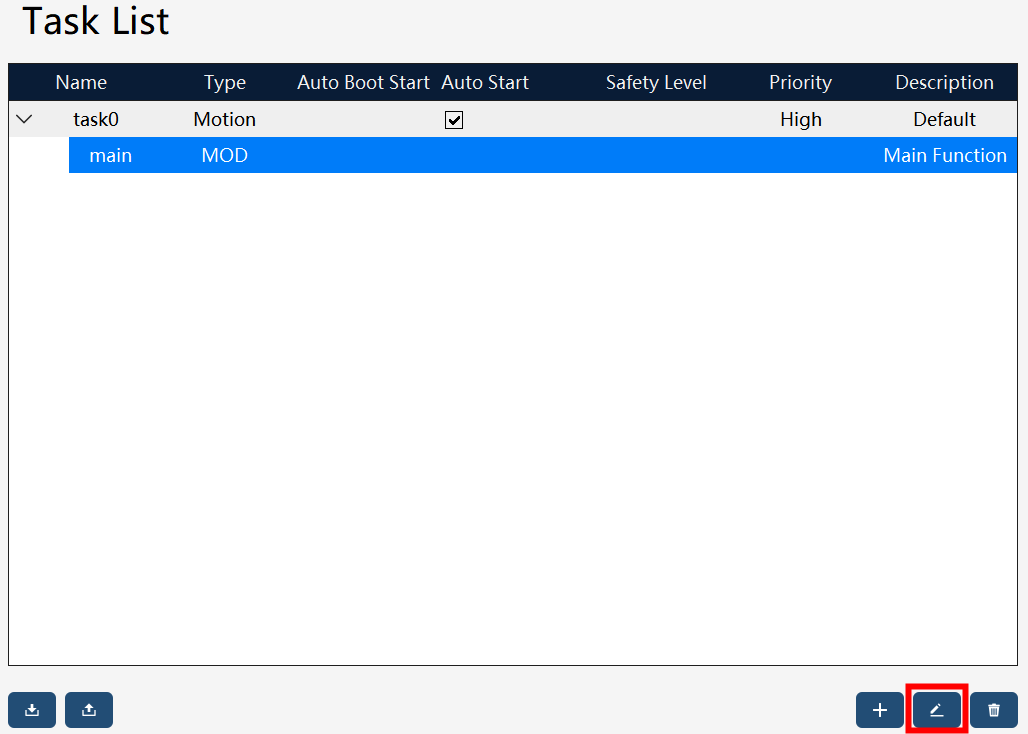
Each task can include several program modules (mod files). As shown below, you can click the Edit button.
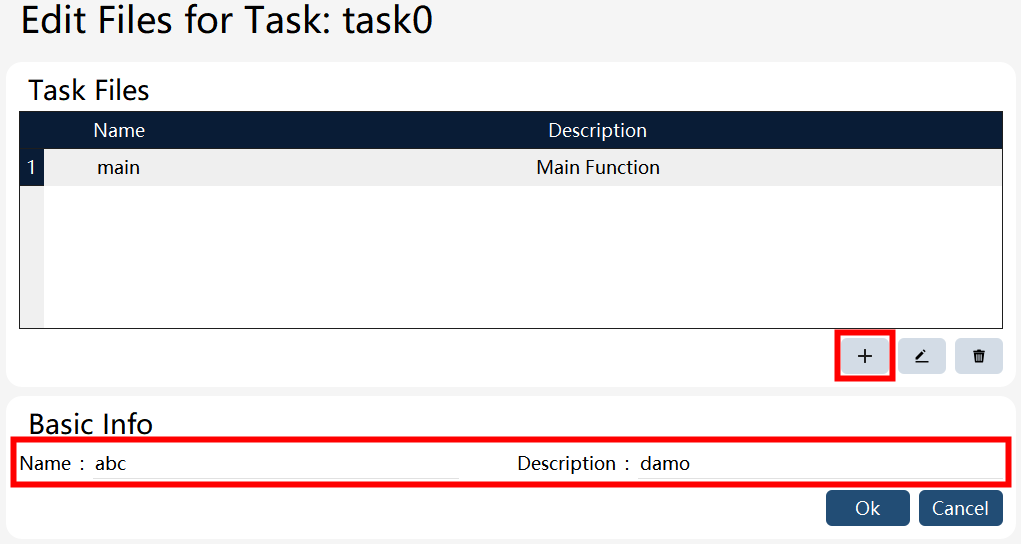
Click "+" on the new page to create a new program module. After entering the basic information such as the name and description of the module, you can click "OK" to complete the creation of the program module.
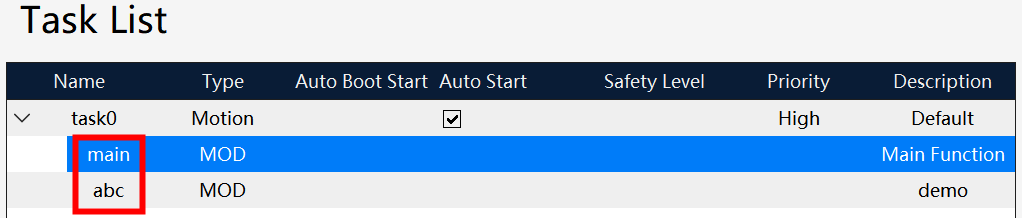
At this point, you can view the newly created program module in the task list.
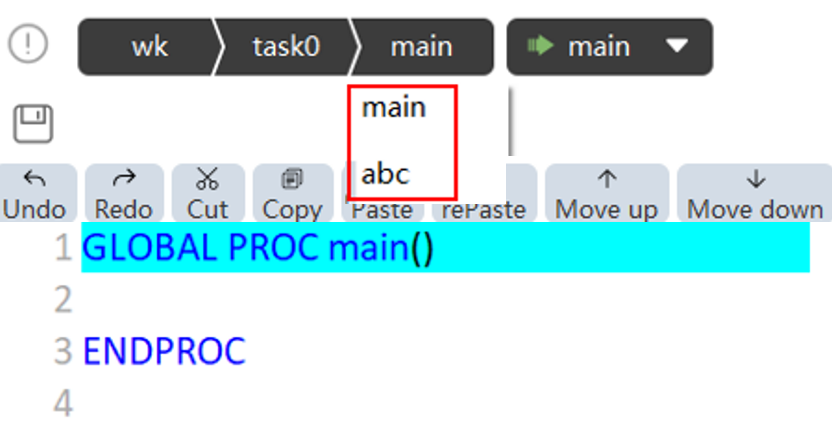
In the upper part of the RL editor, you can also select a new program module and program it.
Starting and running
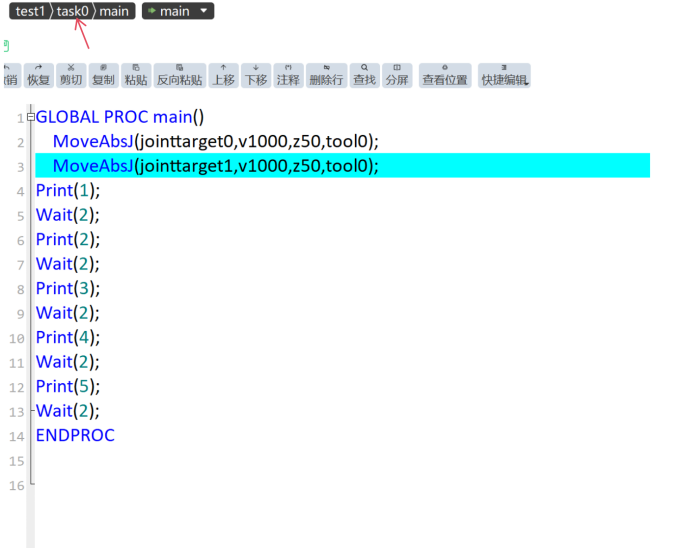
Clickimage::en/image282.png[width=700,align=center] in the upper part of the RL editor to select a task. Use the Start/Stop button or external signals to control the start/stop of the selected task in the condition of manual enabling or automatic power-on.
Use restrictions:
-
Generally, a background task will run cyclically. If a task does not contain any wait commands, the background task may consume too much computing resources, causing the controller to be unable to handle other tasks;
-
The scopes of variable VARS and the constant CONST are limited to their respective tasks, but the GLOBAL-level PERS variable is a global variable;
-
When PPToMain is executing, all non-running tasks execute PPToMain;
-
When there are tasks running, it is forbidden to modify the contents in the Task List interface;
Inter-task communication
The inter-task communication supports two methods: PERS variable and interruption.
Inter-task communication by PERS variable
-
Global-level PERS variables with the same name shall be defined in all task projects that require communication, and the data type and dimension of variables shall be identical;
-
PERS variables shall be used to control task execution and data transmission where necessary;
-
All variables and tasks in the variable list and point list are available at will;
Use restrictions:
-
You just need to specify an initial value for the PERS variable in one of the tasks. If you have specified an initial value for the same PERS variable in multiple tasks, the initial value defined in the first running task will be used.
-
When a task waits for another task by means of the PERS variable and the WaitUntil or WHILE command, it is necessary to pay attention to coordinating with the wait command (greater than 0.1s) to avoid the program quickly executing the empty judgment command, and thus occupying too much system resources.
Semi-static task
Since v2.0.1, the xCore control system supports performing semi-static tasks.
The semi-static task belongs to the multi-task function and runs a program written in RL language. Compared with regular and motion tasks, semi-static tasks have two features as follows: (1) After being properly configured, they can self-start after being switched on without any commands such as power-on and start-up commands; (2) The pause button is not effective on the semi-static task. With these two features, the operation cycle of a semi-static task covers almost the entire time from power-on to power-off of the control system.
Typical application of semi-static takes:
-
Judge the robot position periodically, and notify the host computer via registers, IOs, etc.;
-
Output custom heartbeat signal;
-
Transmit data among multiple devices;
Semi-static task creation
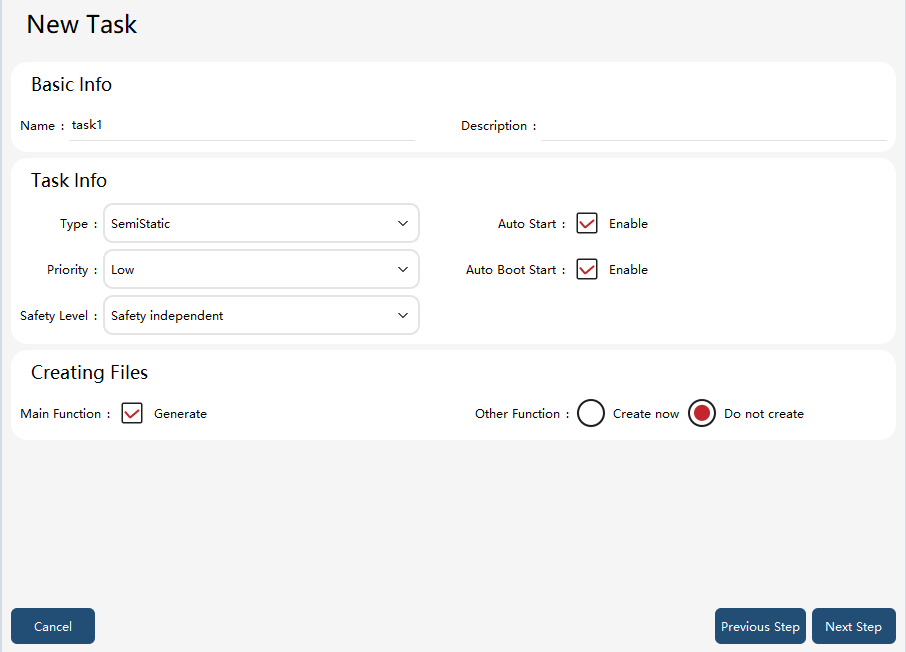
In the task list, click "+" to create a new task. Select Semi-static Task in the Type, complete other attribute settings, and click the "Next" button to create the semi-static task.
Starting and stopping of semi-static tasks
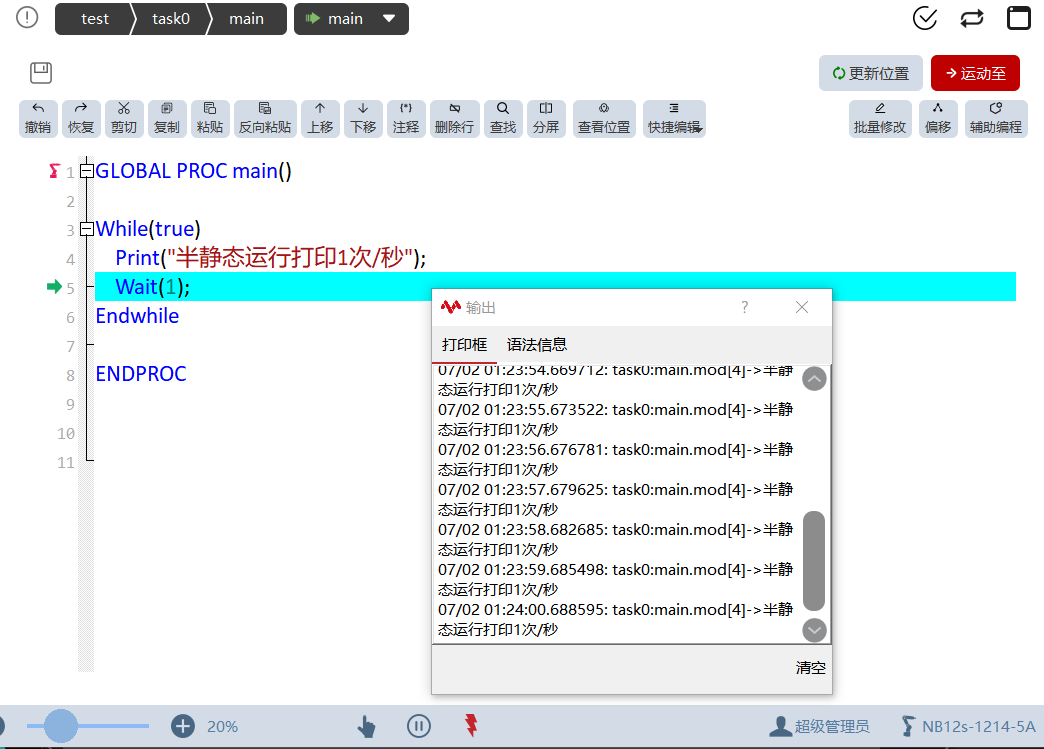
Just like the regular task startup, after creating and configuring a semi-static program, the semi-static task can be started by powering on in manual or automatic mode and clicking the “Start” button. If there is a semi-static task running in the project, there will be a promptimage::en/image285.png[width=700,align=center] in the middle of the bottom status bar. At this time, clicking pause or power off will not stop the semi-static task. Clicking the "semi-static status" button will pop up a confirmation dialog boximage::en/image286.png[width=700,align=center], and clicking "OK" will stop the semi-static task. When the semi-static task does not trigger a program exception, only this button can stop the semi-static task (the semi-static task can be paused only after the regular task is paused).
Configuring semi-static task for self-start
In the project configuration interface, set the project associated with the semi-static task as the default project.
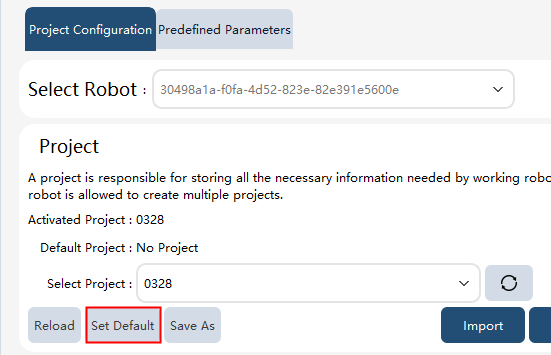
In the task list, check the two options, running on startup or not and running or not.

Finally, click pptomain to synchronize the project configuration from the HMI to the controller, allowing the semi-static task to self-start.
Safety level of semi-static tasks
In addition to configurations such as priority and "running or not" of regular tasks, the semi-static task has an additional feature: safety level.
It is used to define the controller’s exception handling policy for the semi-static task as the semi-static task operates abnormally (e.g. data reception failed).
-
Safety irrelevant: It applies to the host computer or operators who do not care about the operating condition of semi-static tasks. A semi-static task configured with this safety level will be stopped individually if its operation is faulty, with the operation of other tasks not affected.
-
System stop: Applicable when the data of semi-static tasks affect the program’s safety logic (e.g. deciding the motion point via a semi-static task, and informing the host computer how to control the robot via a semi-static task). The semi-static tasks of the System stop level will make all tasks paused if there is any fault in their operation.
Recommendations for semi-static task debugging
-
The controller supports single-step debugging of semi-static tasks in manual power-on mode. However, it is still recommended to complete debugging with regular tasks first, and then change the task type to semi-static task to avoid unexpected startups of unfinished semi-static tasks during reboots in the debugging process;
-
For semi-static tasks, it is recommended to add error handling for commands that may fail. For example, the ReadXX command may time out or fail due to network fluctuations, external device issues, or other unexpected factors. To ensure that semi-static tasks continue execution with minimal interruption, it is advisable to use a try_catch statement to protect the code that may fail, and perform appropriate error handling in the catch statement (e.g., use goto to jump back to before the Read command and retry the data reading);
-
Due to the specialty of long-term execution inherent to semi-static tasks, the single-runimage::en/image290.png[width=700,align=center] and loop-runimage::en/image291.png[width=700,align=center] settings in the upper-right corner of the debugging interface do not apply to semi-static tasks. All semi-static tasks run in a continuous loop by default.
Task export/import
Task export
On the task list page, click theimage::en/image269.png[width=700,align=center] button at the bottom left to enter the task export interface.
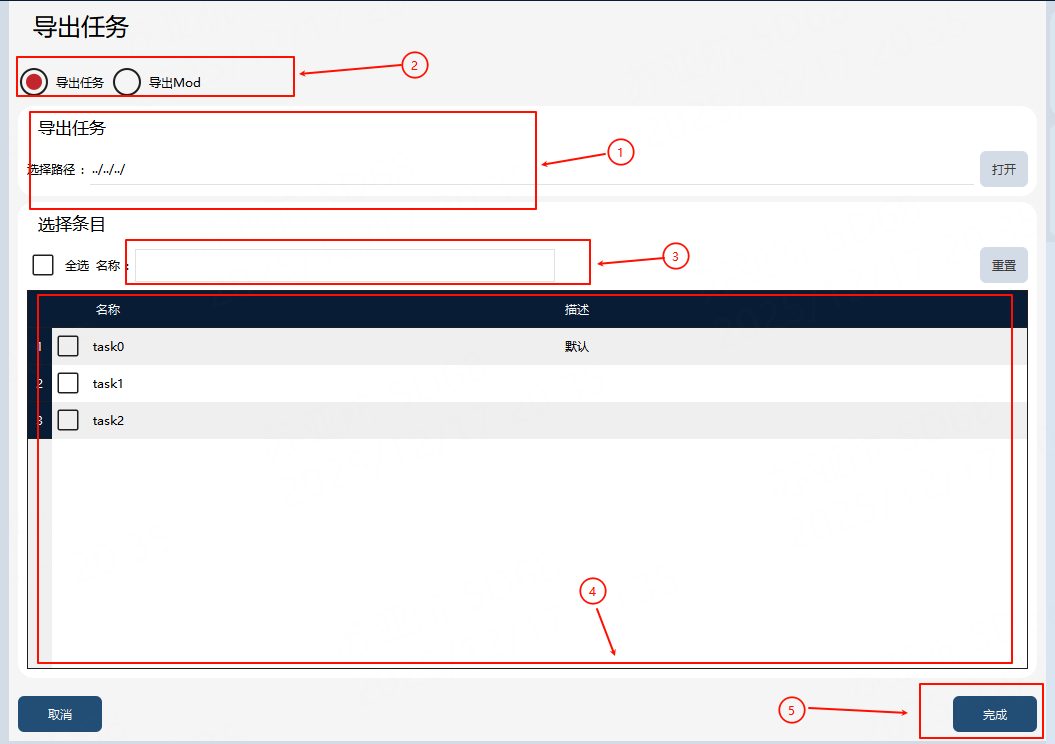
① |
Task export target file (including path) |
② |
Export format |
③ |
Filter box |
④ |
Task list |
⑤ |
Task export button |
Export steps: First, input or select the path for the task export target file in ①, select the export format in ②, and filter by name in ③, if necessary. Then, check the tasks to be exported in ④. Finally, click the button in ⑤ to execute the export, and the exported task file will be generated in the path specified in ①.
Task import
On the task list page, click theimage::en/image271.png[width=700,align=center] button at the bottom left to enter the task import interface.
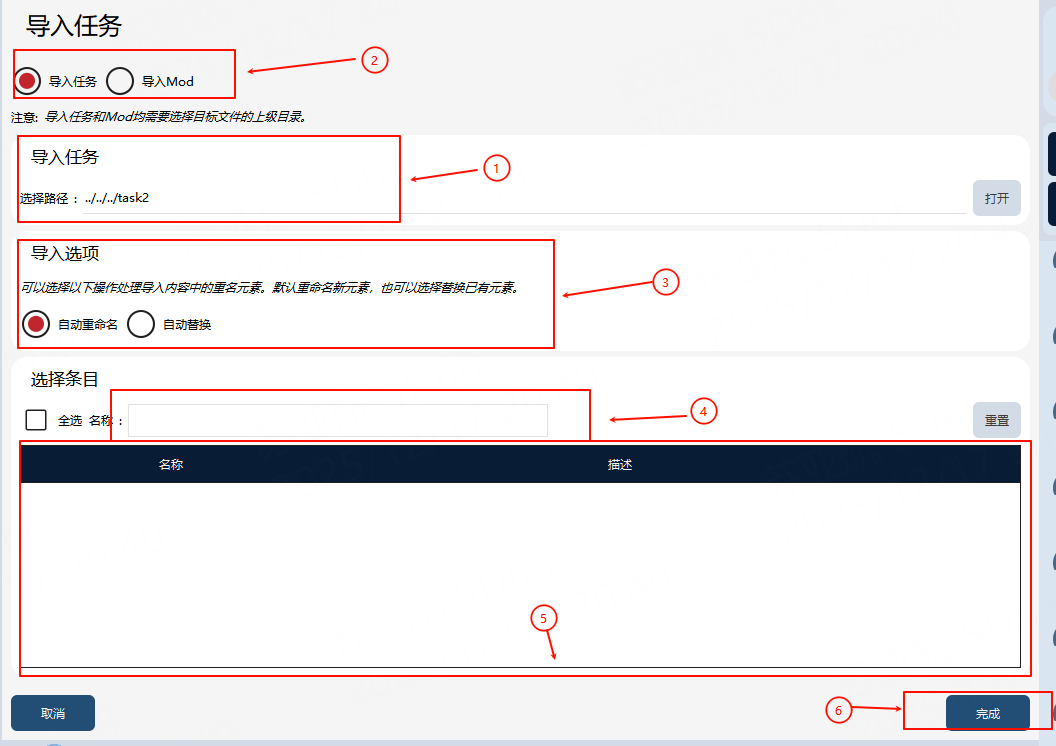
① |
Task import file |
② |
Task import format |
③ |
Task import option, which is the strategy for handling entry conflict |
④ |
Filter box |
⑤ |
Task import entry |
⑥ |
Task import button |
Import steps: First, select the import format in ②, select the import task in ①, and filter by name in ④, if necessary. Then, select the conflict handling strategy in ③ and the tasks to be imported in ⑤. Finally, click the "Finish" button in ⑥ to execute the import, and the selected tasks will be imported locally.