10.14.1 Overview
The OPC-UA of the xCore control system currently supports the xCore controller as the server of OPC-UA communication, and supports all mandatory nodes and some optional nodes in the OPC 40010-1 OPC UA for Robotics, Part 1: Vertical Integration standard by default. For a detailed model introduction, please refer to the relevant parts of Appendix OPC-UA. In addition, it also supports user-defined variables and event upload functions.
10.14.2 Open and close
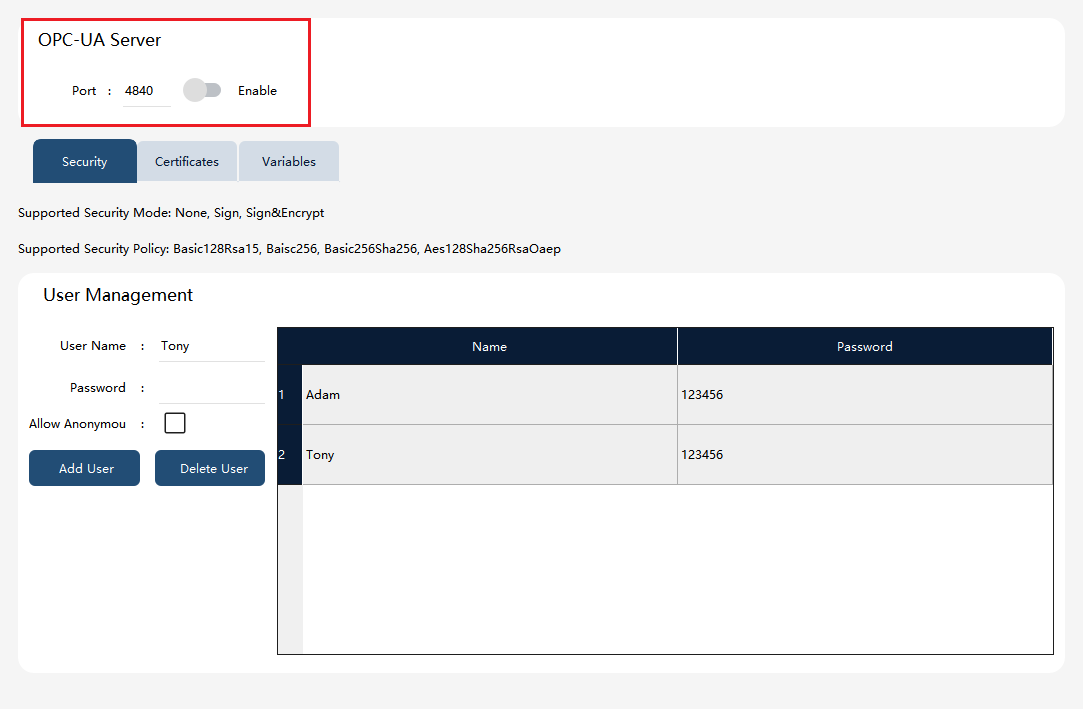
On the HMI main interface, enter the OPC-UA configuration interface through the menu "Communication" -> "OPC-UA", as shown in the figure below. You can enter the port of the OPC-UA service in the "Port" edit box above, and turn on or off the OPC-UA service through the "Enable" button.
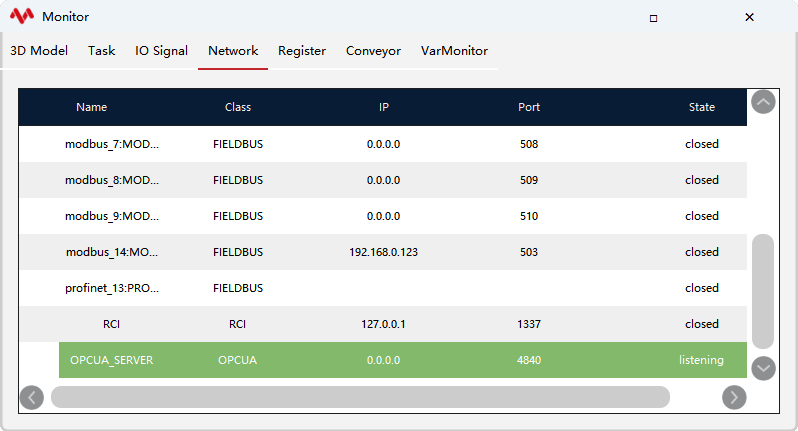
After the OPC-UA service is opened normally, you can see that the OPC-UA service is in a listening state in the network connection of the status monitoring, as shown in the following figure.
10.14.3 Safety
Click the "Safety" tab on the OPC-UA configuration interface to enter the safety configuration interface, as shown in the figure below:
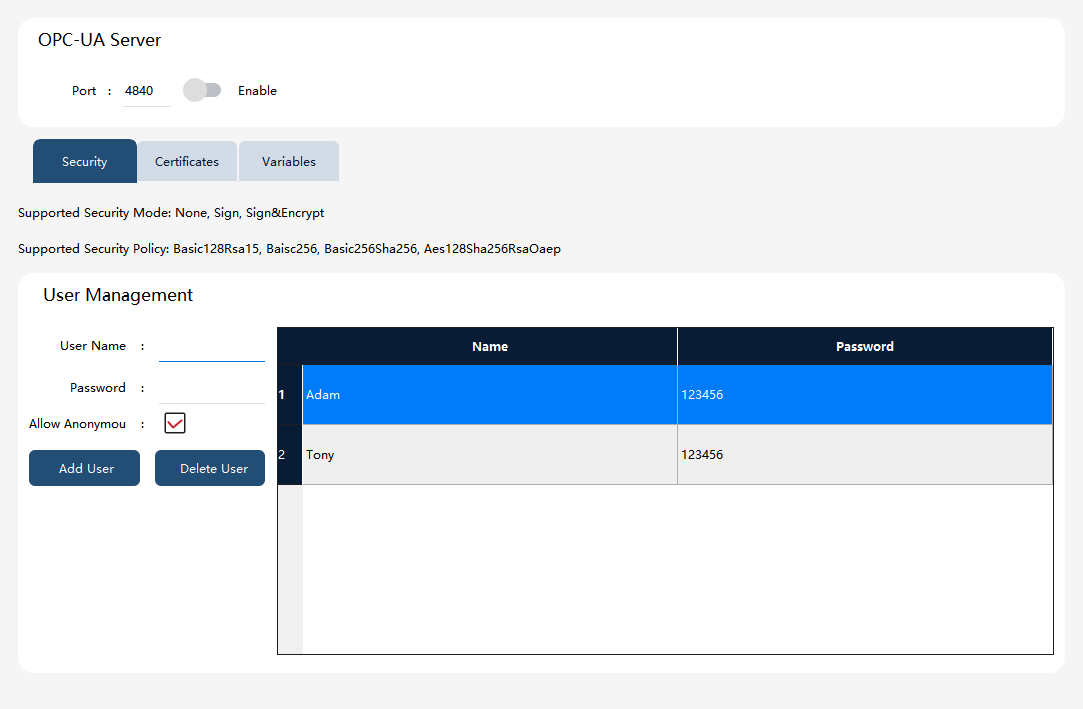
This interface is mainly used to explain and configure OPC-UA server safety policies.
1. None, Sign, and Sign & Encrypt are supported by default. Select the required mode when the client connects.
2. Four safety policies are supported by default: Basic 128Rsa15, Basic 256, Basic 256Sha256, and Aes128Sha256RsaOaep. Just select the required policy when the client connects.
3. Tick the "Allow Anonymous" check box to allow the client to log in anonymously. If it is not checked, the client can only log in with the user in the list on the right.
4. Enter the user name and password, click the "New User" button, and you can add a new user to the list on the right.
5. Select the user in the list on the right, and click the "Delete User" button to delete unwanted users.
10.14.4 Certificate
Click the "Certificate" tab on the OPC-UA configuration interface to enter the certificate configuration interface, as shown in the figure below:
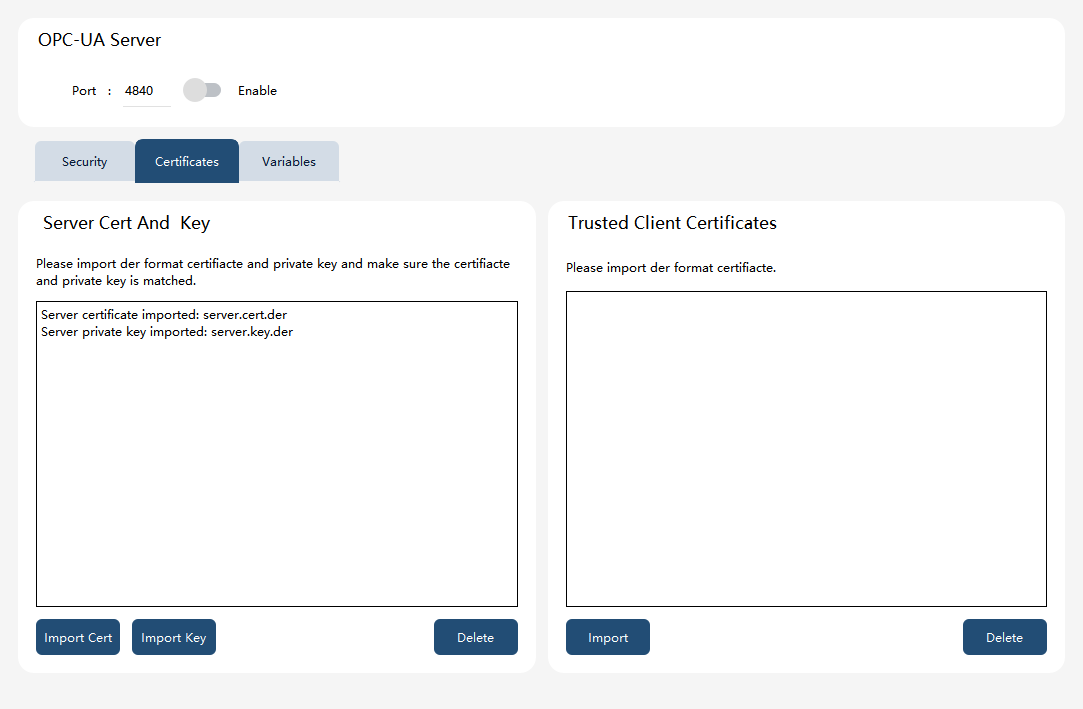
1. By default, if the OPC-UA server does not import the certificate and private key, the control system will use the self-generated certificate and private key.
2. Click the "Import Certificate" button to import the server certificate, and click the "Import Private Key" button to import the server private key. Both the imported certificate and private key need to be in der format, and ensure that the certificate and private key match. Additionally, it should be noted that the URL of the imported server certificate must be: urn:xcore.opcua.server.
3. Click the "Import" button on the right to import trusted client certificates, and click the "Delete" button to delete the selected client certificates.
10.14.5 Custom variable configuration
Click the "Variable" tab on the OPC-UA configuration interface to enter the custom variable configuration interface, as shown in the figure below:
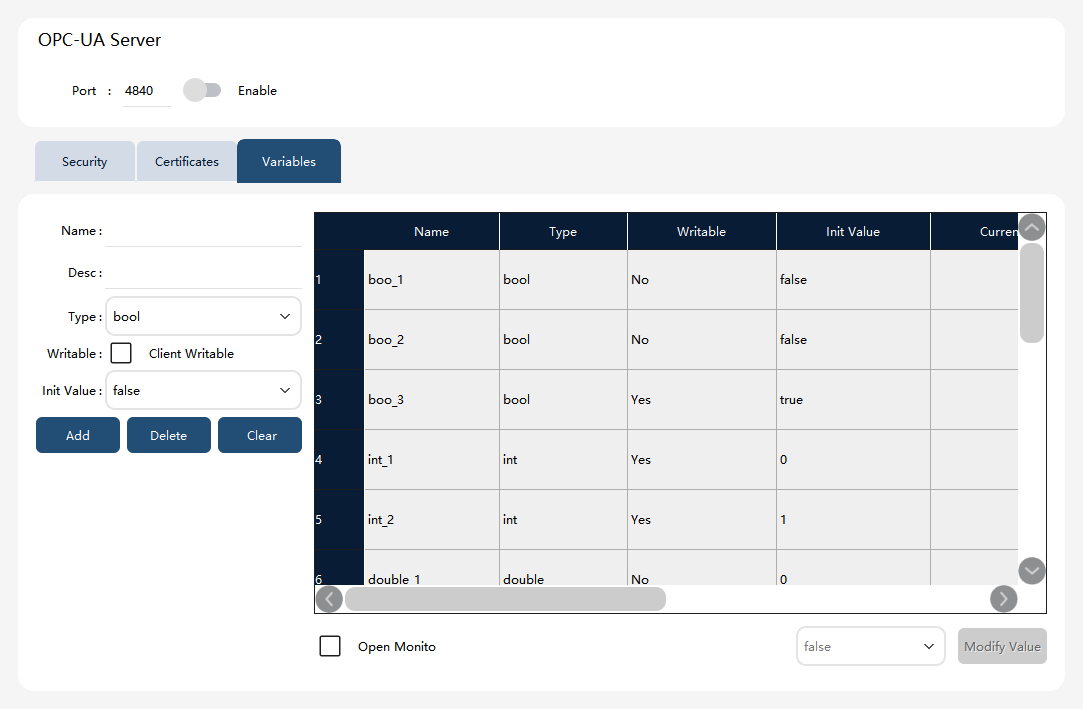
The OPC-UA communication of the xCore control system supports custom variable function, supports four types of variables: bool, int, double, and string, and supports configuring whether the client writeable properties. The specific configuration functions are as follows:
1. Fill in the attributes such as "Name", "Description", "Type", "Writable", and "Initial Value" on the left side of the page, and click the "Create" button to add a custom variable to the list on the right. A maximum of 128 custom variables are supported.
2. Click the "Delete" button to delete the selected variable in the list on the right. Click the "Clear" button to remove all variables from the list on the right.
3. Check the "Enable Monitoring" check box under the variable list on the right to turn on variable monitoring, and "Current Value" will display the value of the variable in the controller in real time. Click the "Modify Value" button to modify the current value of the selected variable.
The client can find the node of the custom variable under the CustomVariables node in the Robotics model, and perform read and write operations. On the robot side, the user can use the ReadOpcUaVarByName and WriteOpcUaVarByName commands to read or modify OPC-UA custom variables in the RL program. For detailed usage methods, please refer to the corresponding instructions in the RL command chapter.
10.14.6 Event
The OPC-UA server supports notifying the OPCUA client of some state changes of the robot through event. The currently supported reporting events are shown in the following table.
Event |
Severity |
Power on/off |
100 |
Manual/automatic switching |
100 |
Program running/stop |
100 |
Emergency stop triggered |
600 |
Safety gate stop triggered |
600 |
Protection stop triggered |
600 |
Collision alarm |
600 |
The display of client events is shown in the following figure:
