xplugindemo Example
This page describes how source files in the xplugindemo example (in the secondary development package) correspond to the HMI.
Complete the matching scenario in Environment Overview first.
1. Build, import, and use
The source tree contains the example and include/. It does not include the prebuilt xplugin library. Complete build, import, and use as follows.
-
Obtain the repository source and the development package as described in Secondary Development Packages.
-
Copy include and lib from the matching development package into the source-tree root. The repository already provides
include/; still overwrite it with the package headers so they match the prebuilt xplugin library. The resulting layout is:
<source-root>/
├── include/
├── lib/
│   ├── windows/     Windows: xplugin.dll, xplugin.lib
│   └── aarch64/     Teach-pendant Linux: xplugin.so
└── examples/xplugindemo/xplugindemo.pro
- In Qt Creator, open
xplugindemo.pro, then run qmake and build.
On the Chinese Windows operating system, an MSVC build may fail with C4819, or with unusual namespace errors such as xplugin::QWidget or xplugin::xplugin. SDK headers are UTF-8 without a BOM and contain Chinese comments, while MSVC parses them using the system encoding by default (GBK on Chinese Windows), which can break namespace brace matching. Add the following to xplugindemo.pro (or your plugin .pro):
win32-msvc {
    QMAKE_CXXFLAGS += /utf-8
    QMAKE_CFLAGS   += /utf-8
}
Then clean the build directory, run qmake again, and rebuild.
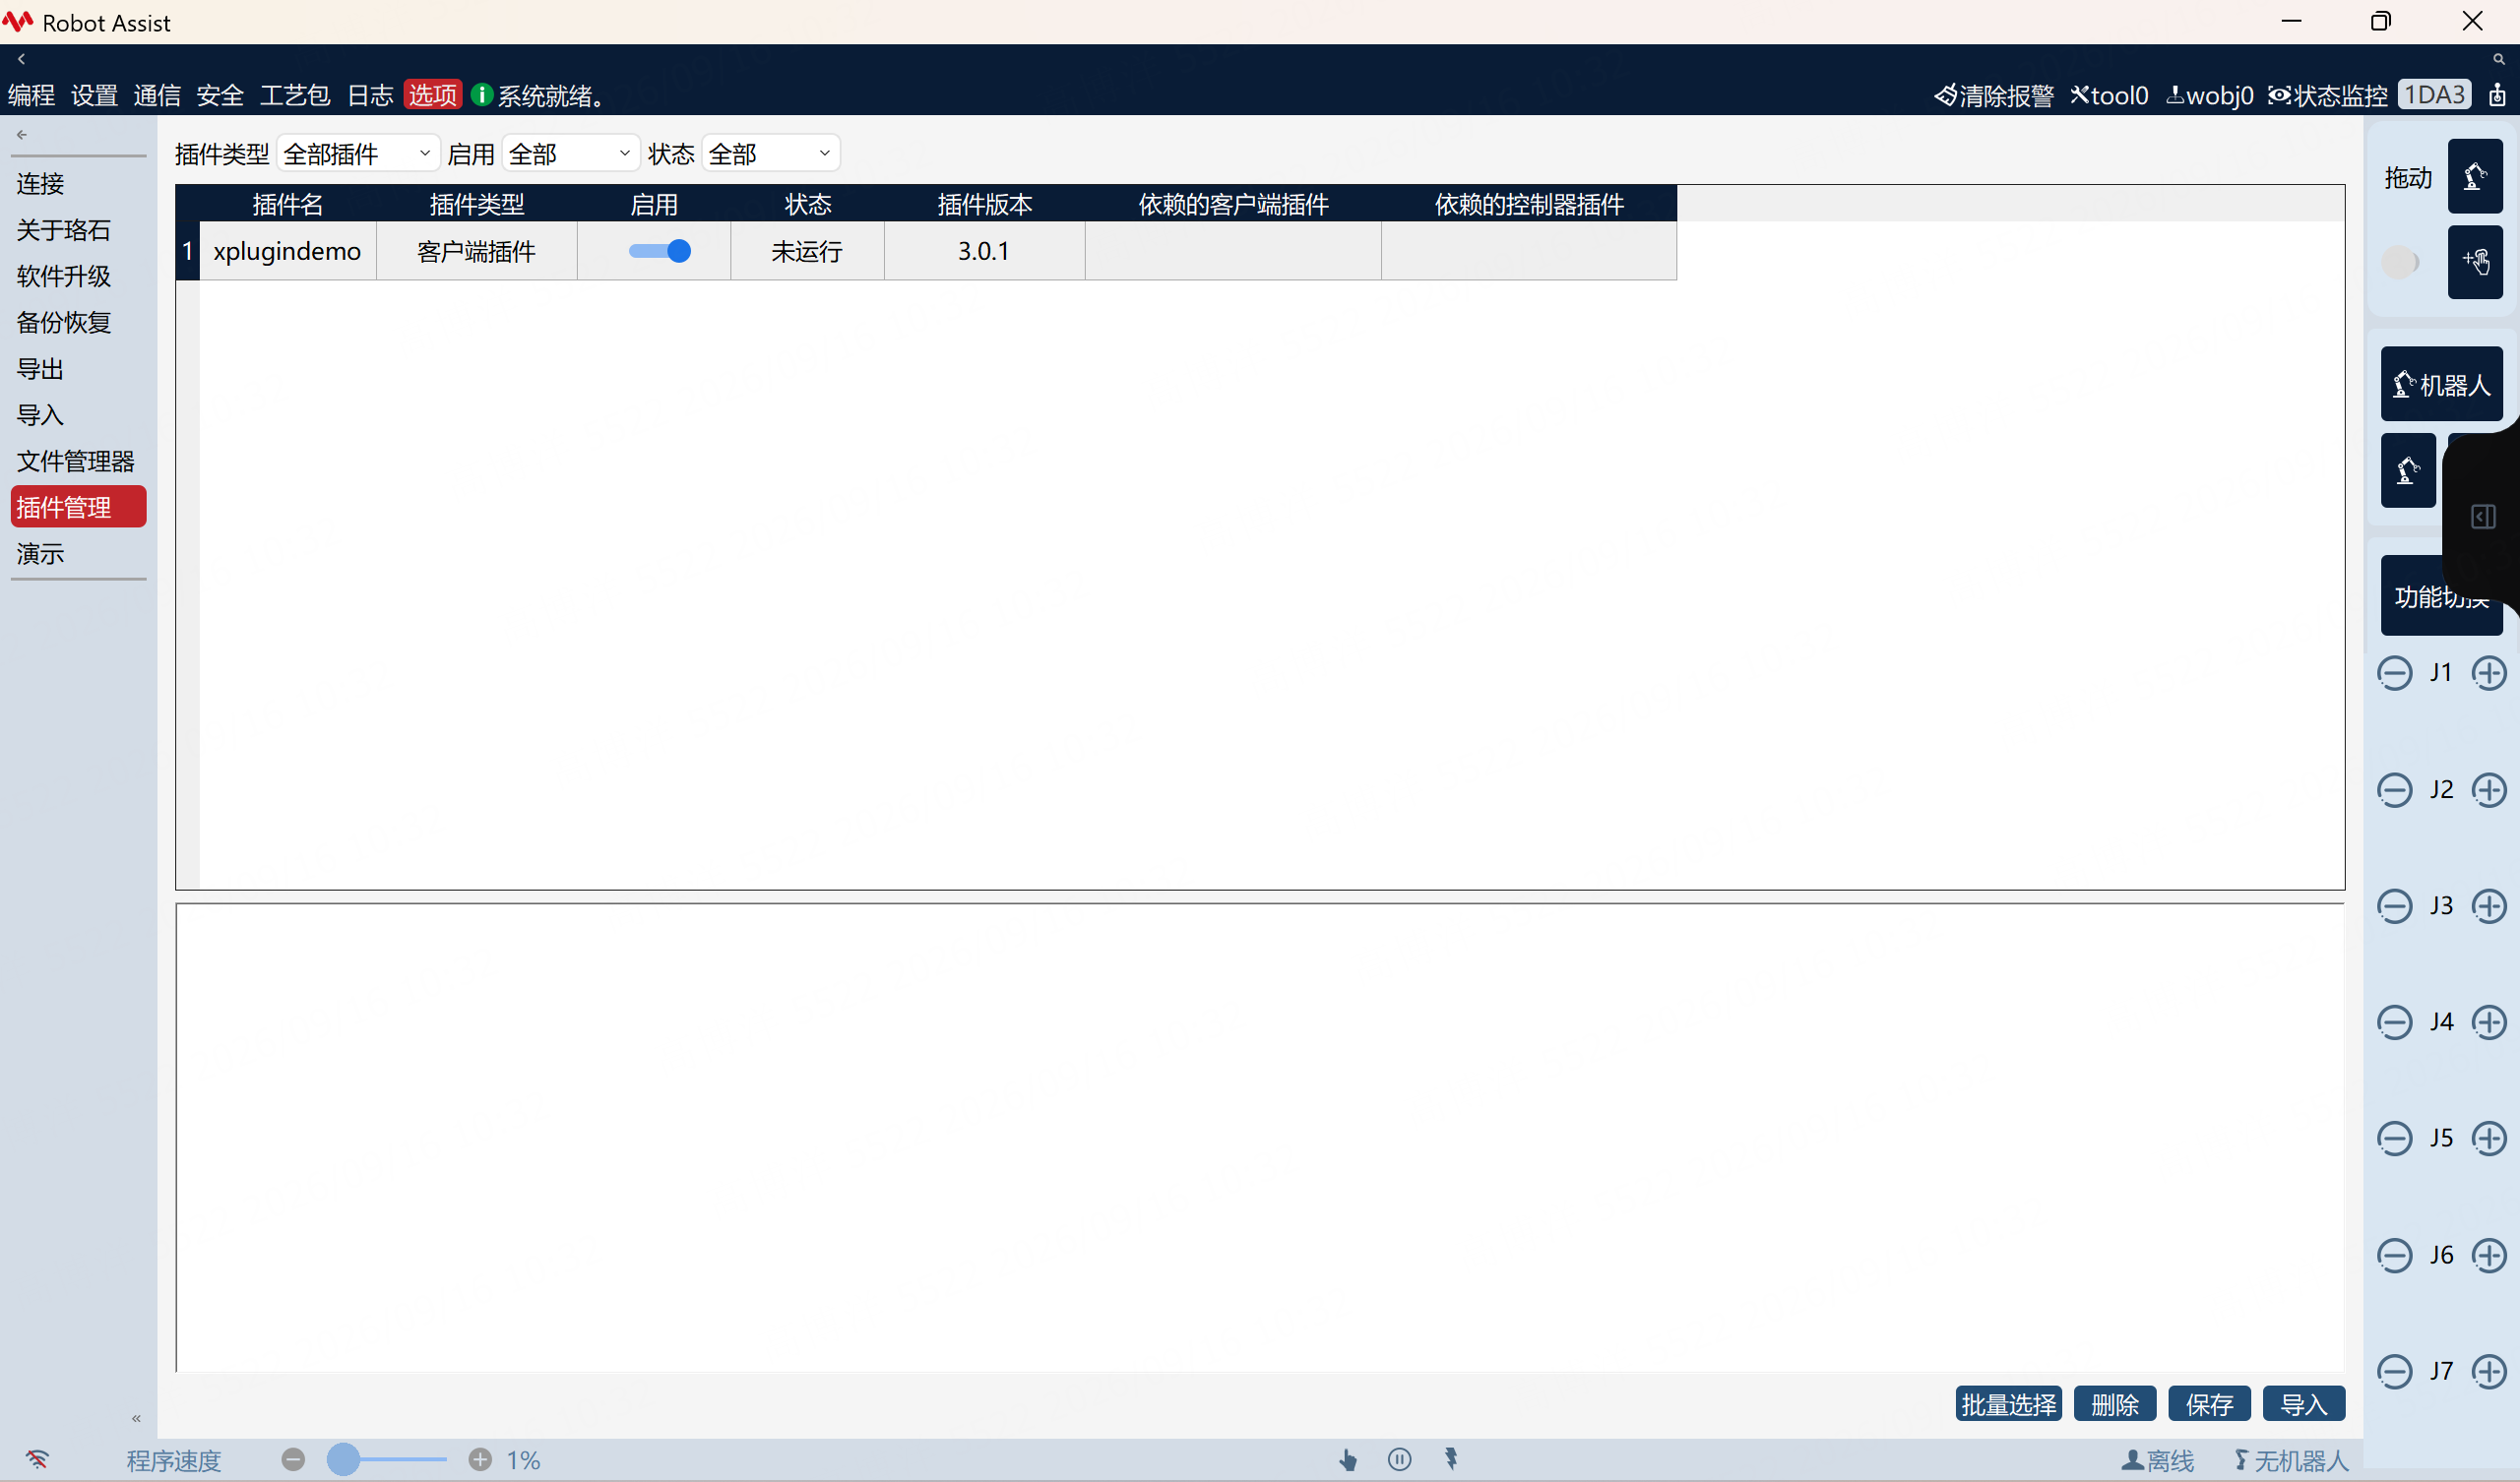
- Package according to Creating the Plugin Package and import according to Installation and Usage. The name field in the JSON configuration file (
xplugindemo.json) and the plugin file name must be xplugindemo. - Enable the plugin under Options → Plugin Management, save, and restart when prompted.
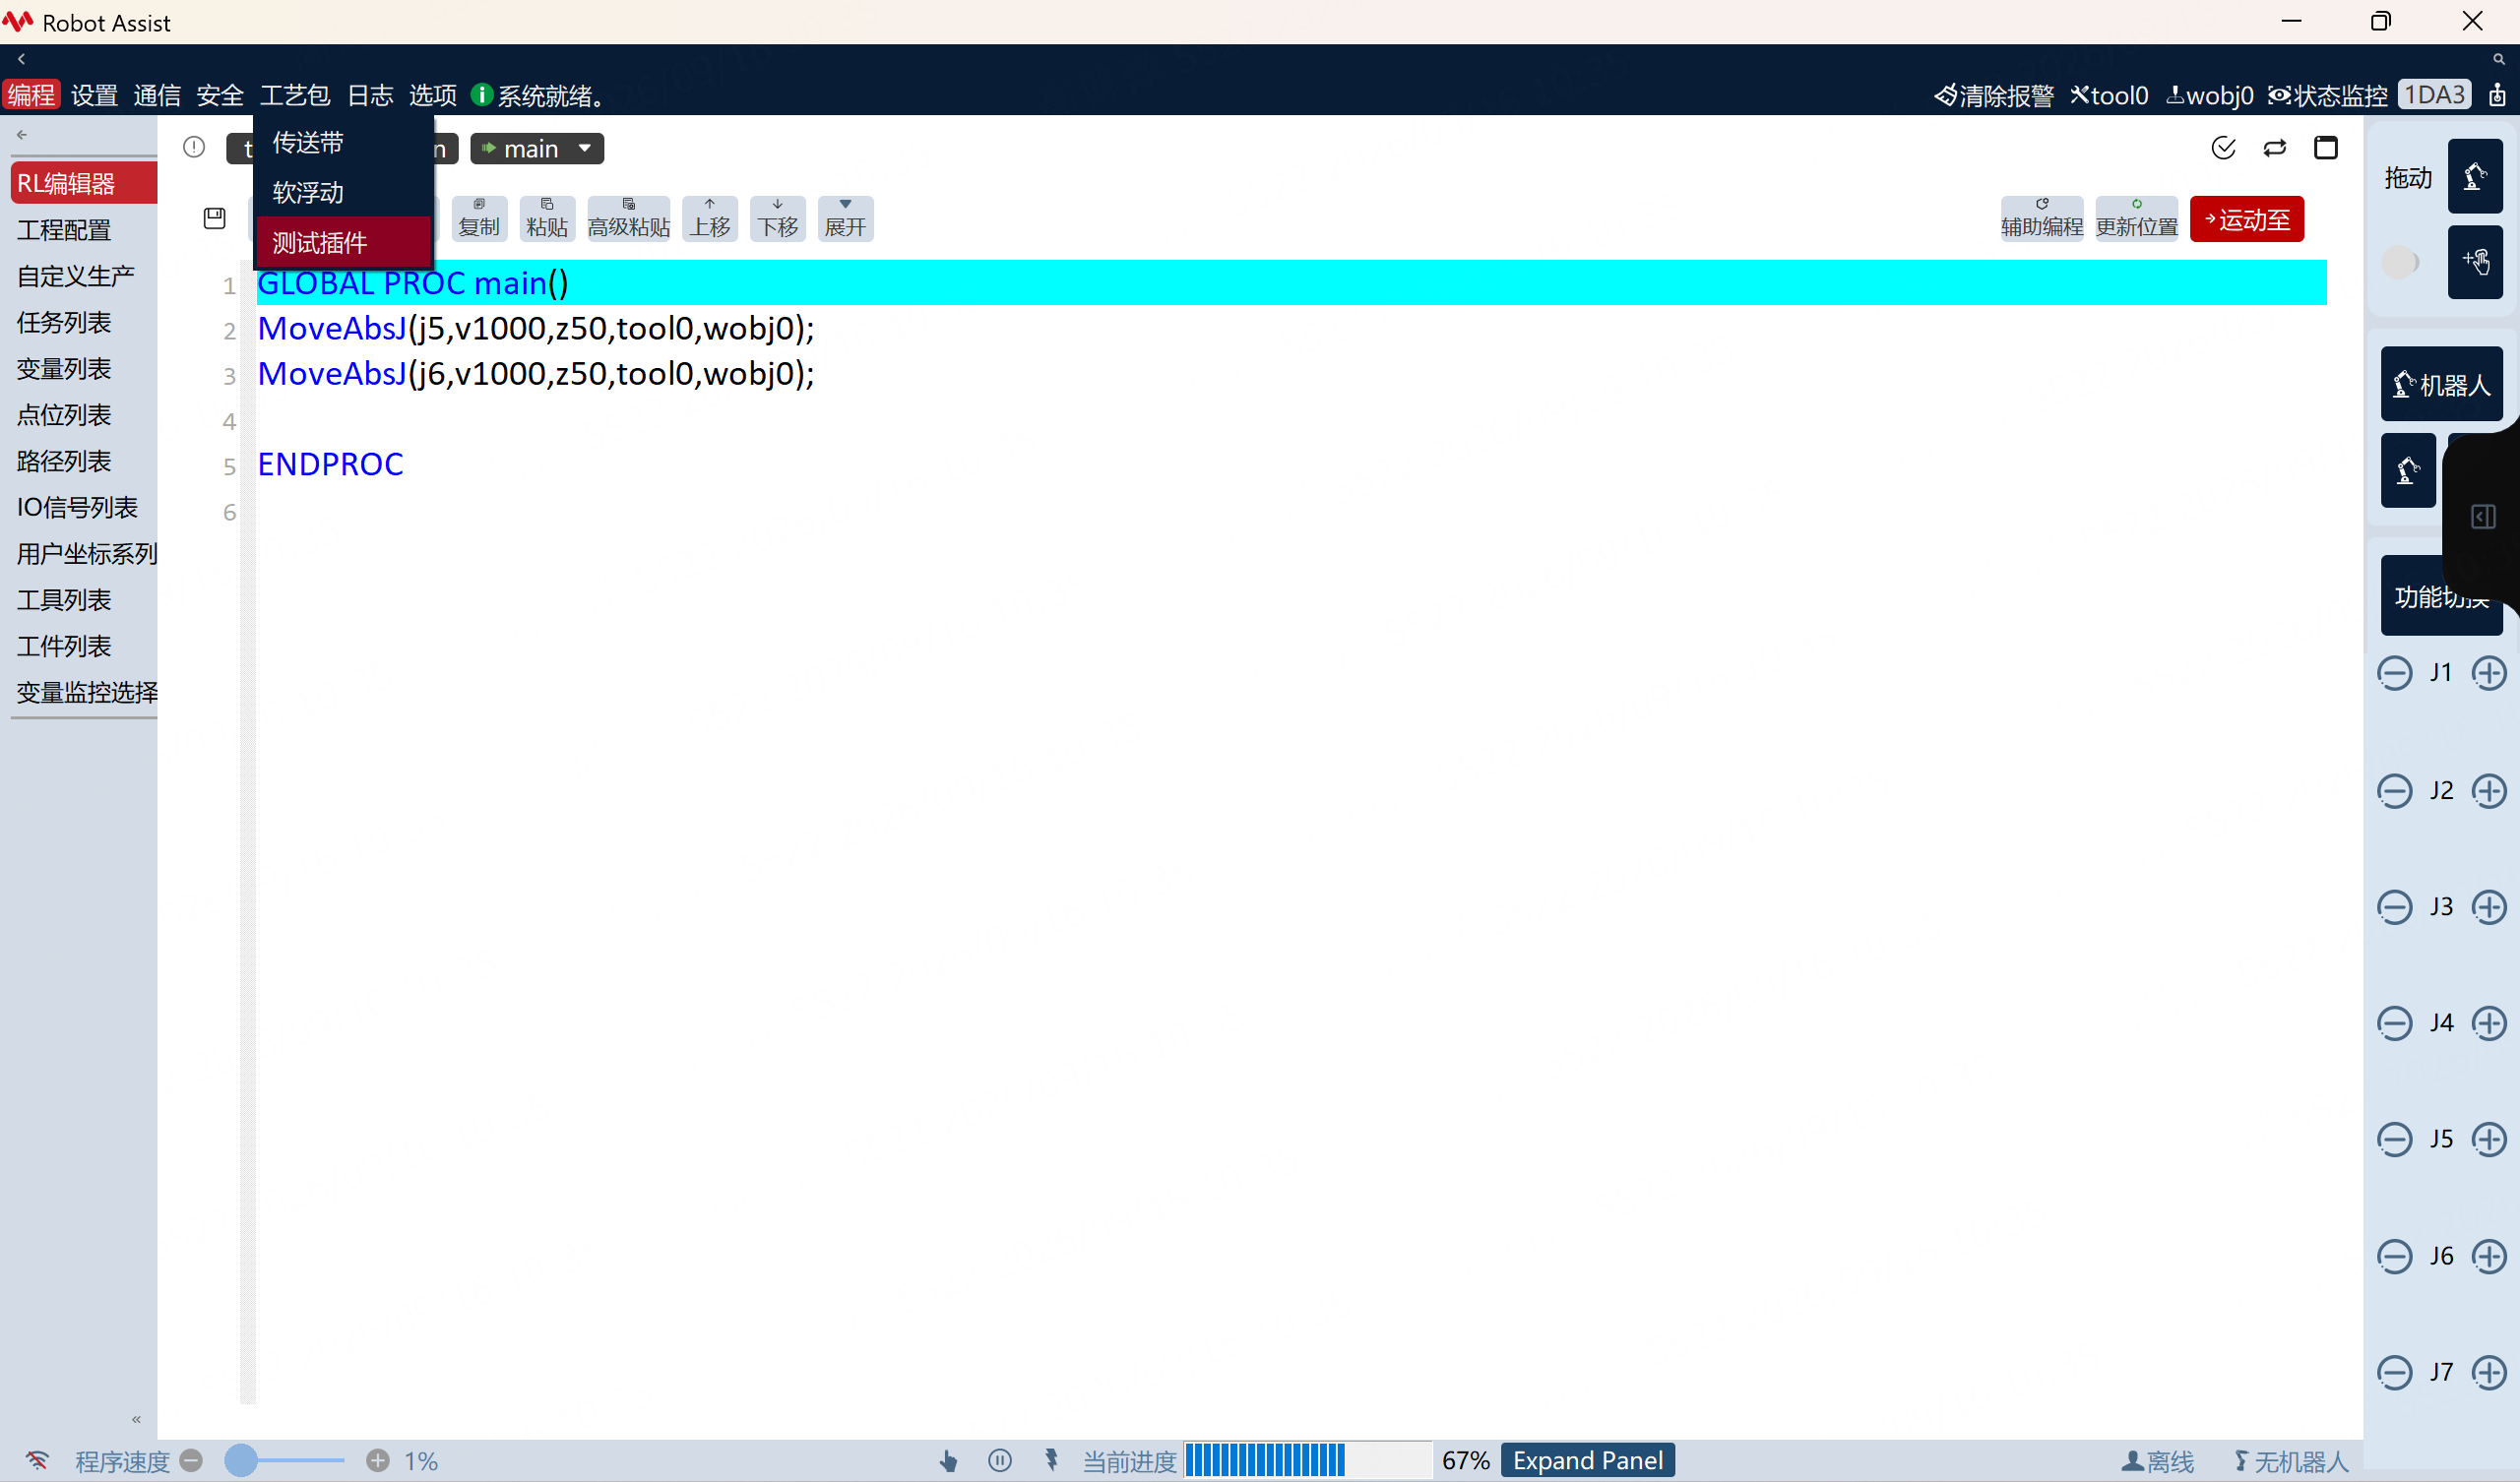
- After restart, open it from the Process package drop-down. The UI name in this example is 测试插件.
2. UI mount regions
init() registers the UI in the corresponding HMI regions. Implementation: xplugindemo.cpp. For detailed API descriptions, see: API Reference — Global Functions.
| HMI location | Call | Source |
|---|---|---|
| Center page | CreateCenterWidget | pages/demoshell.* |
| Bottom status bar | CreateStatusBar | showstatusbar.* |
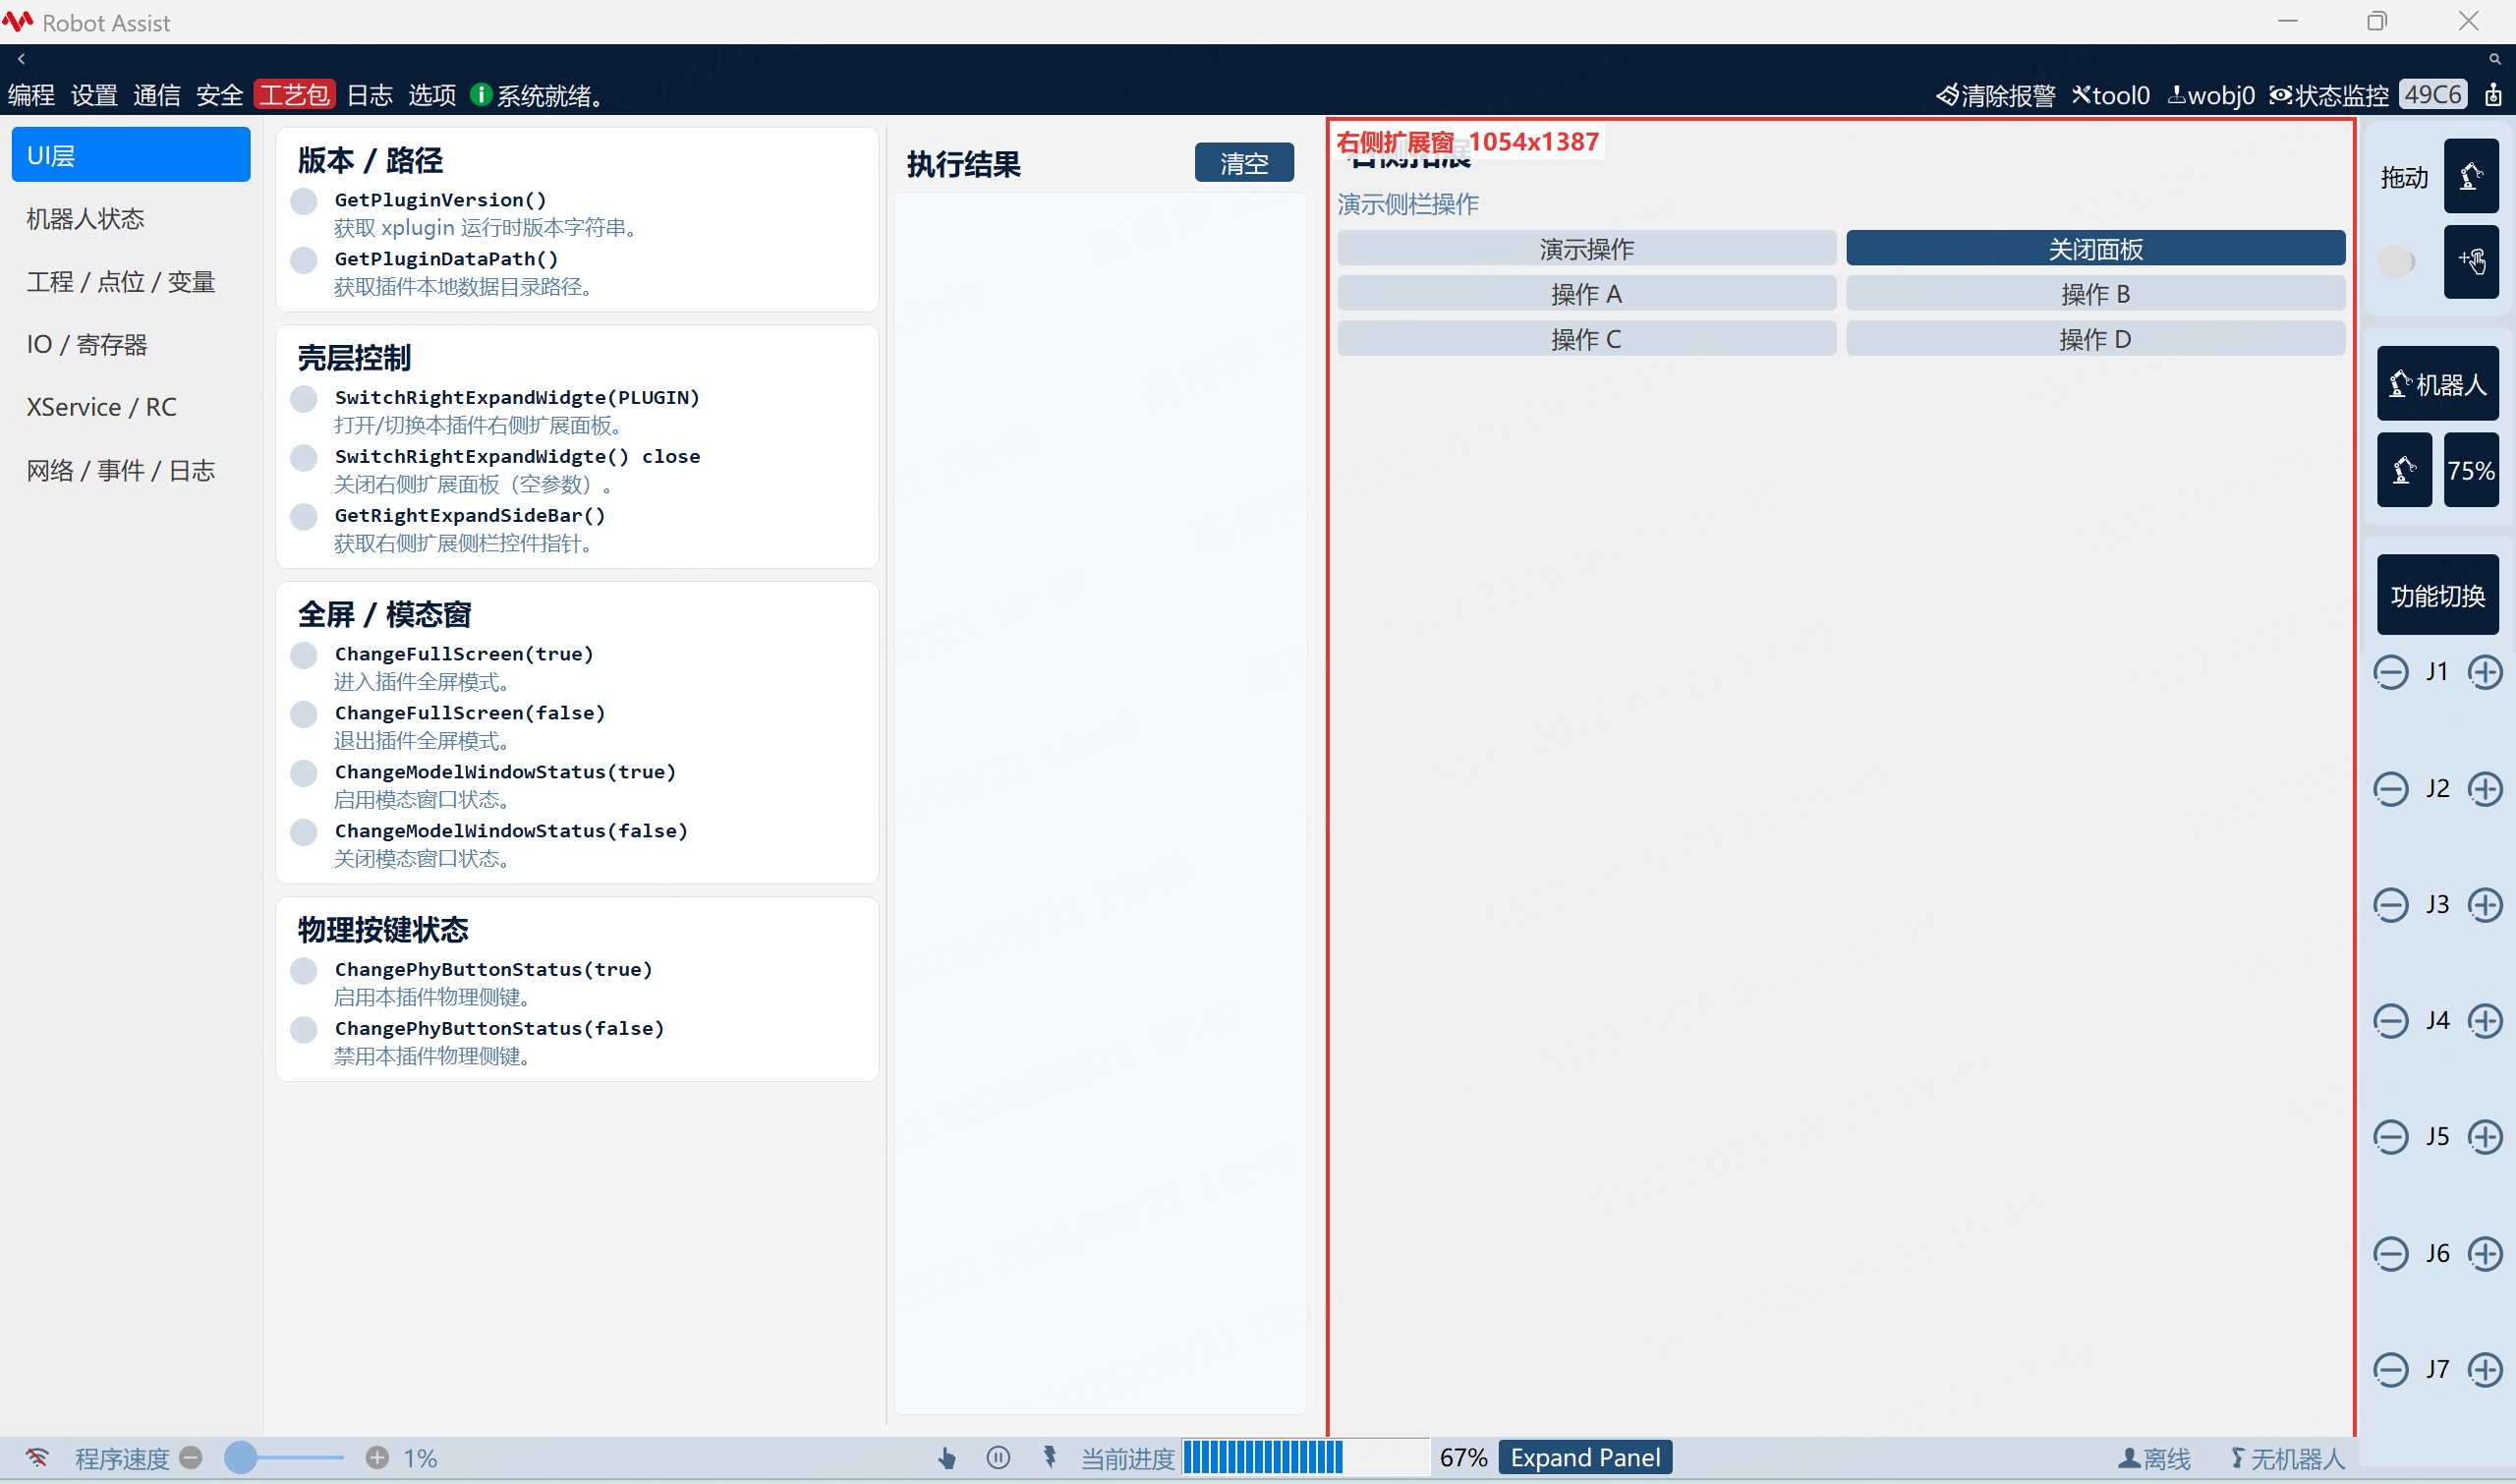
| Right expand panel | CreateRightExpandWidgte | expandwidget.* |
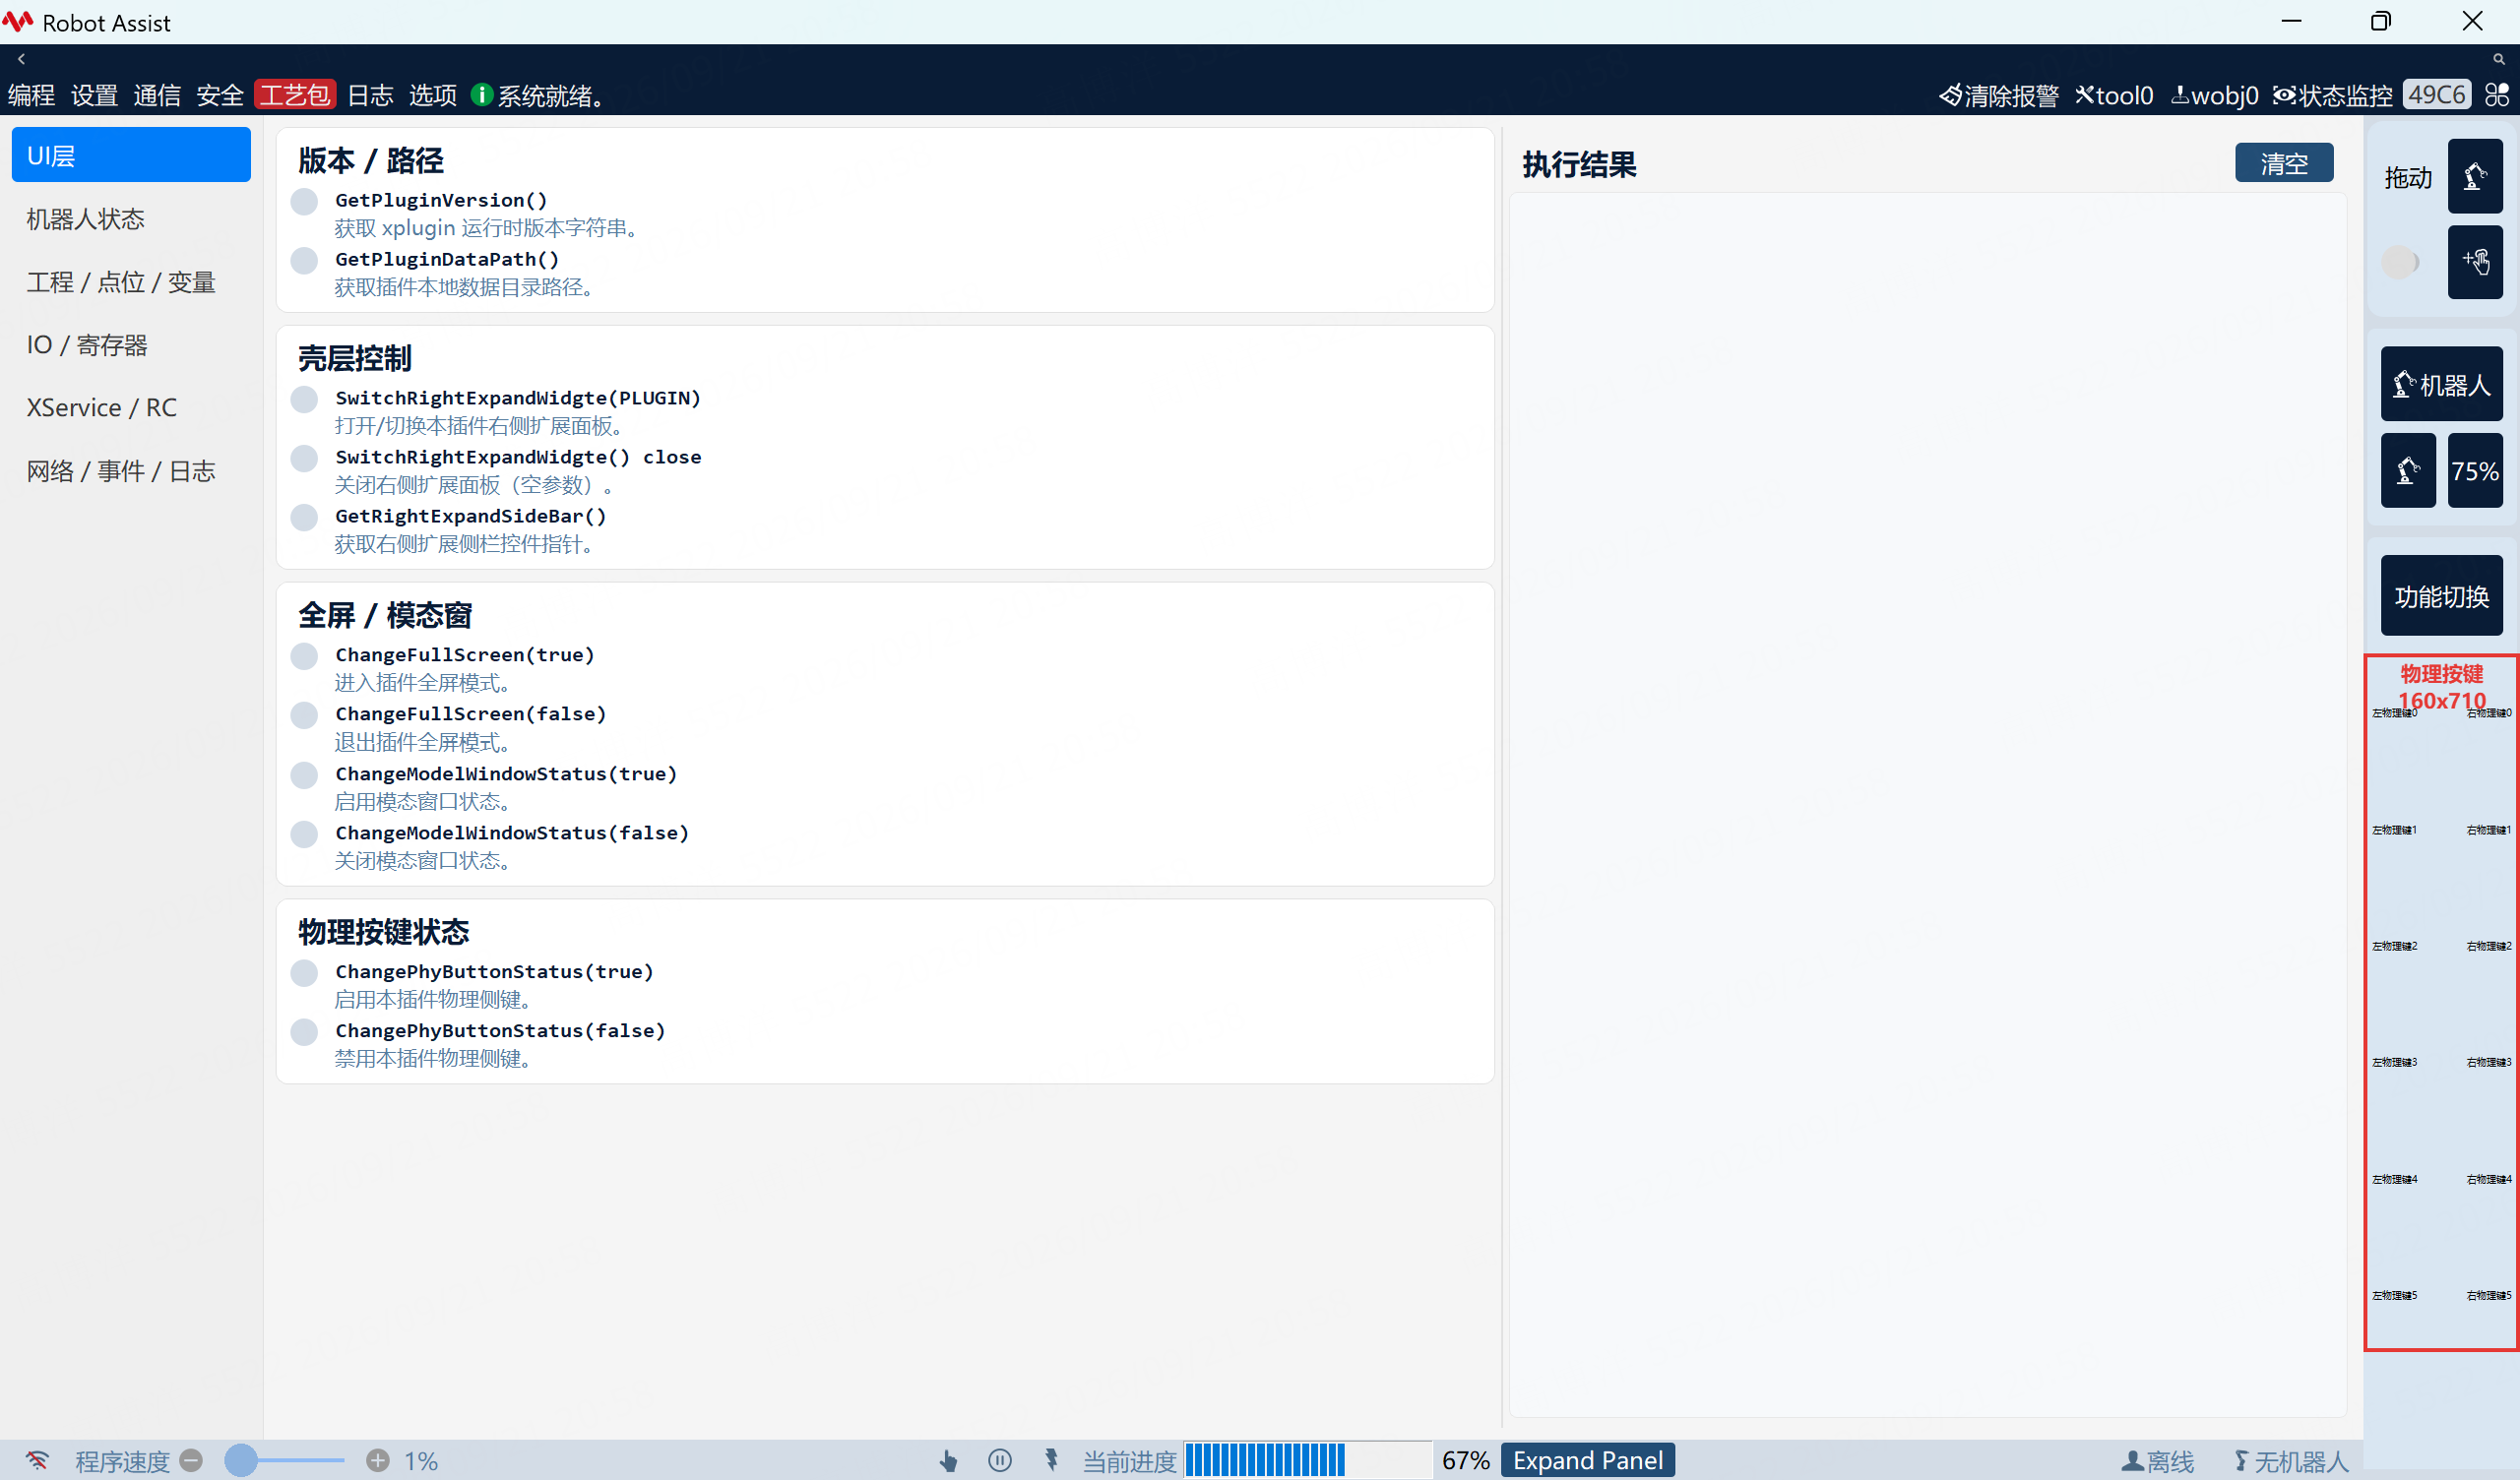
| Physical buttons | CreatePhyButtonList | xplugindemo.cpp |
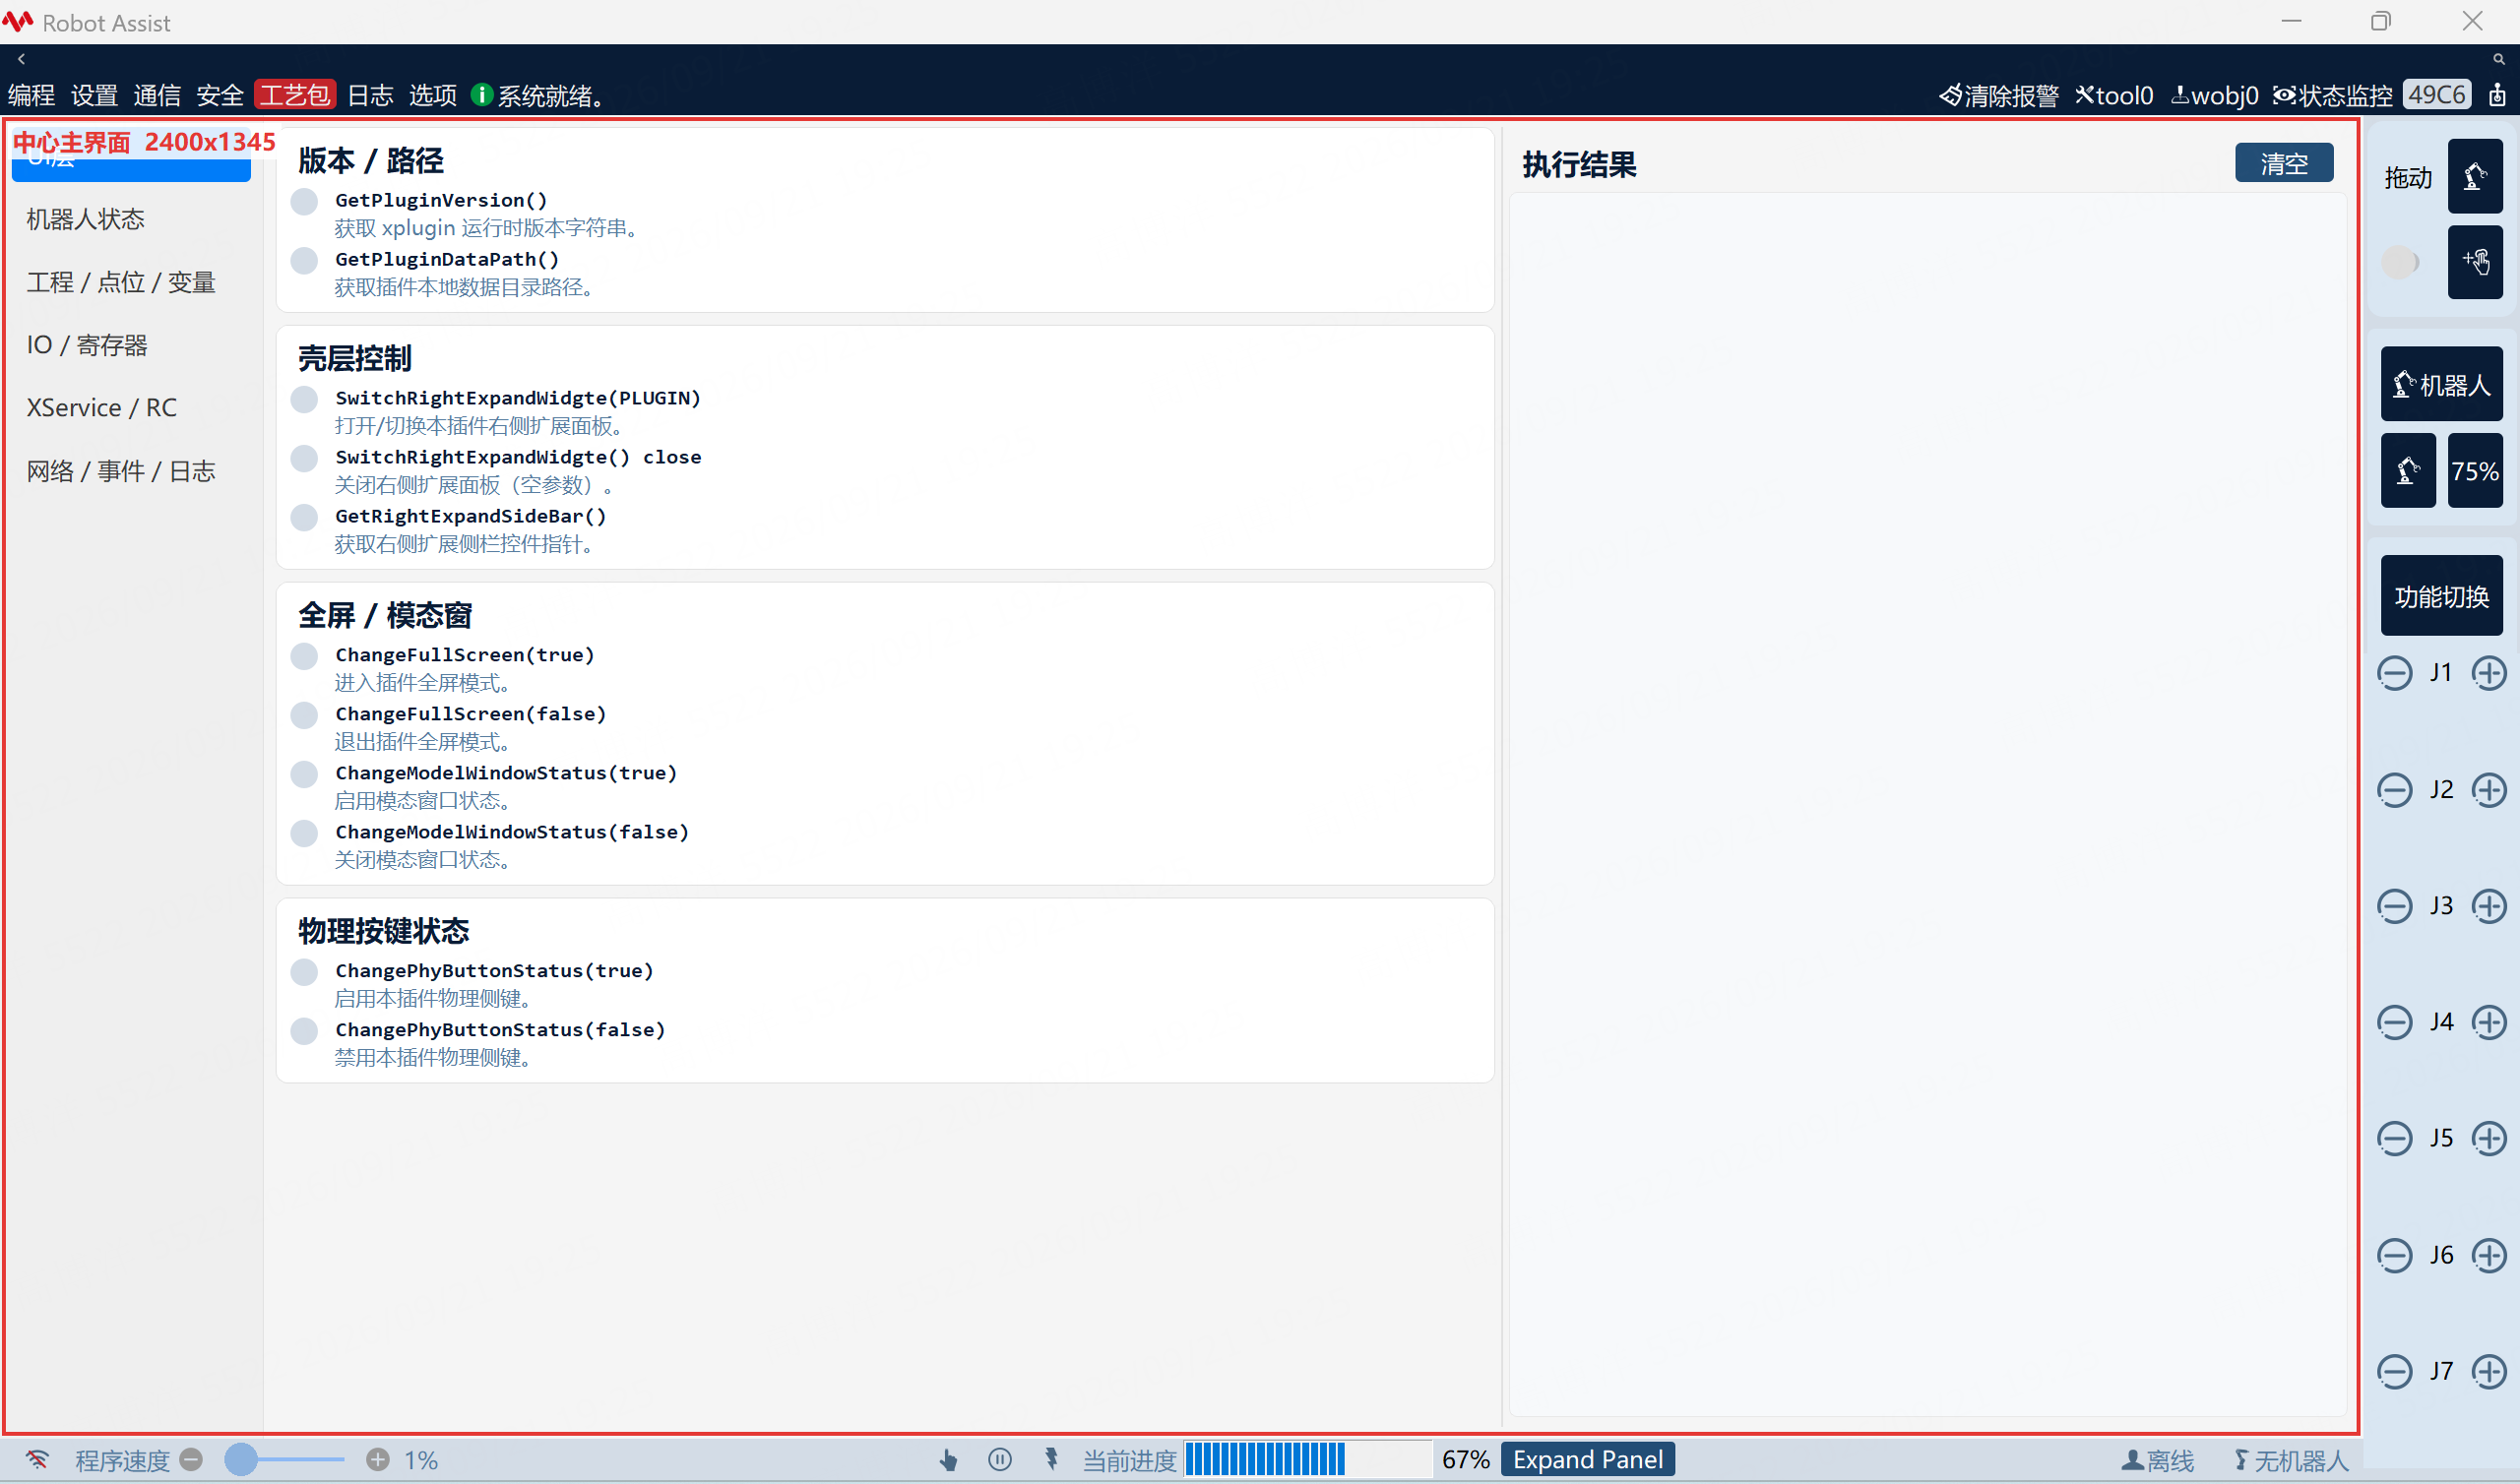
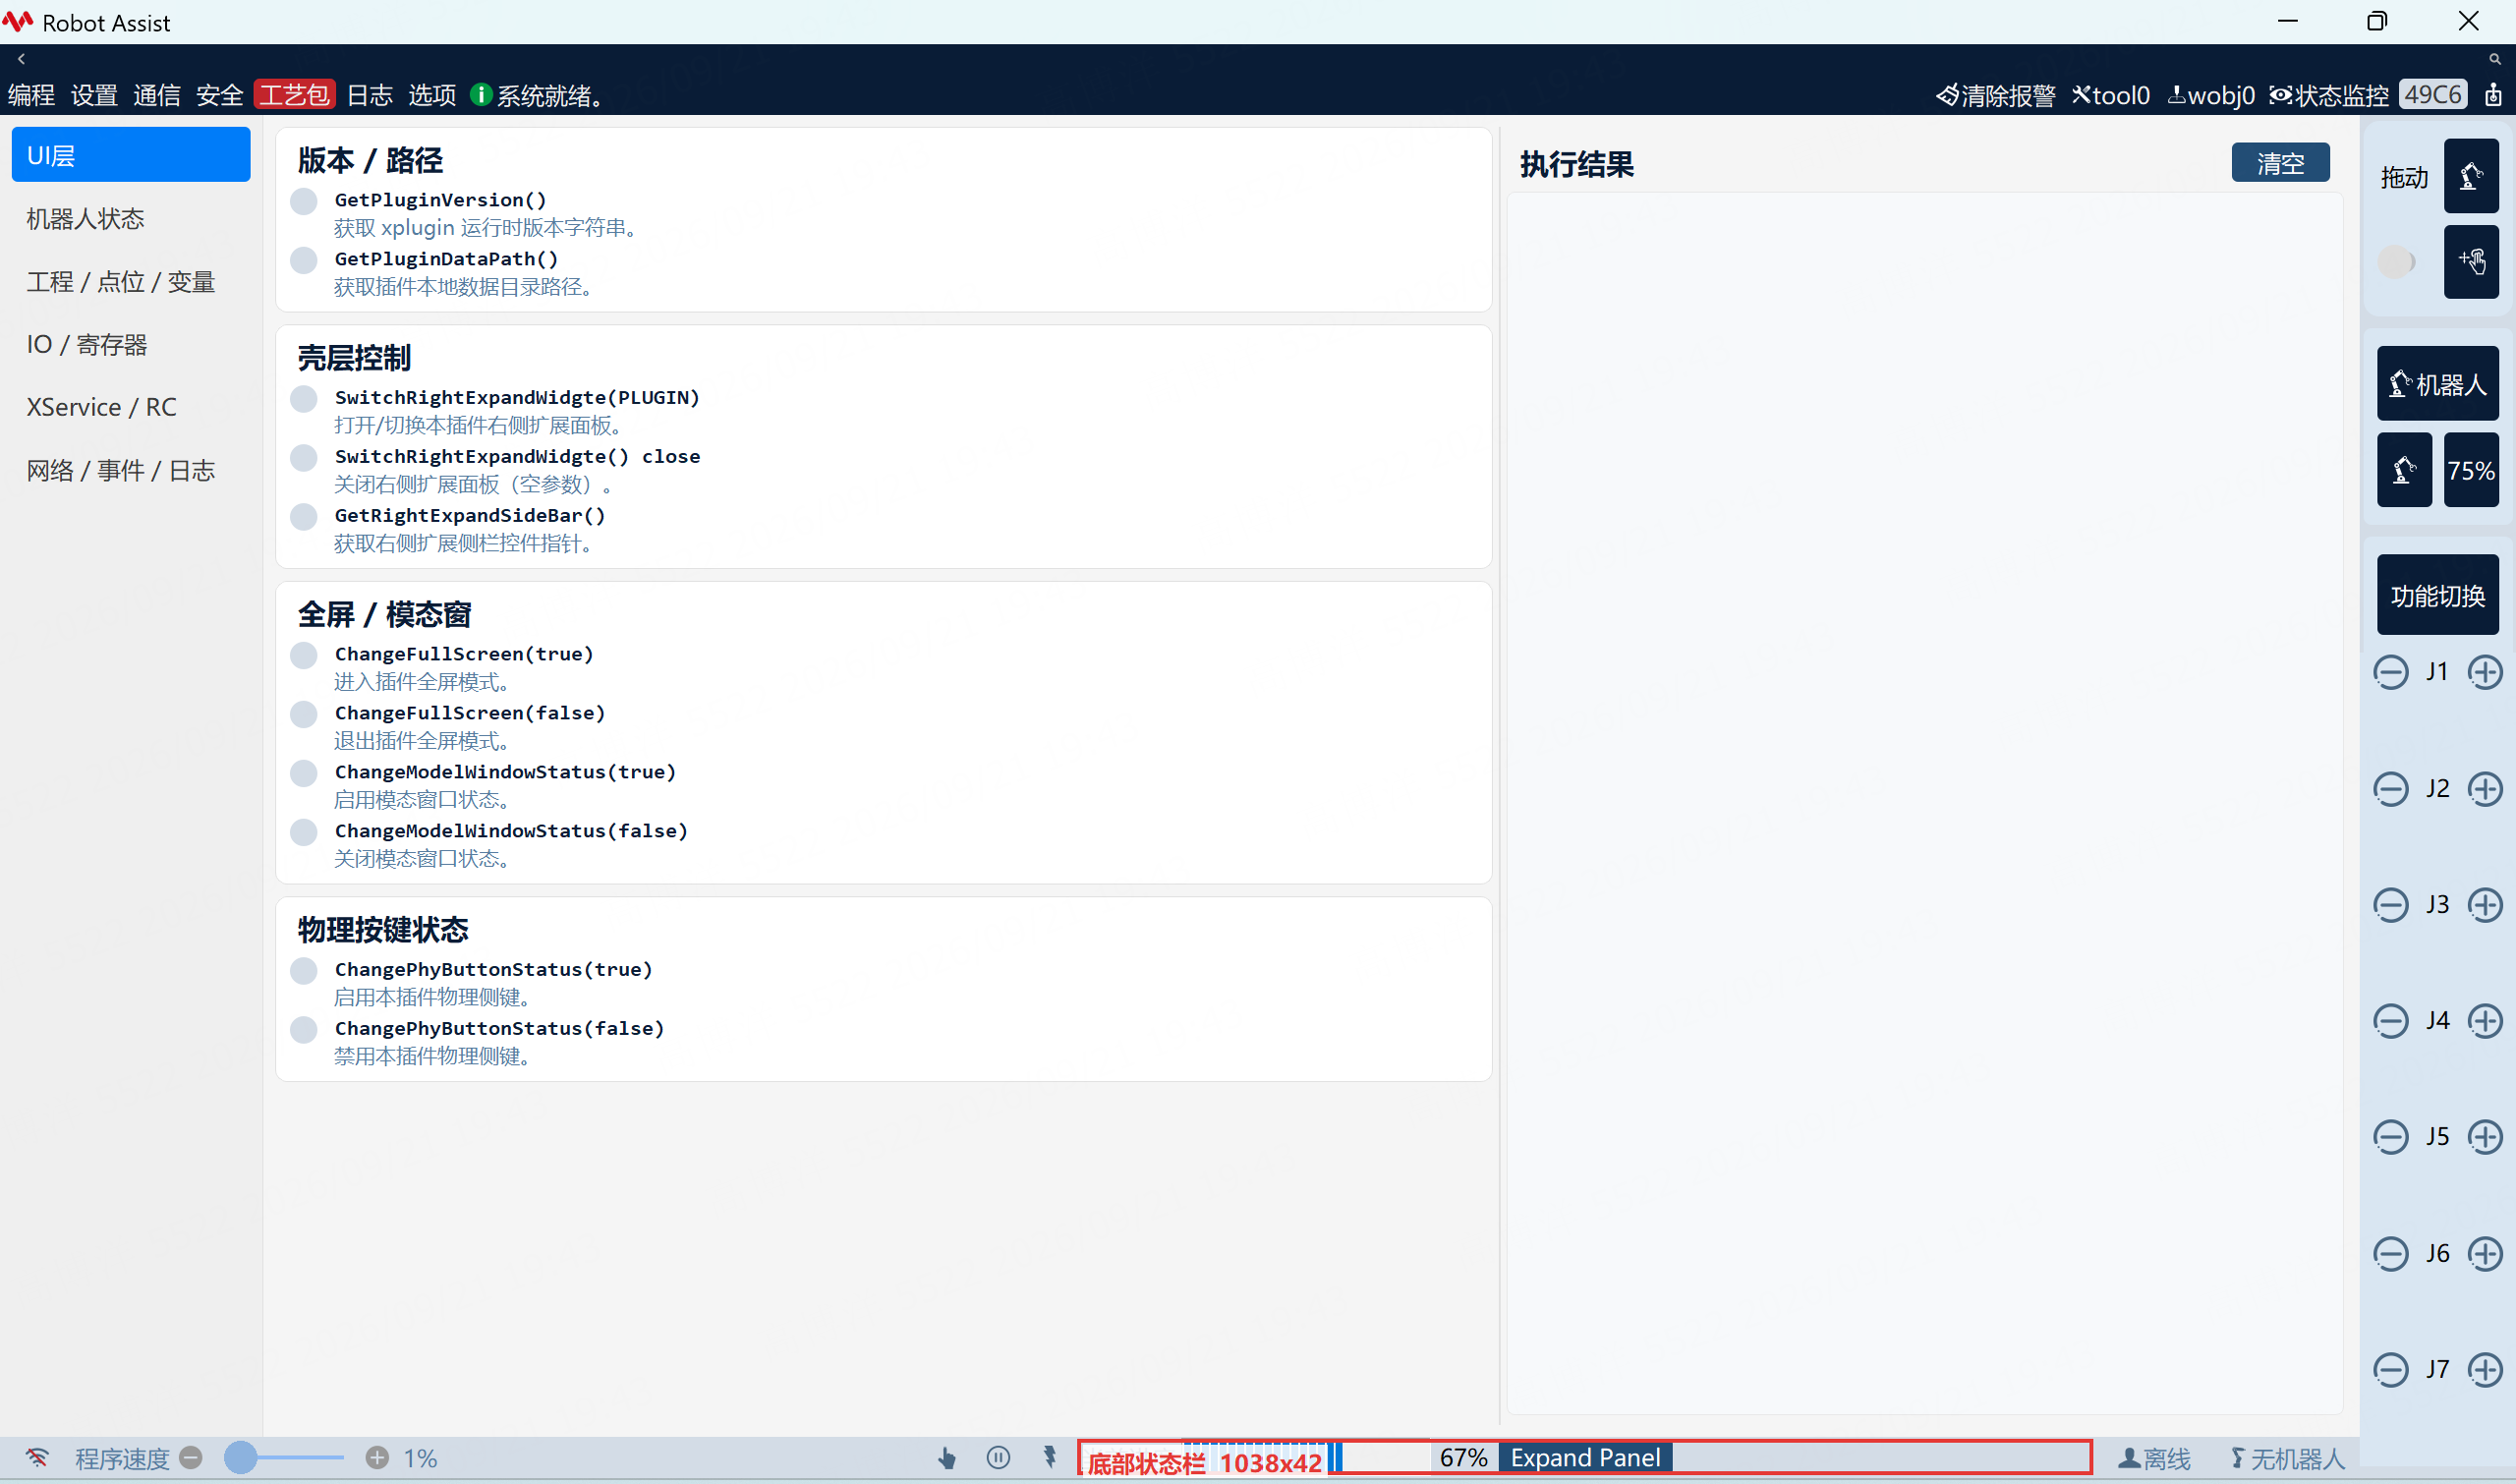
The red frames only mark regions. The default example UI does not show them.
The center page is registered with CreateCenterWidget. Source: pages/demoshell.*.
The bottom status bar is registered with CreateStatusBar. Source: showstatusbar.*. This example shows progress there and provides an Expand Panel button.
The right expand panel is registered with CreateRightExpandWidgte. Source: expandwidget.*. When open, it is on the right of the center page.
The physical buttons are registered with CreatePhyButtonList. Implementation: xplugindemo.cpp. The frame covers six configurable keys on each side. The function switch is reserved by the system and cannot be changed by the plugin.
3. Center-page navigation groups
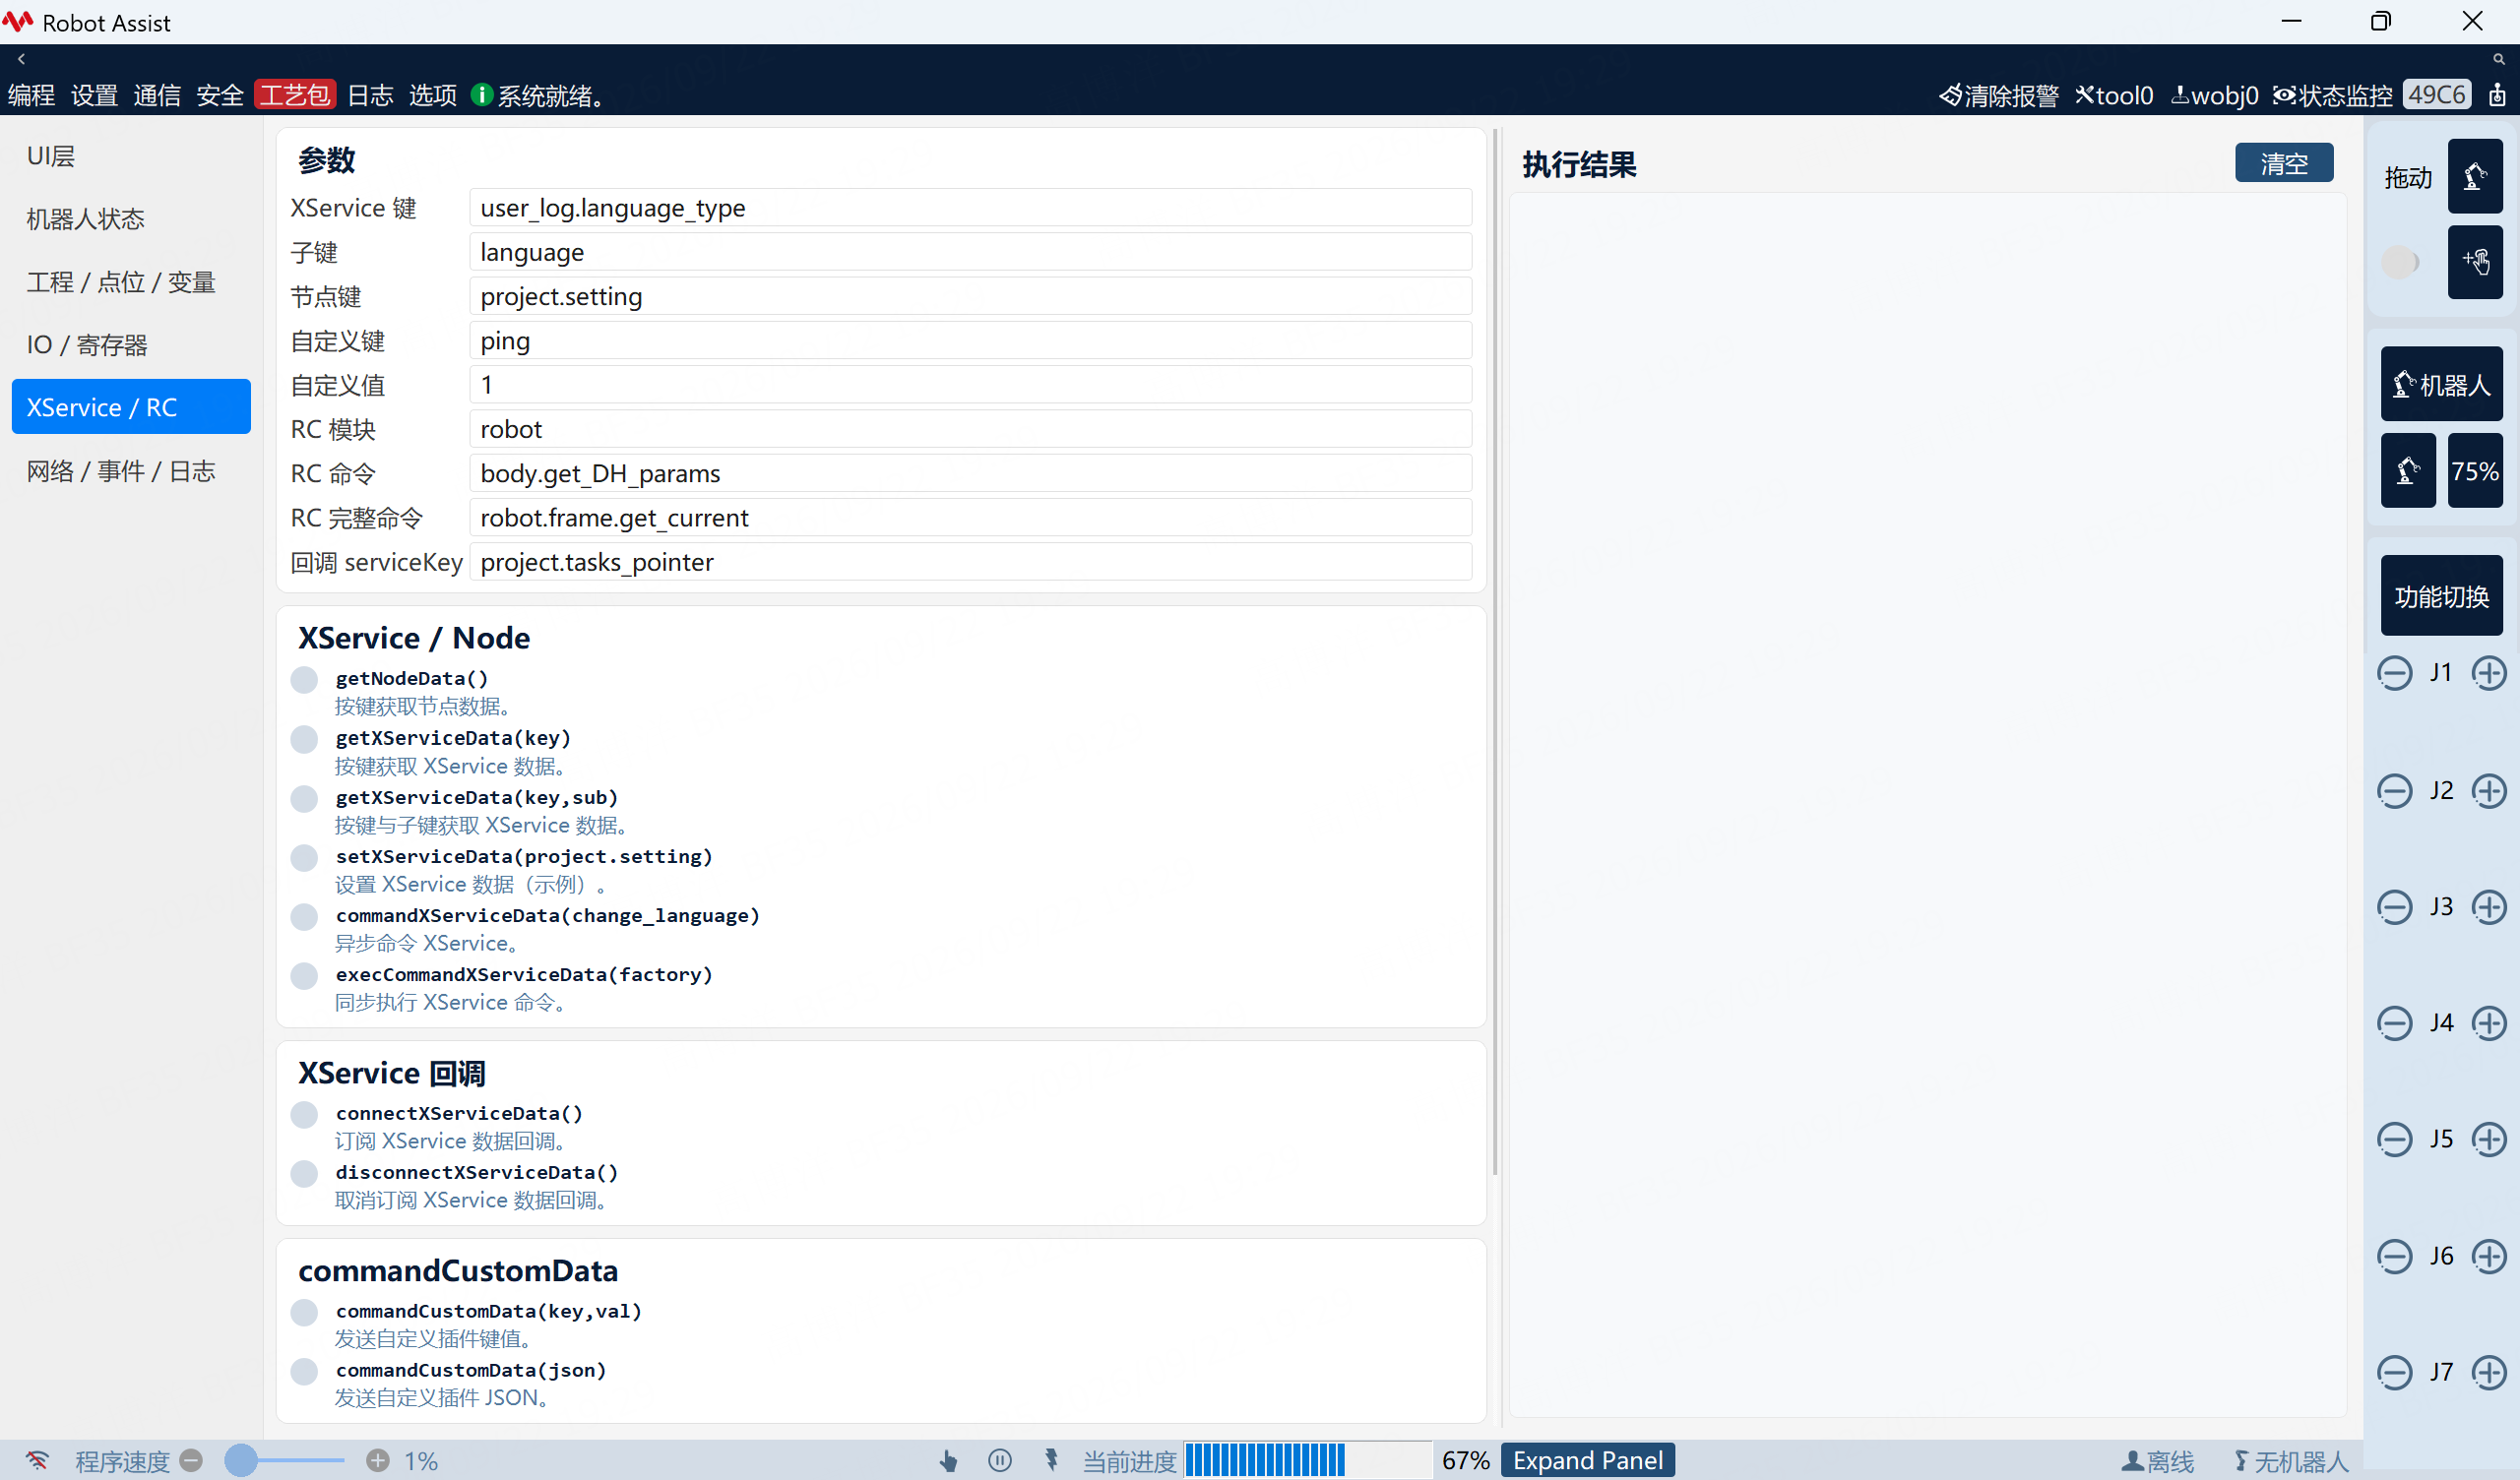
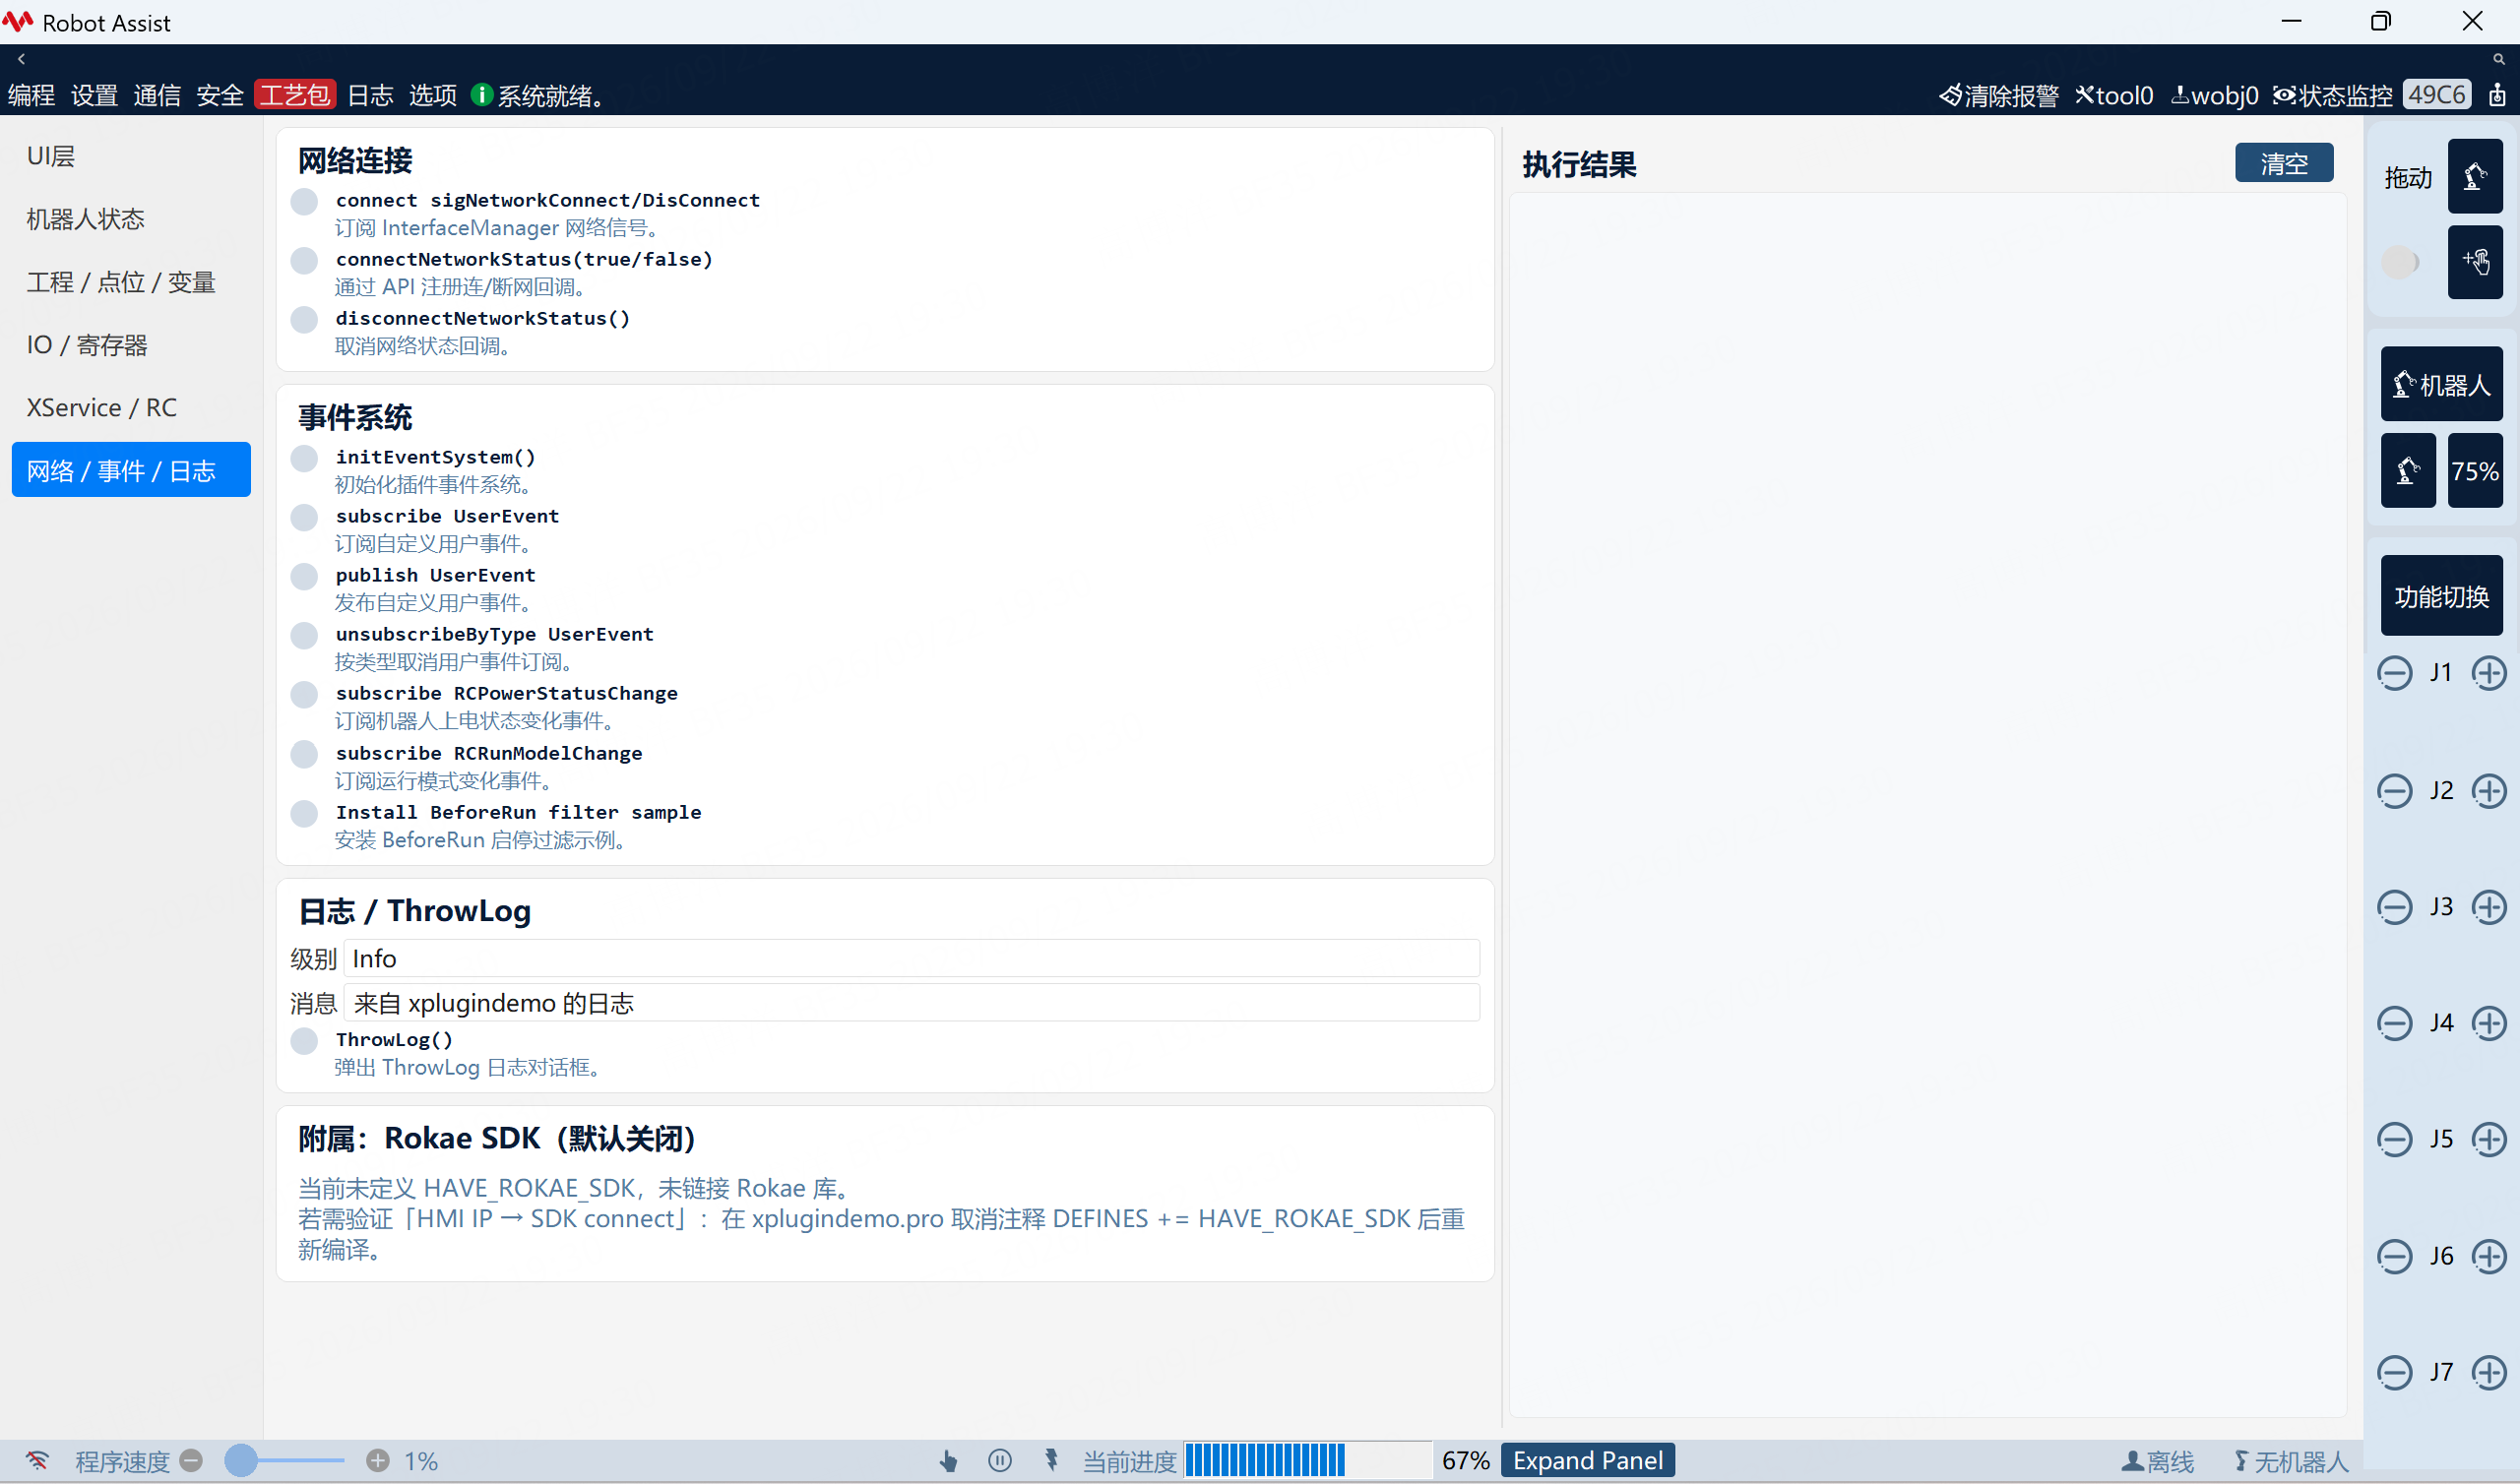
DemoShell switches groups from the left navigation. Source files are under pages/xplugin/. Each group calls APIs from buttons and shows return values in the result pane. For detailed API descriptions, see: API Reference — InterfaceManager.
Write operations such as changing power state, setting IO, or deleting a project alter controller or project state. Confirm site conditions before execution.
| Navigation | Source file |
|---|---|
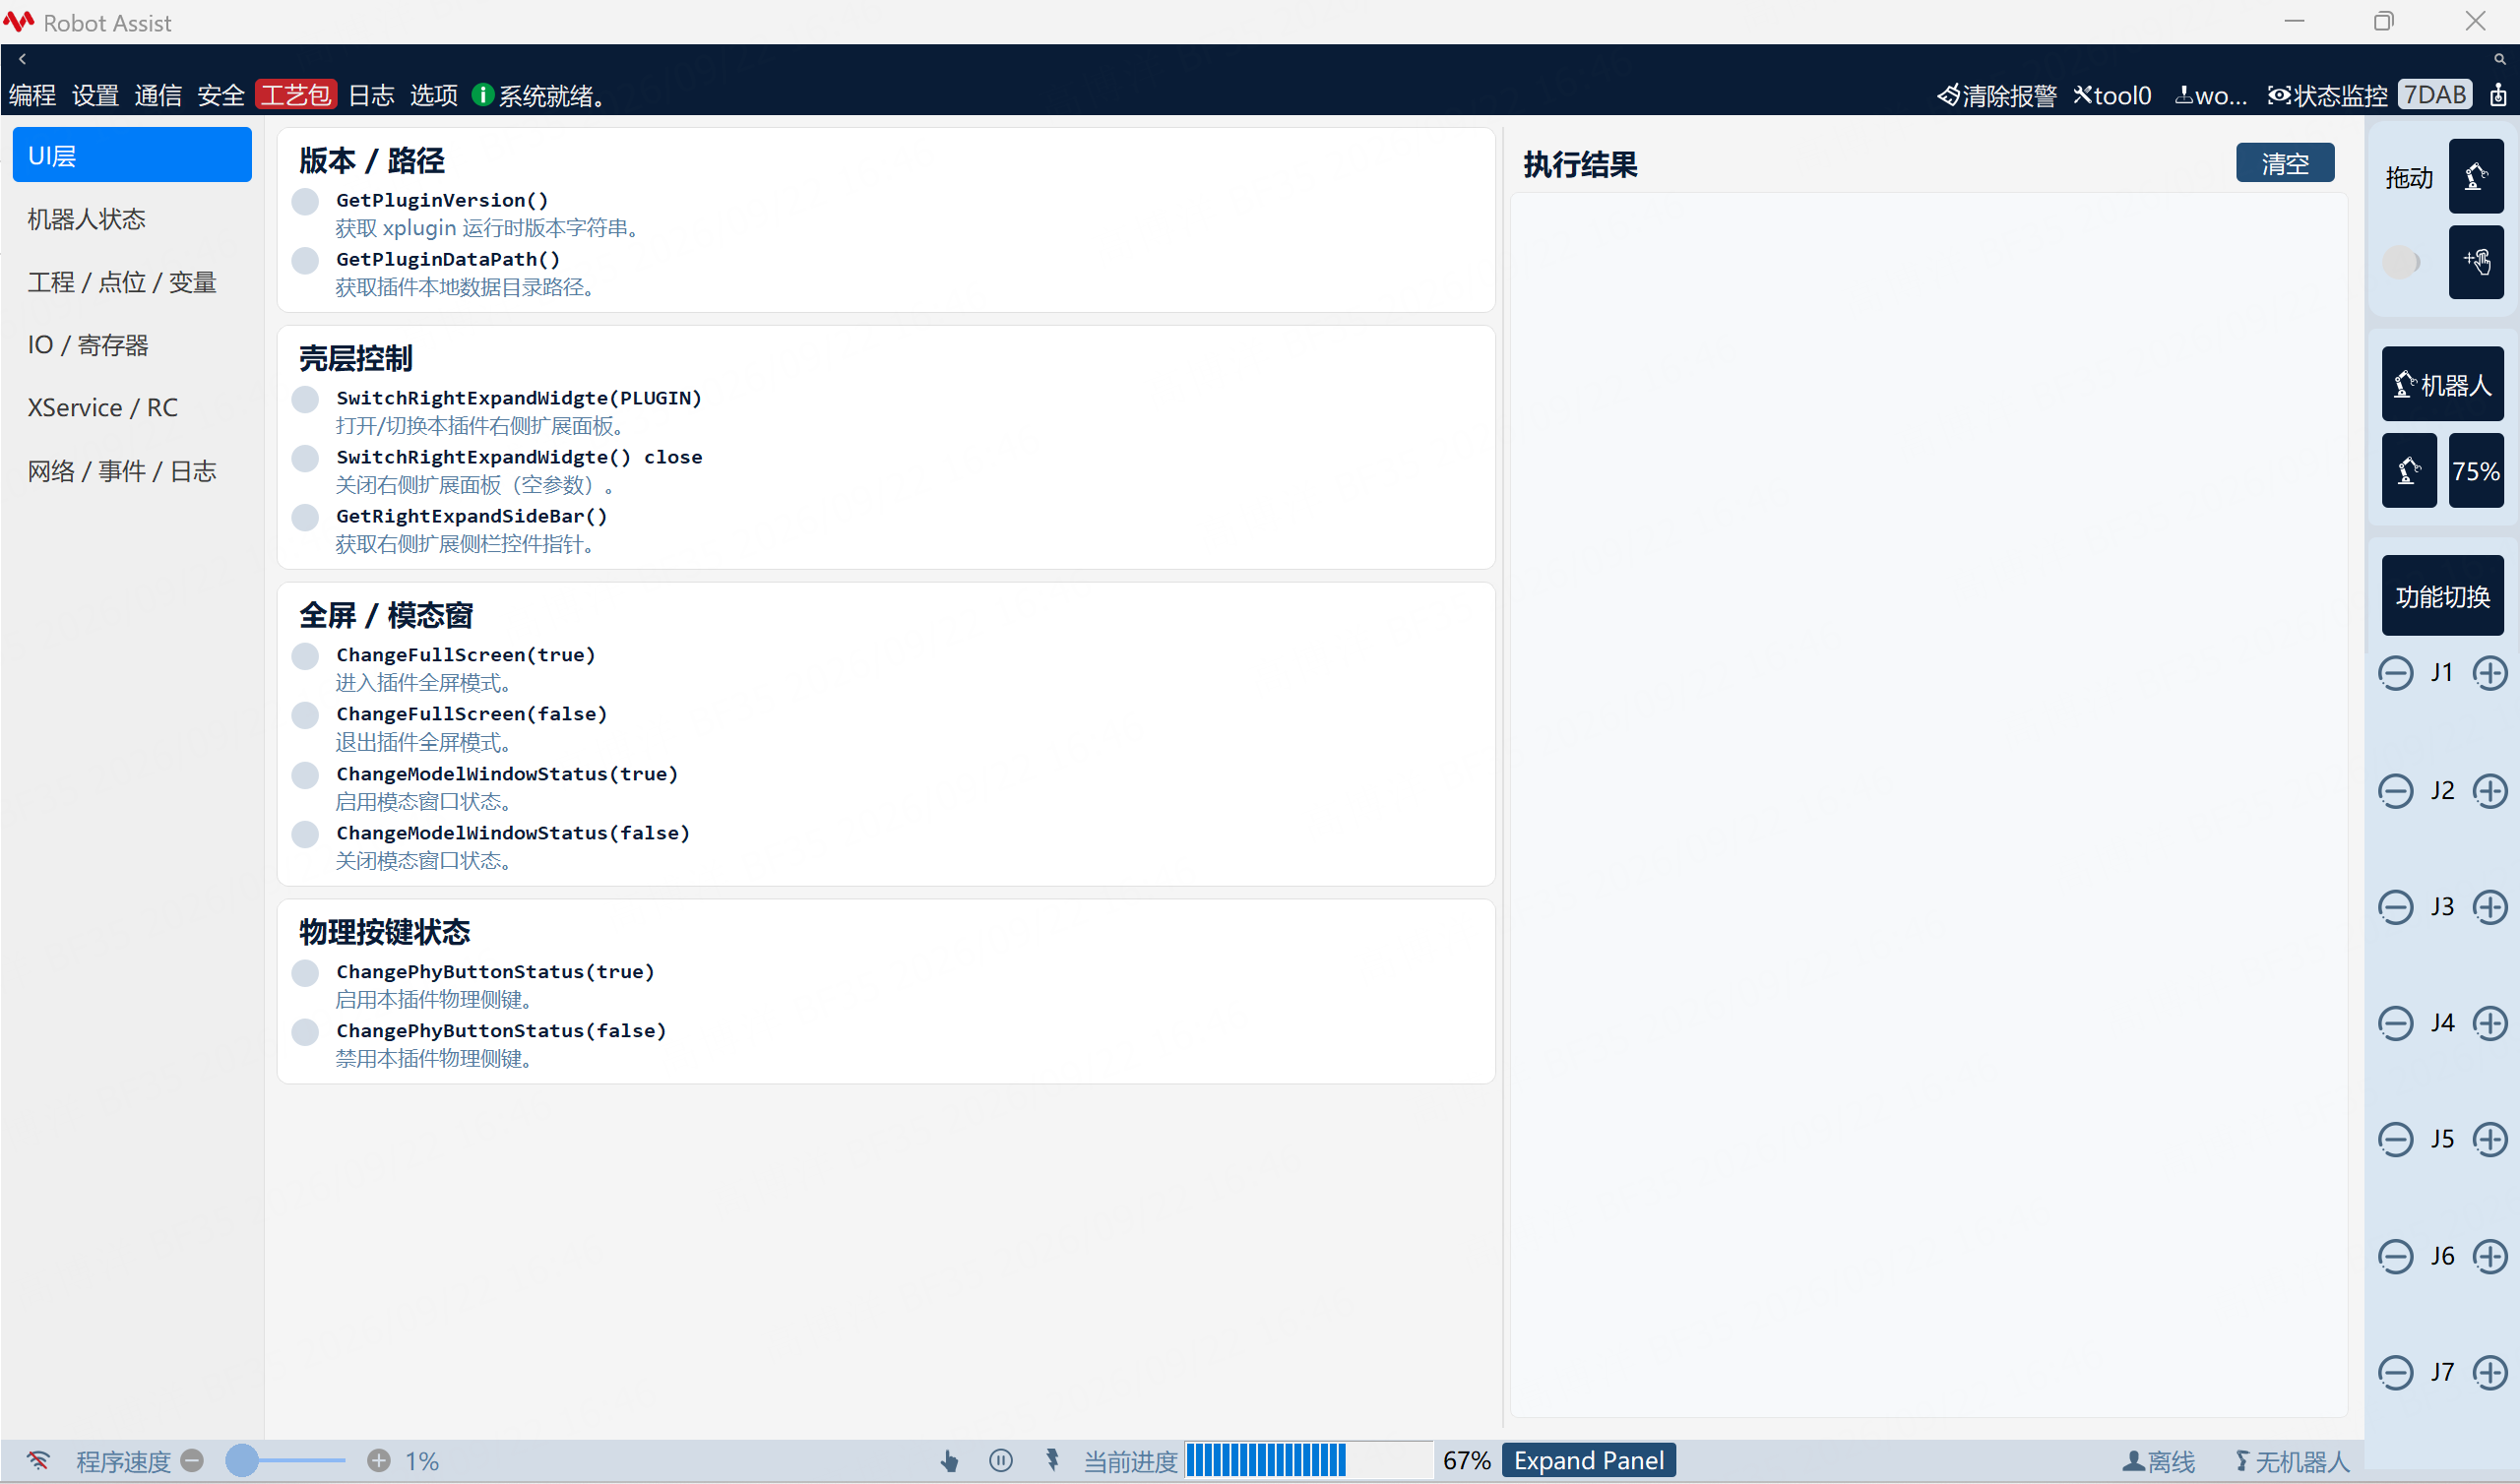
| UI Layer | pagehmishell.cpp |
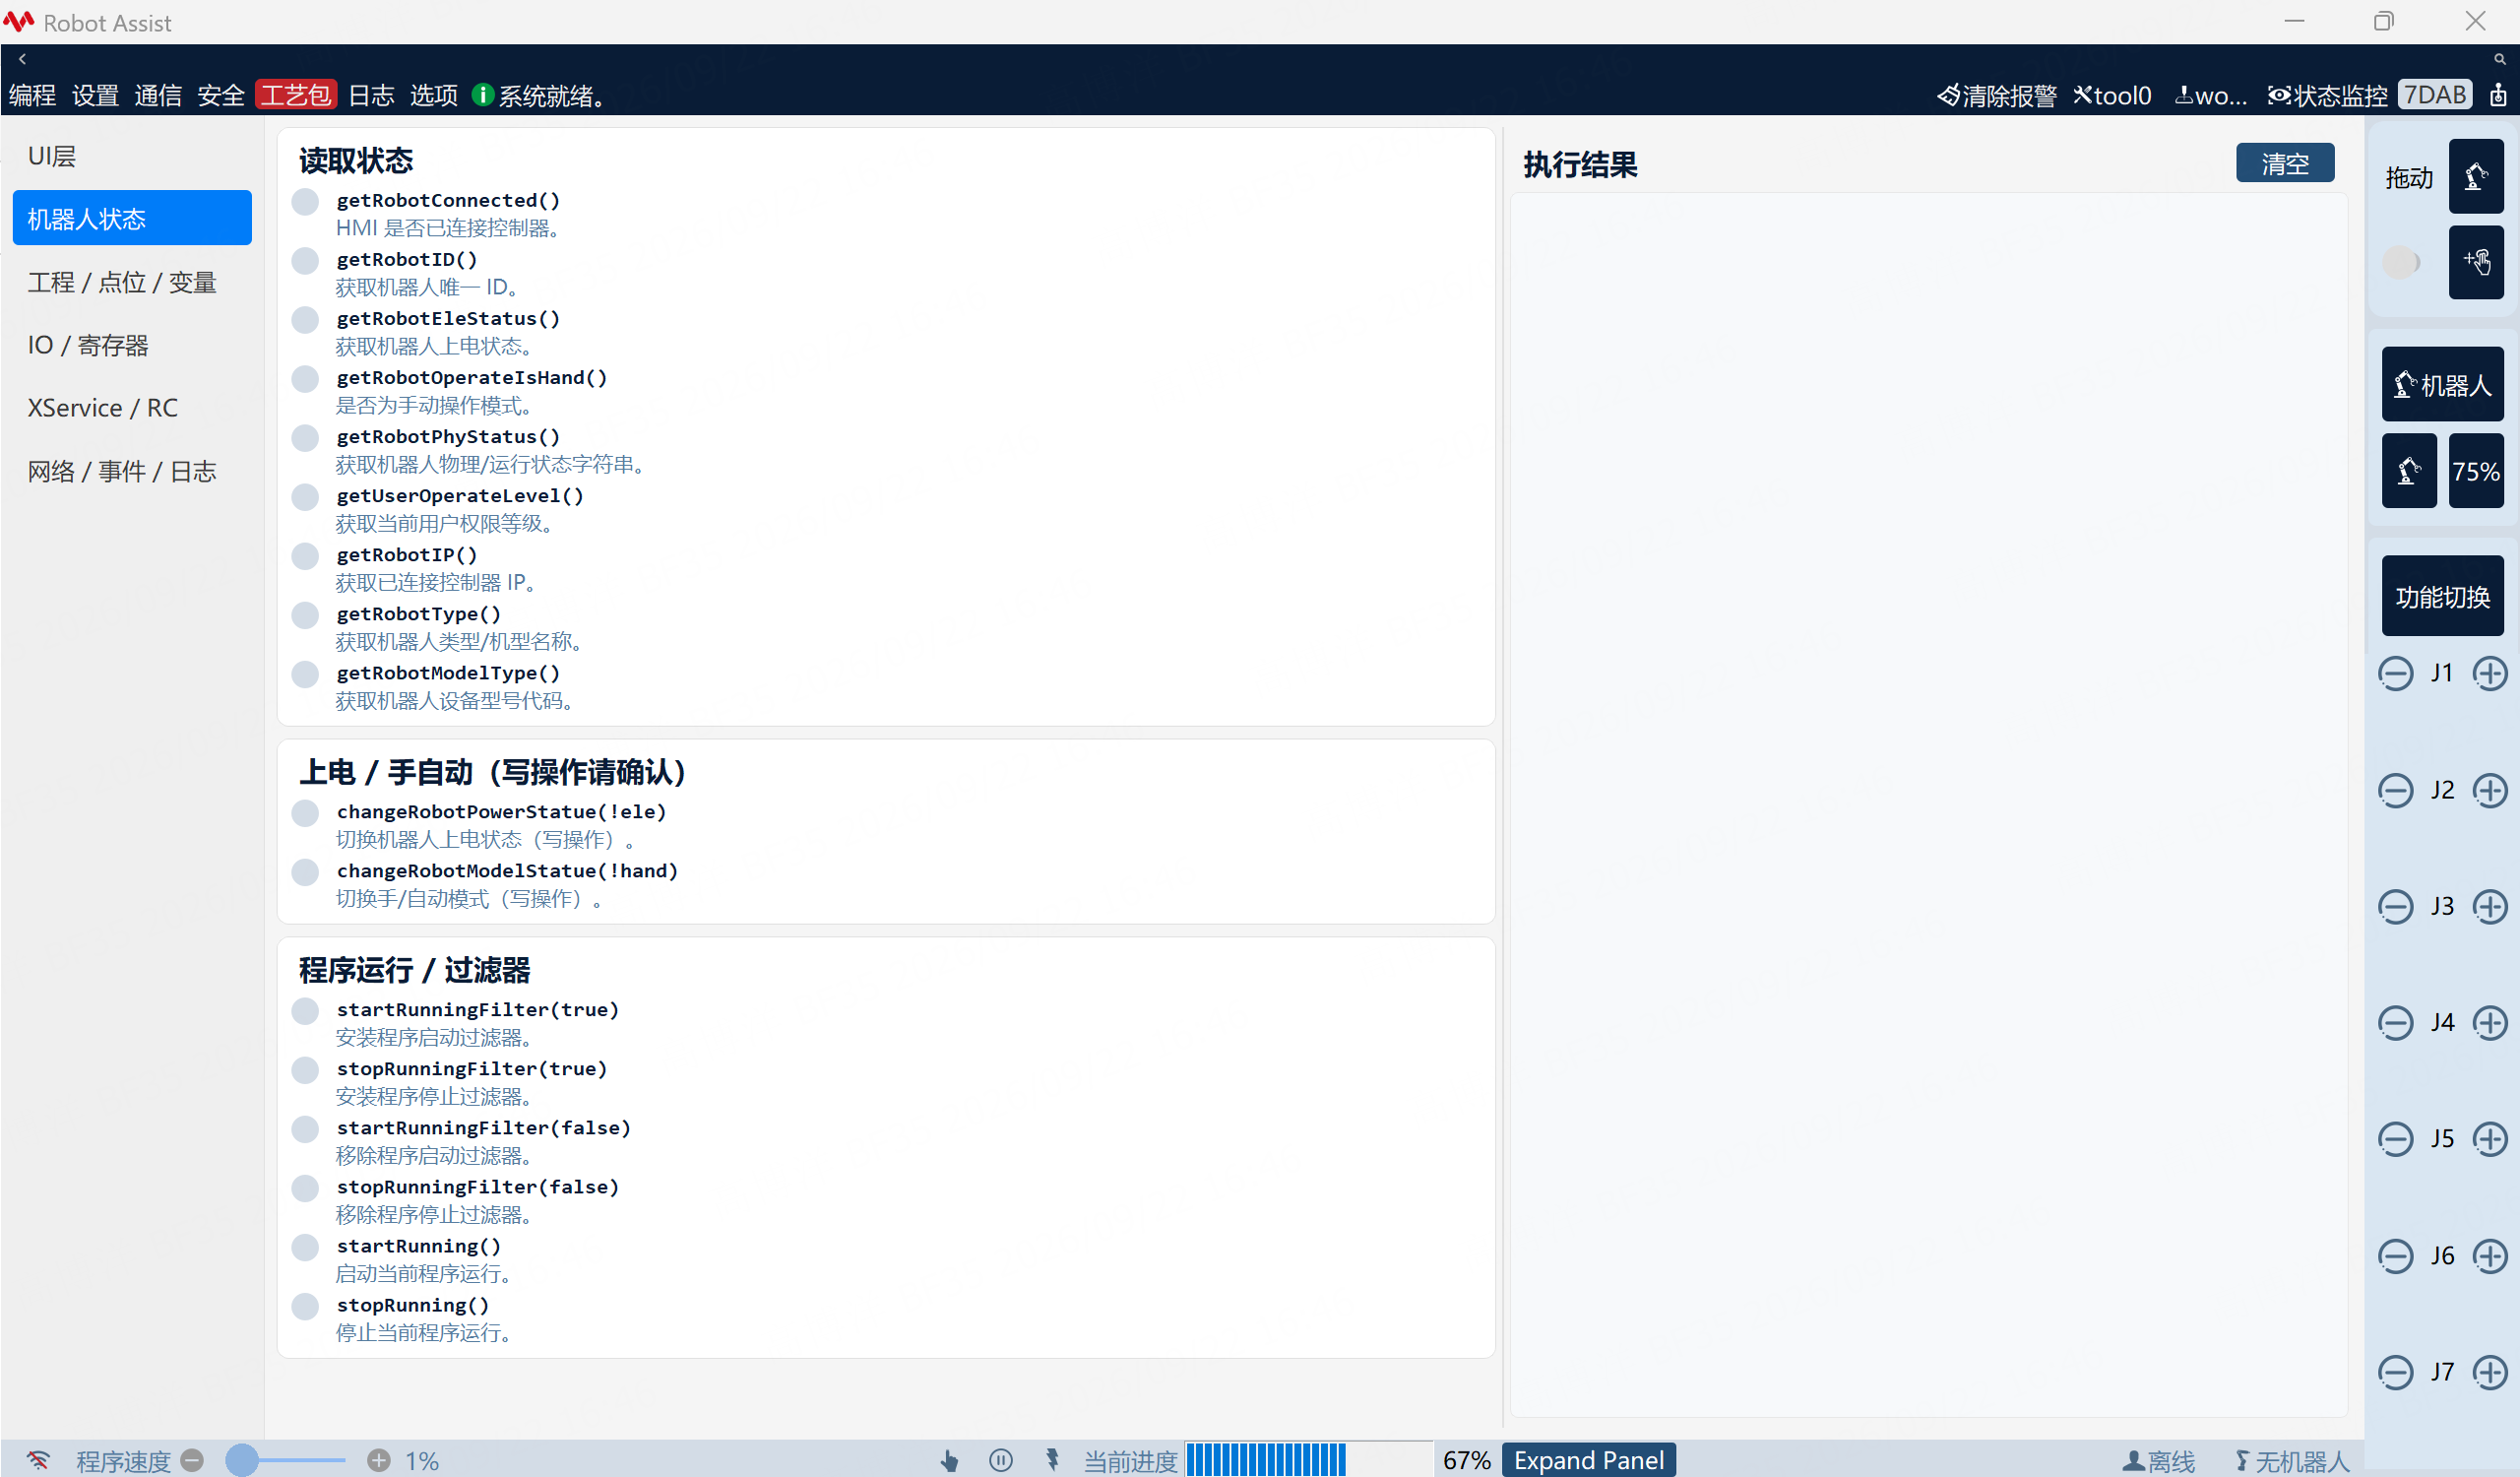
| Robot Status | pagerobotstatus.cpp |
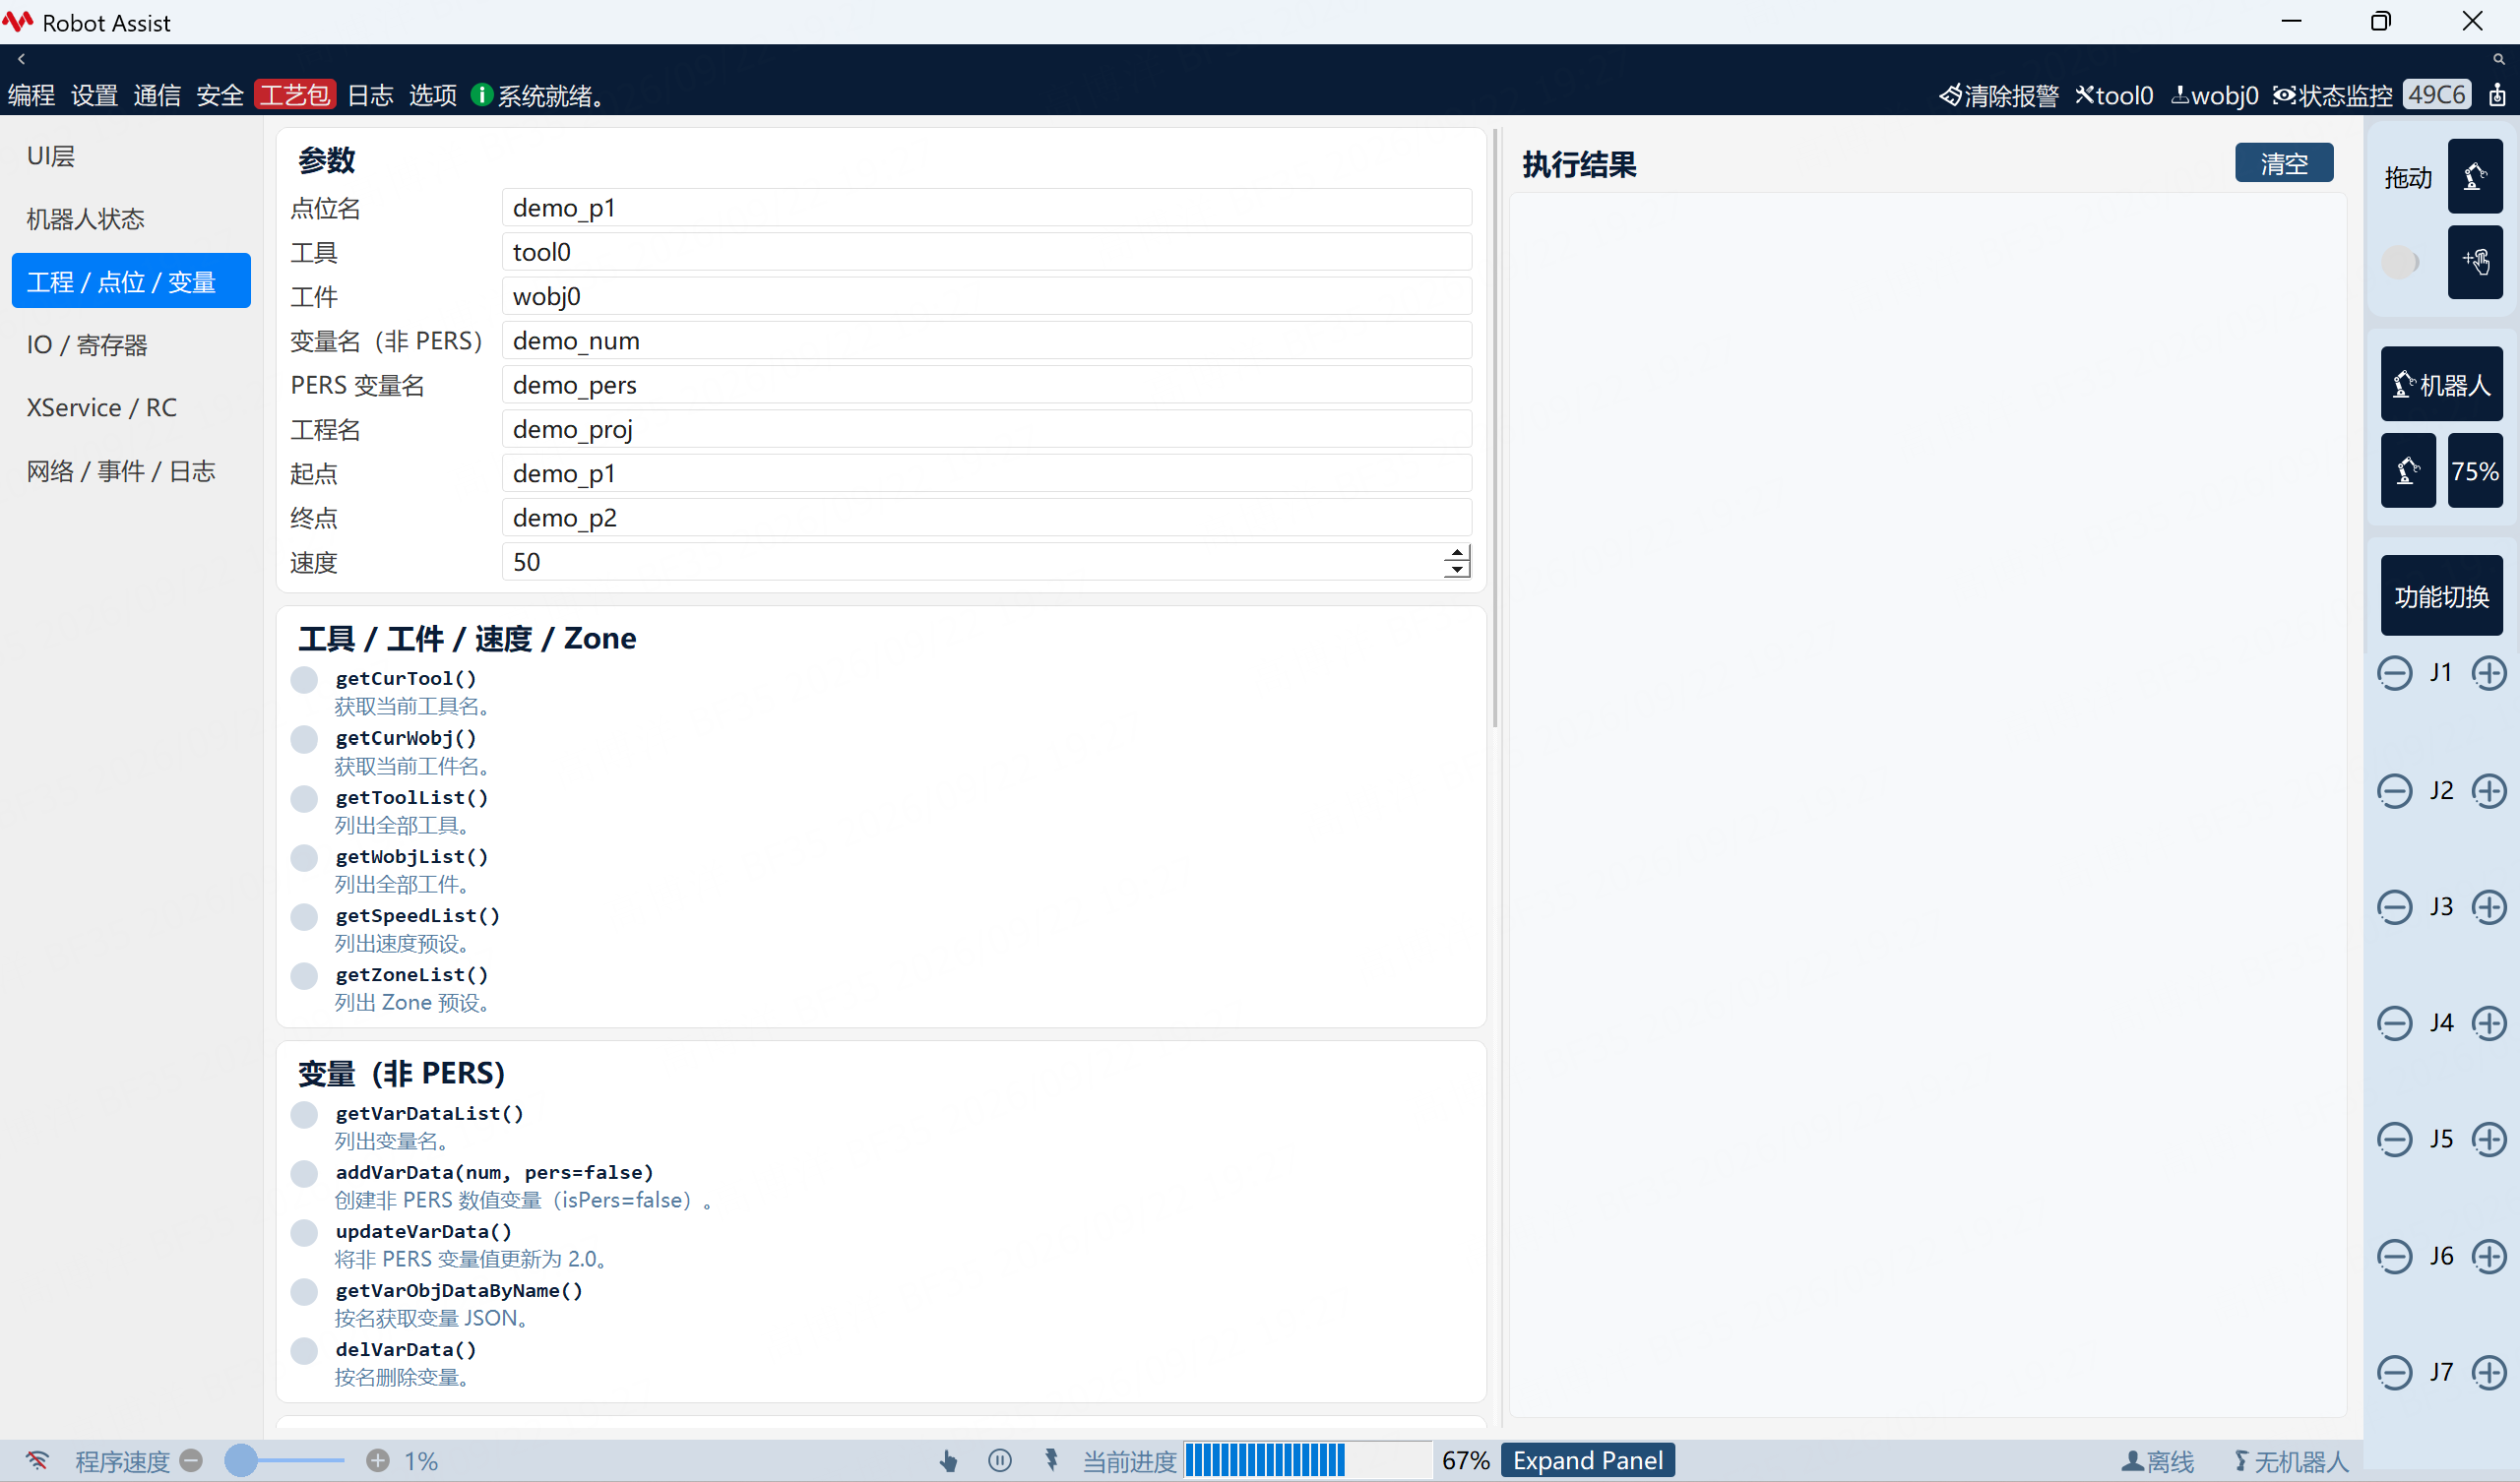
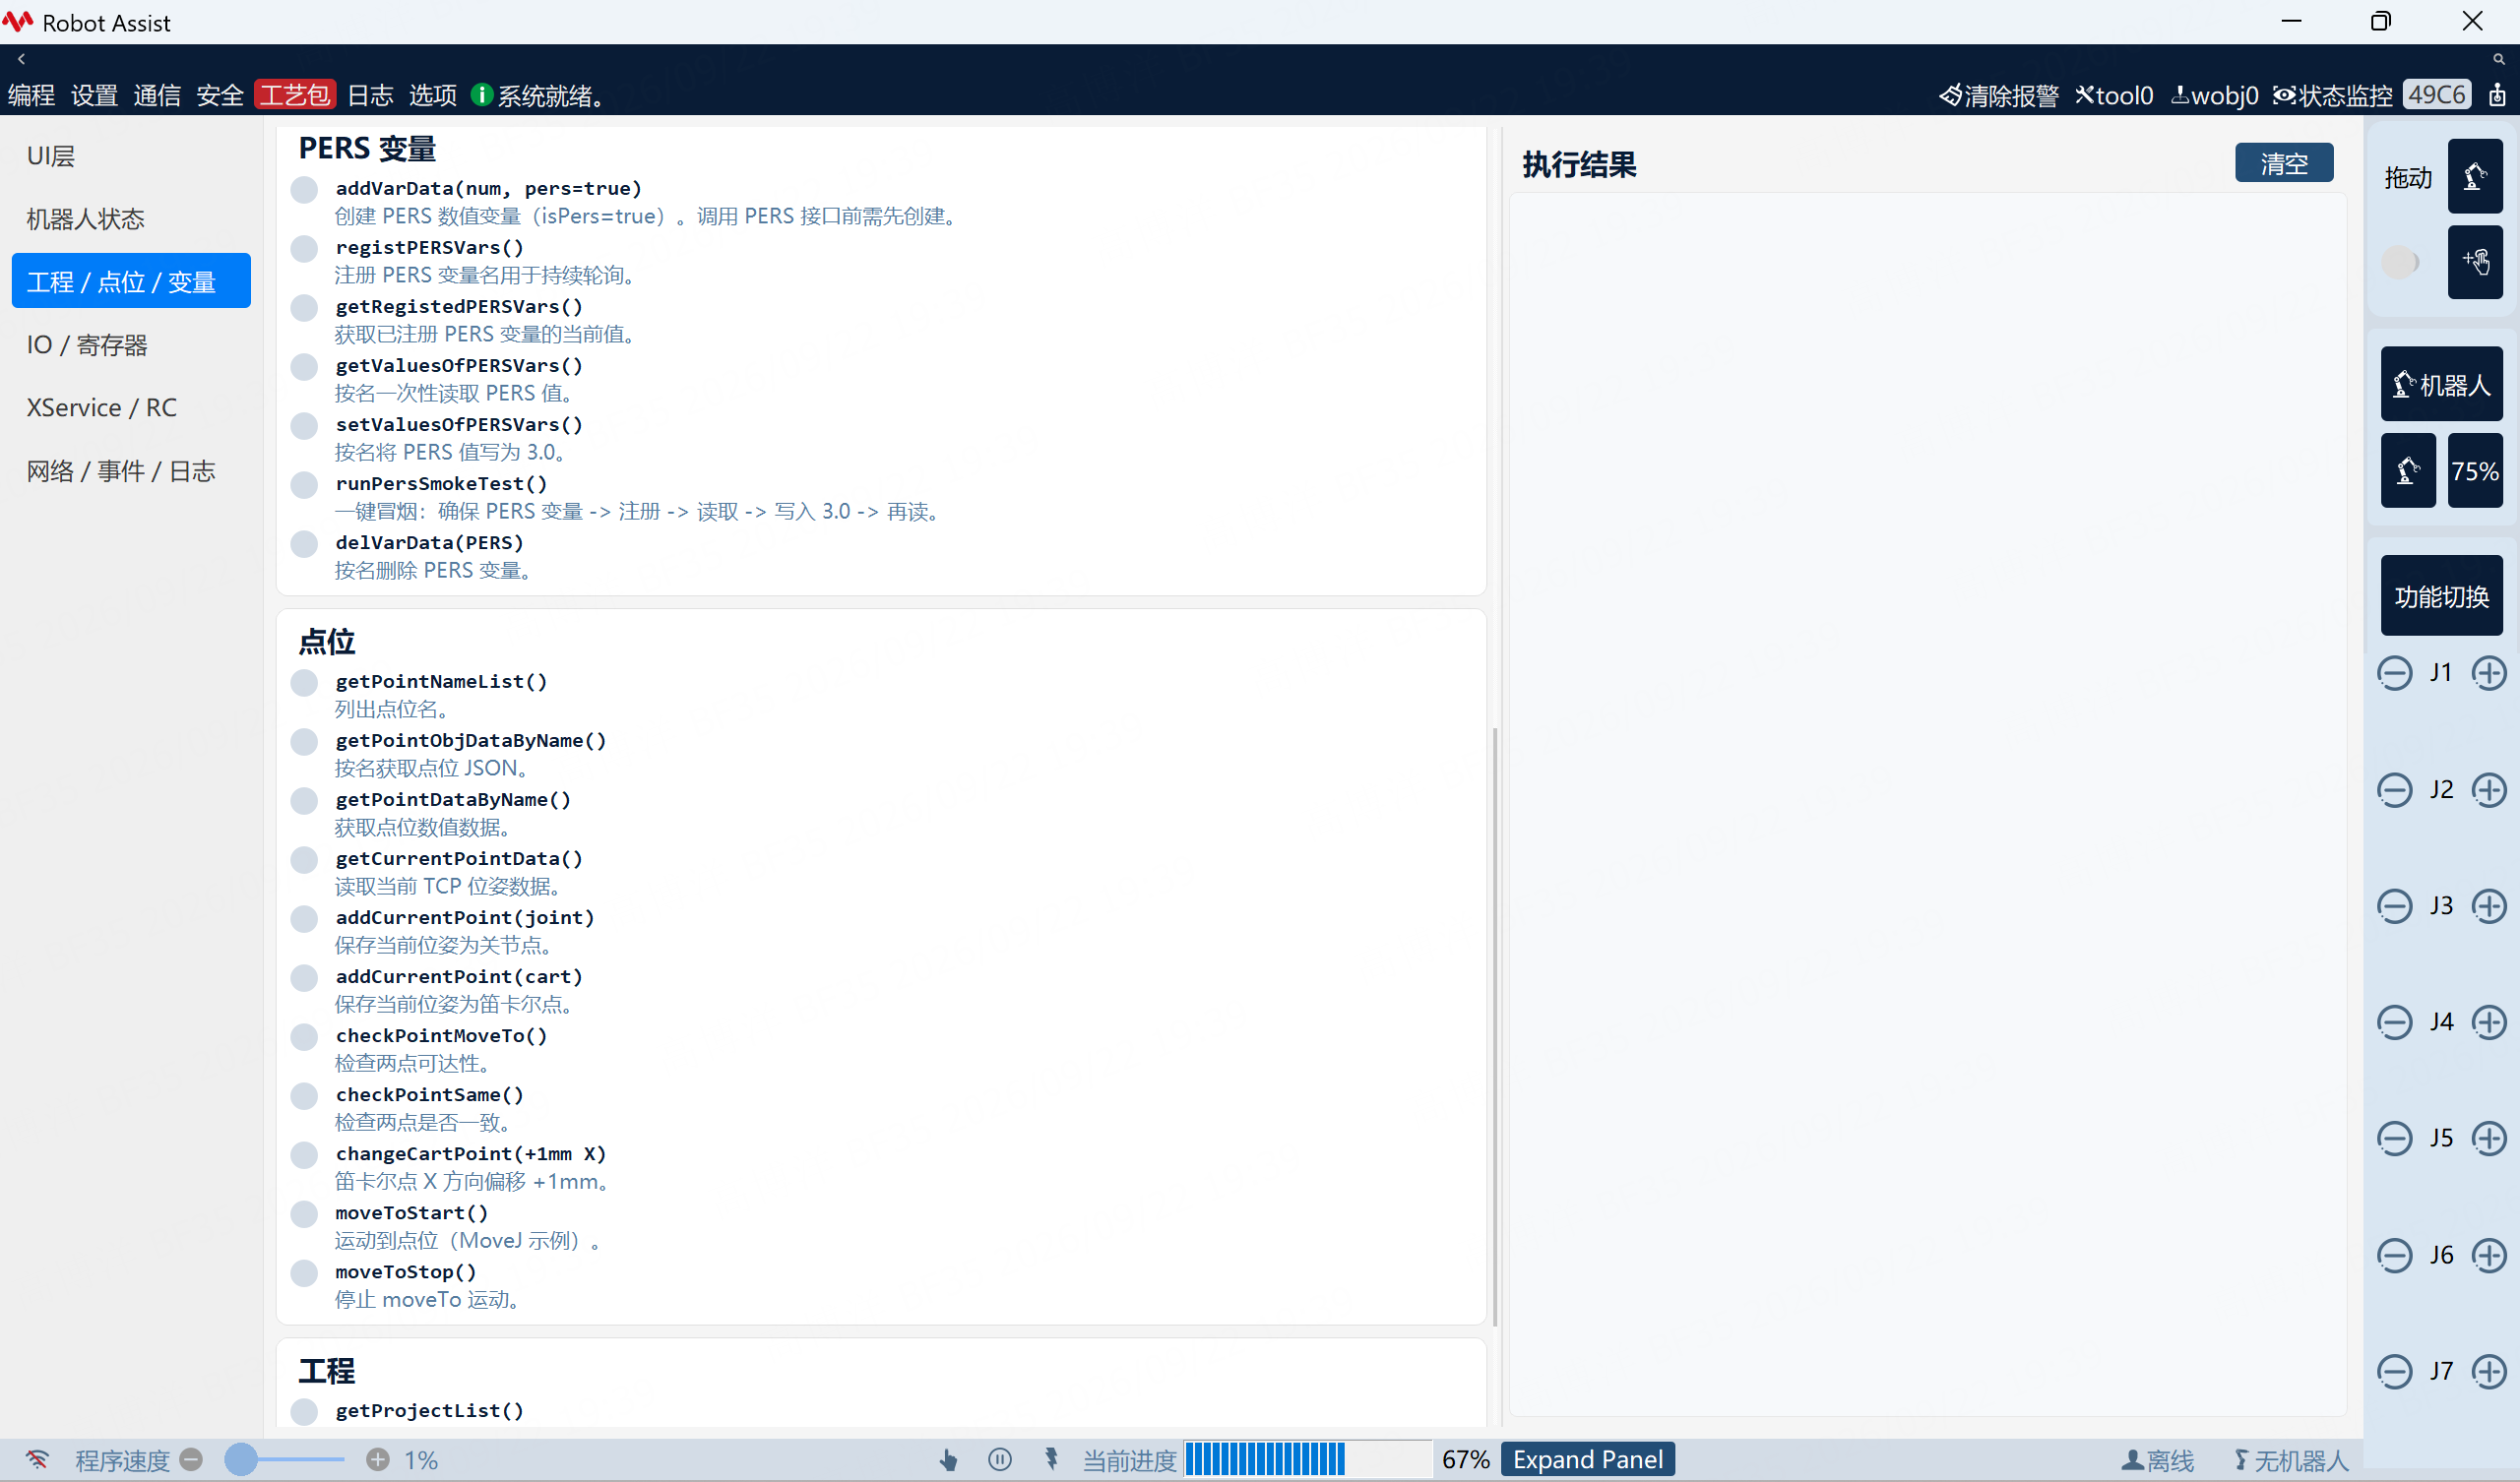
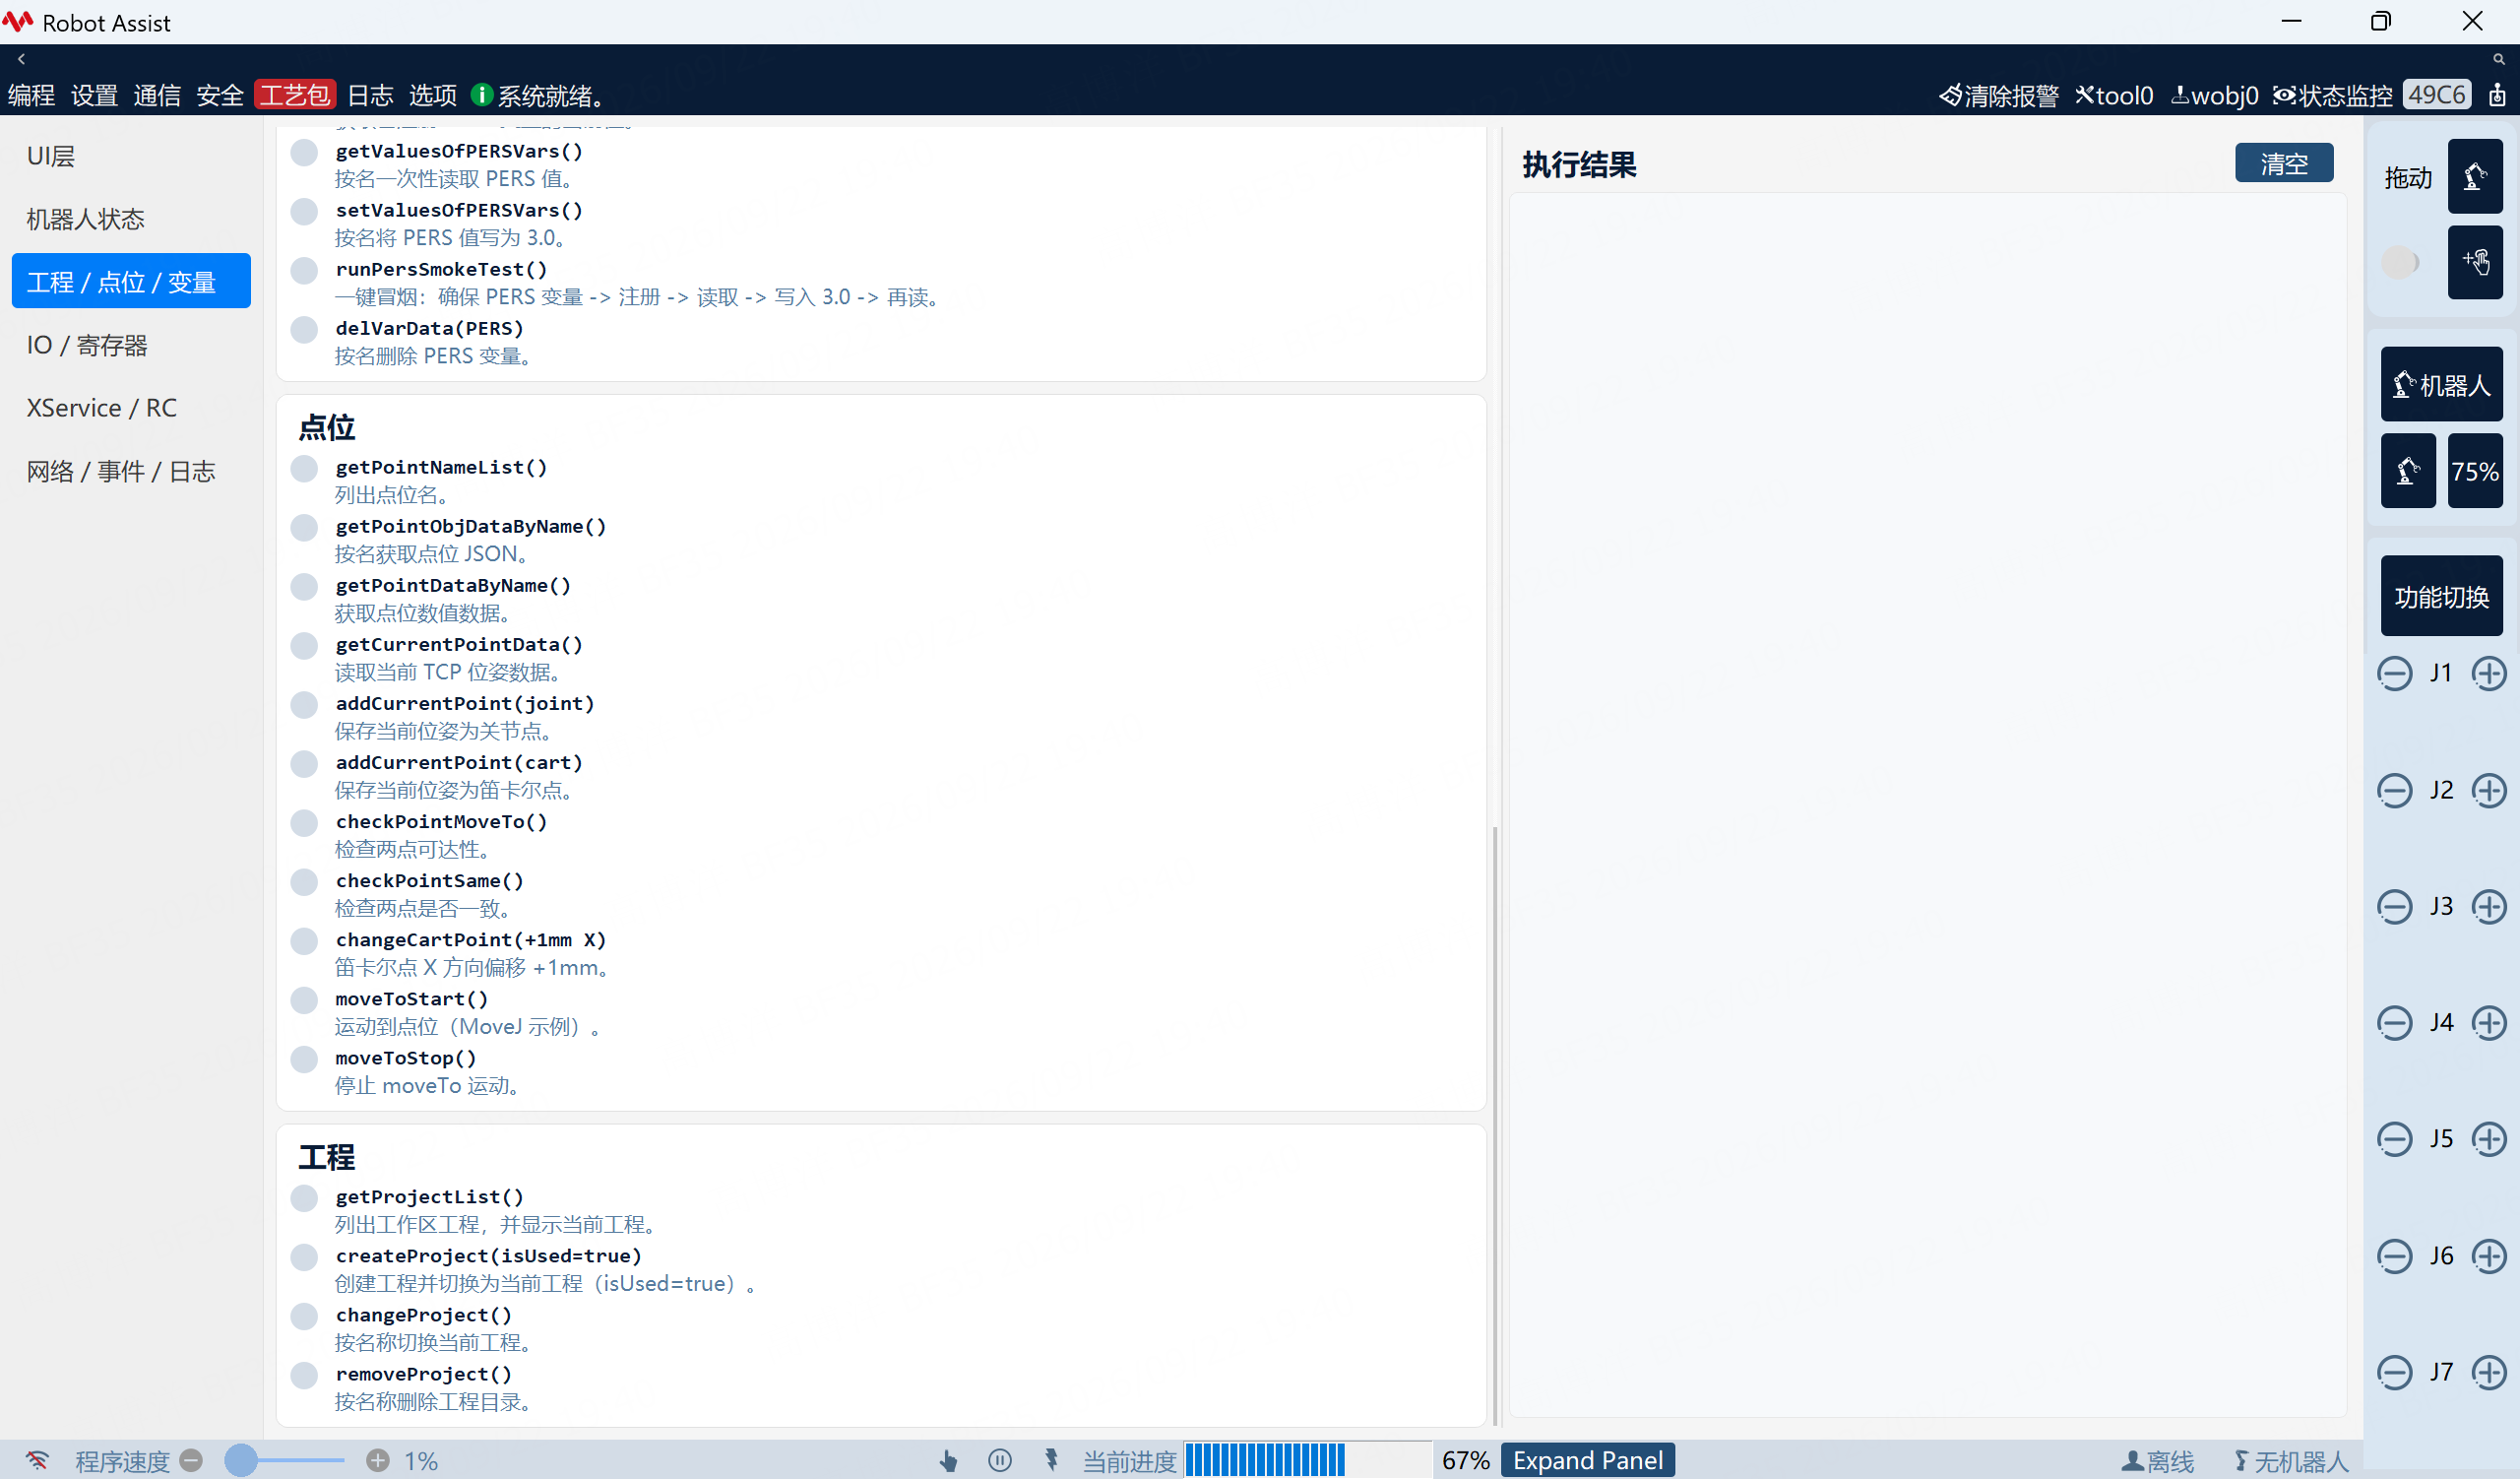
| Project / Point / Variable | pageprojectpointvar.cpp |
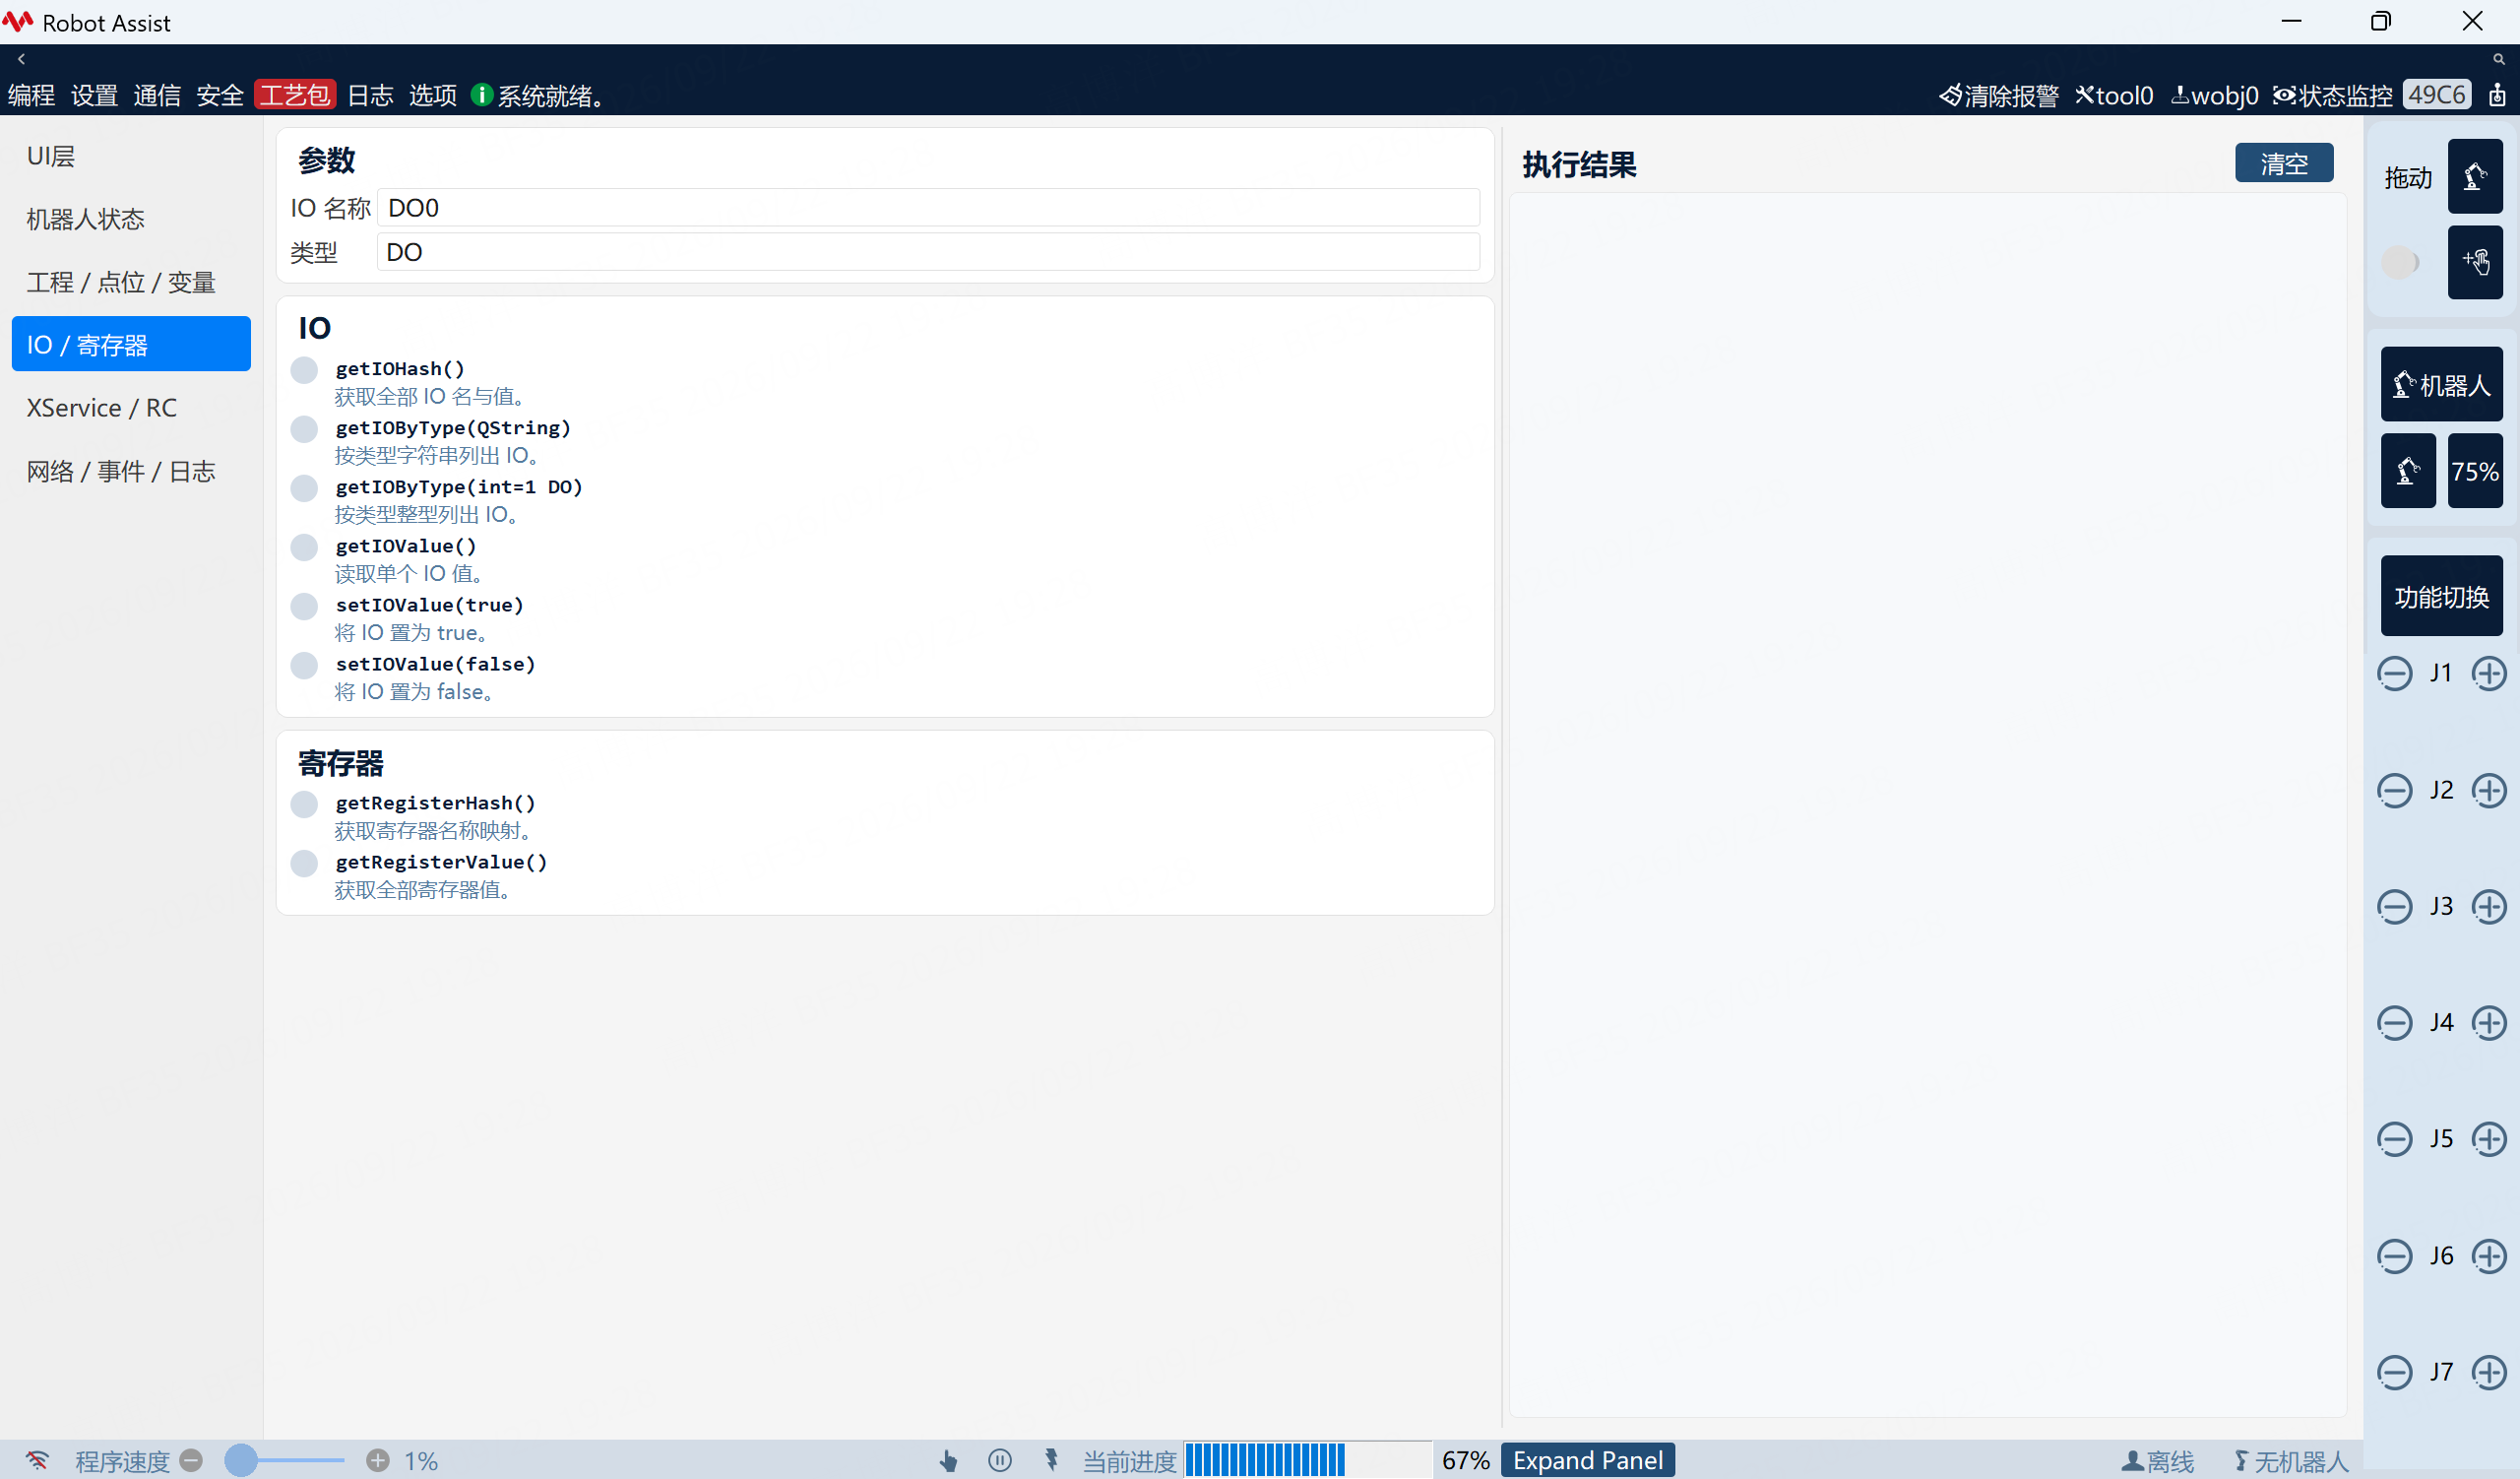
| IO / Register | pageioregister.cpp |
| XService / RC | pagexservicerc.cpp |
| Network / Event / Log | pagenetworkeventlog.cpp |
UI Layer (pagehmishell.cpp):
Robot Status (pagerobotstatus.cpp):
Project / Point / Variable (pageprojectpointvar.cpp):
This group is long; scroll the page to view all sections, in order:
IO / Register (pageioregister.cpp):
XService / RC (pagexservicerc.cpp):
Network / Event / Log (pagenetworkeventlog.cpp):
4. Auxiliary programming (RL)
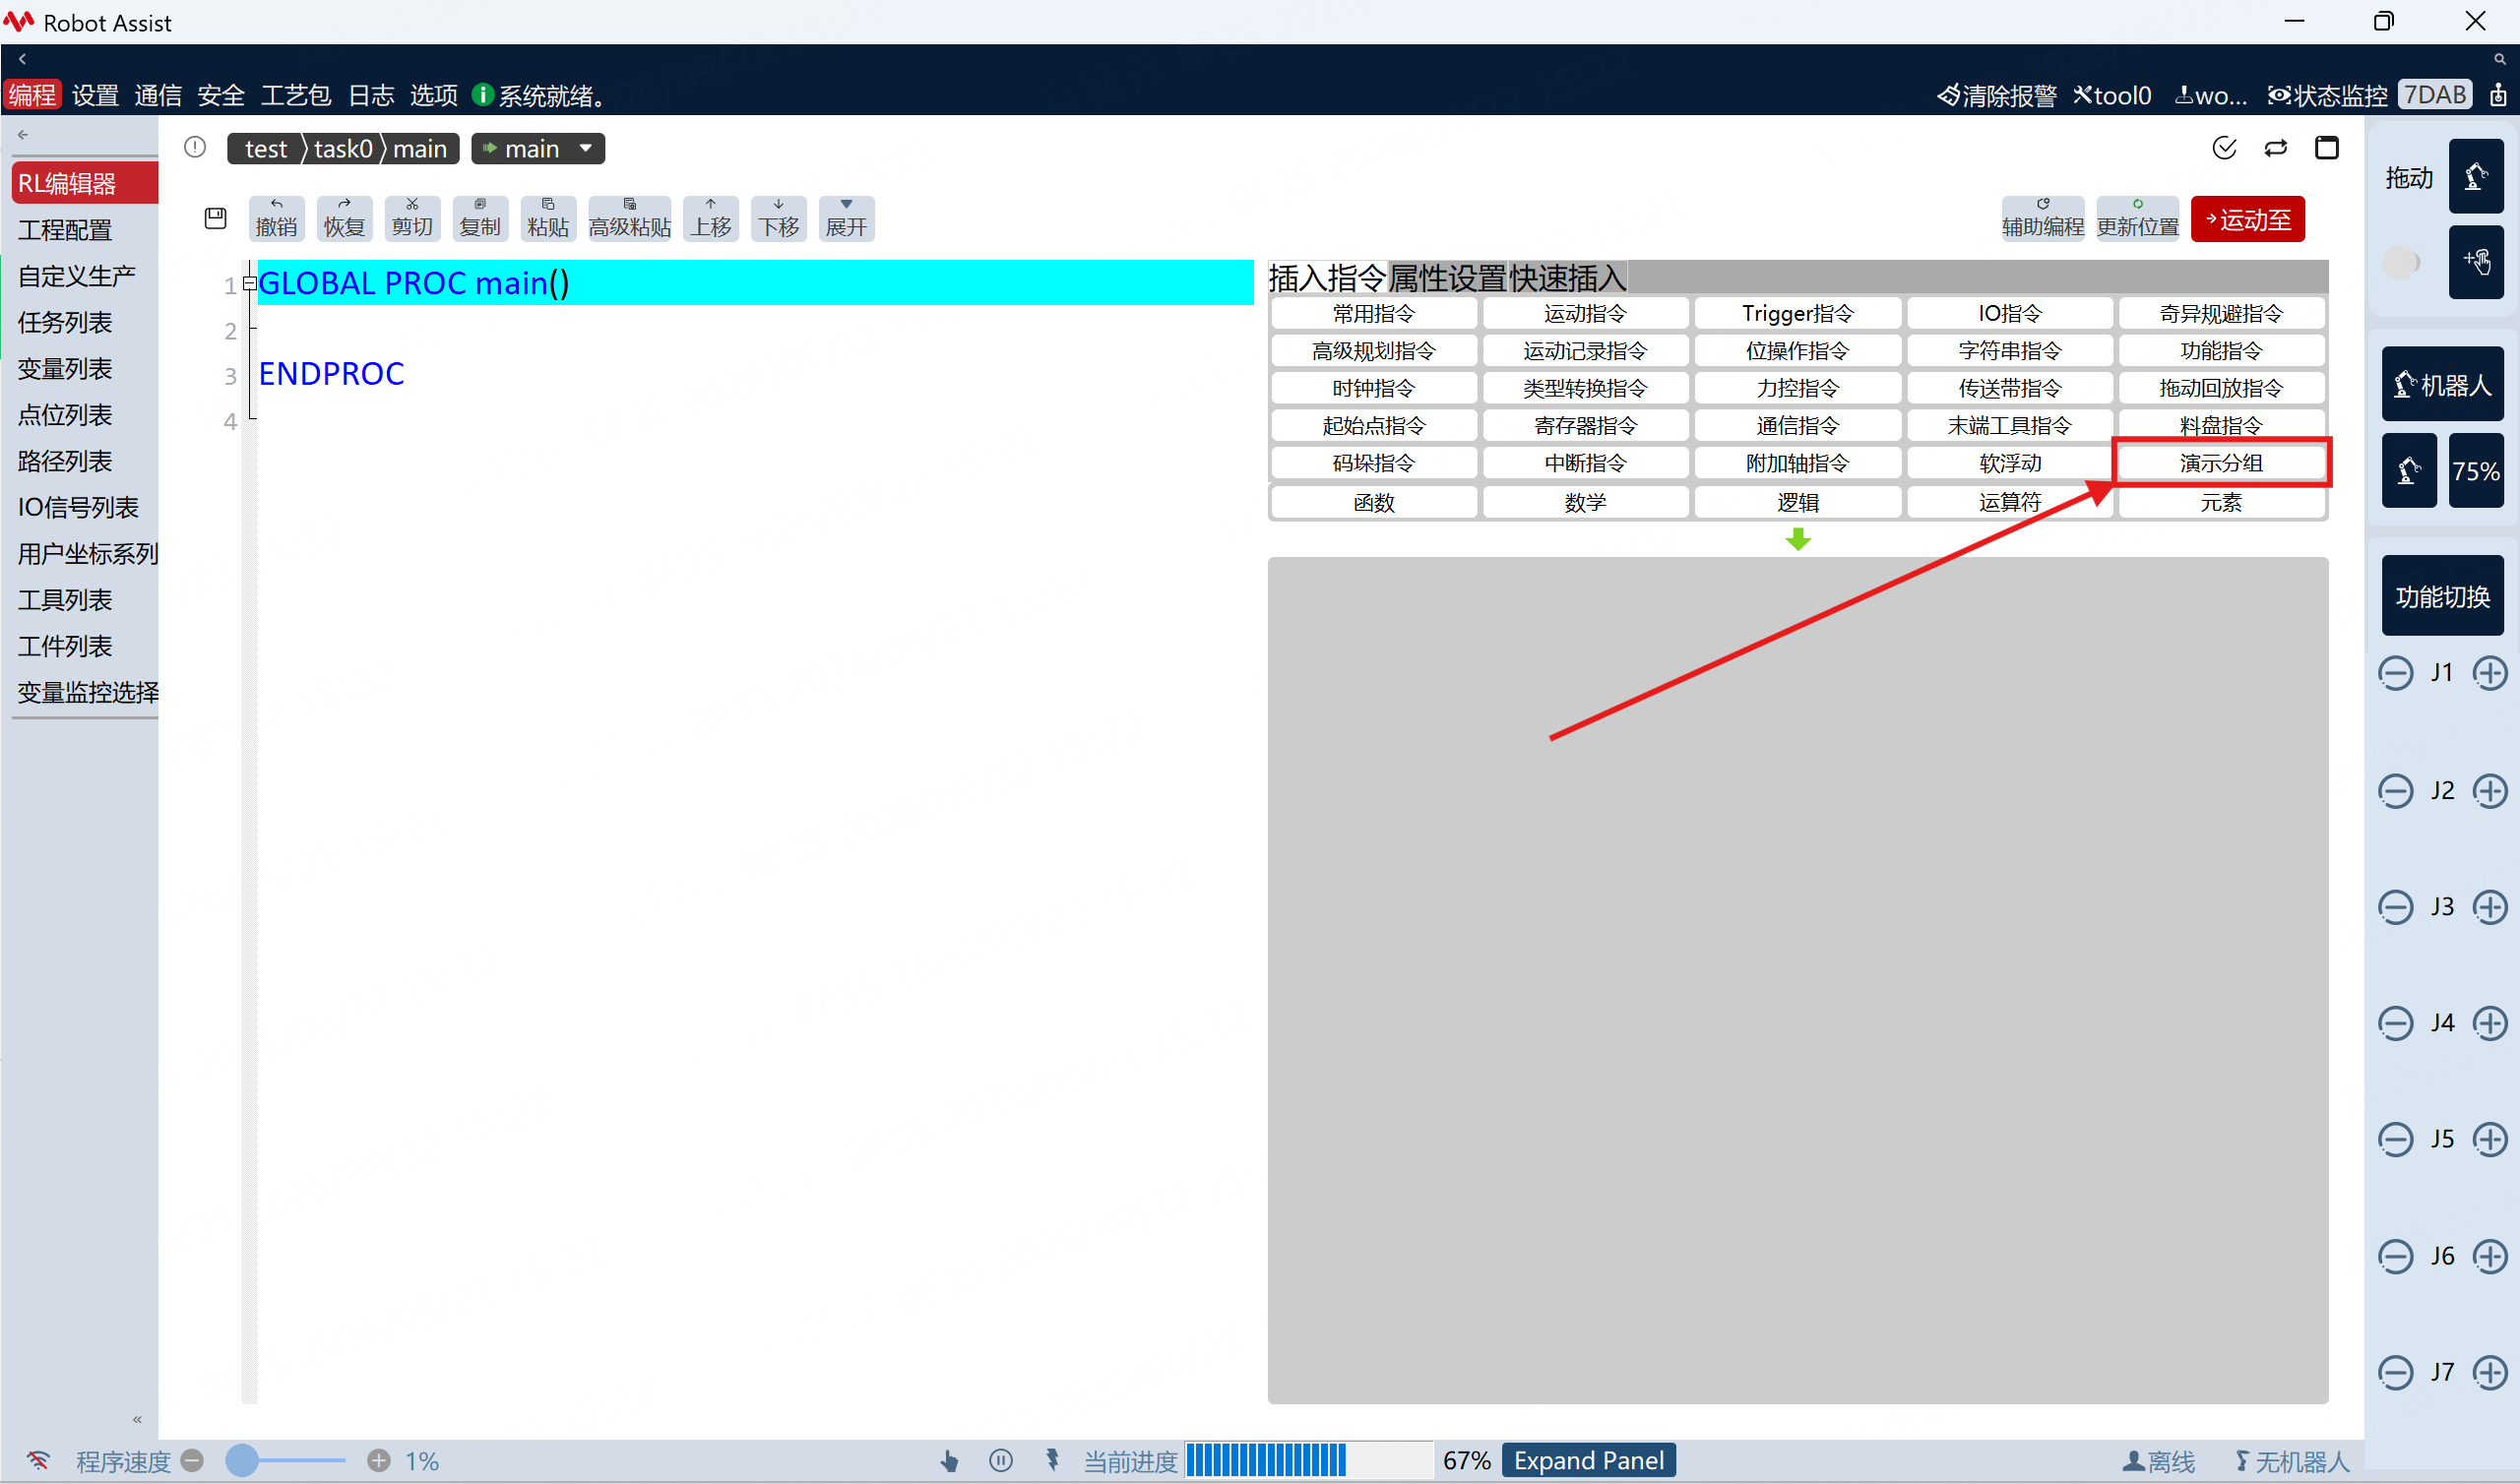
Auxiliary programming lets a plugin register custom commands in the RL editor. This example registers the group 演示分组 (tr("demo group") in source) and the Custom command.
After the plugin is enabled and the HMI is restarted, follow the steps below.
4.1 Find the demo group
- Open Programming → RL Editor.
- In 插入指令 on the right, select 演示分组.
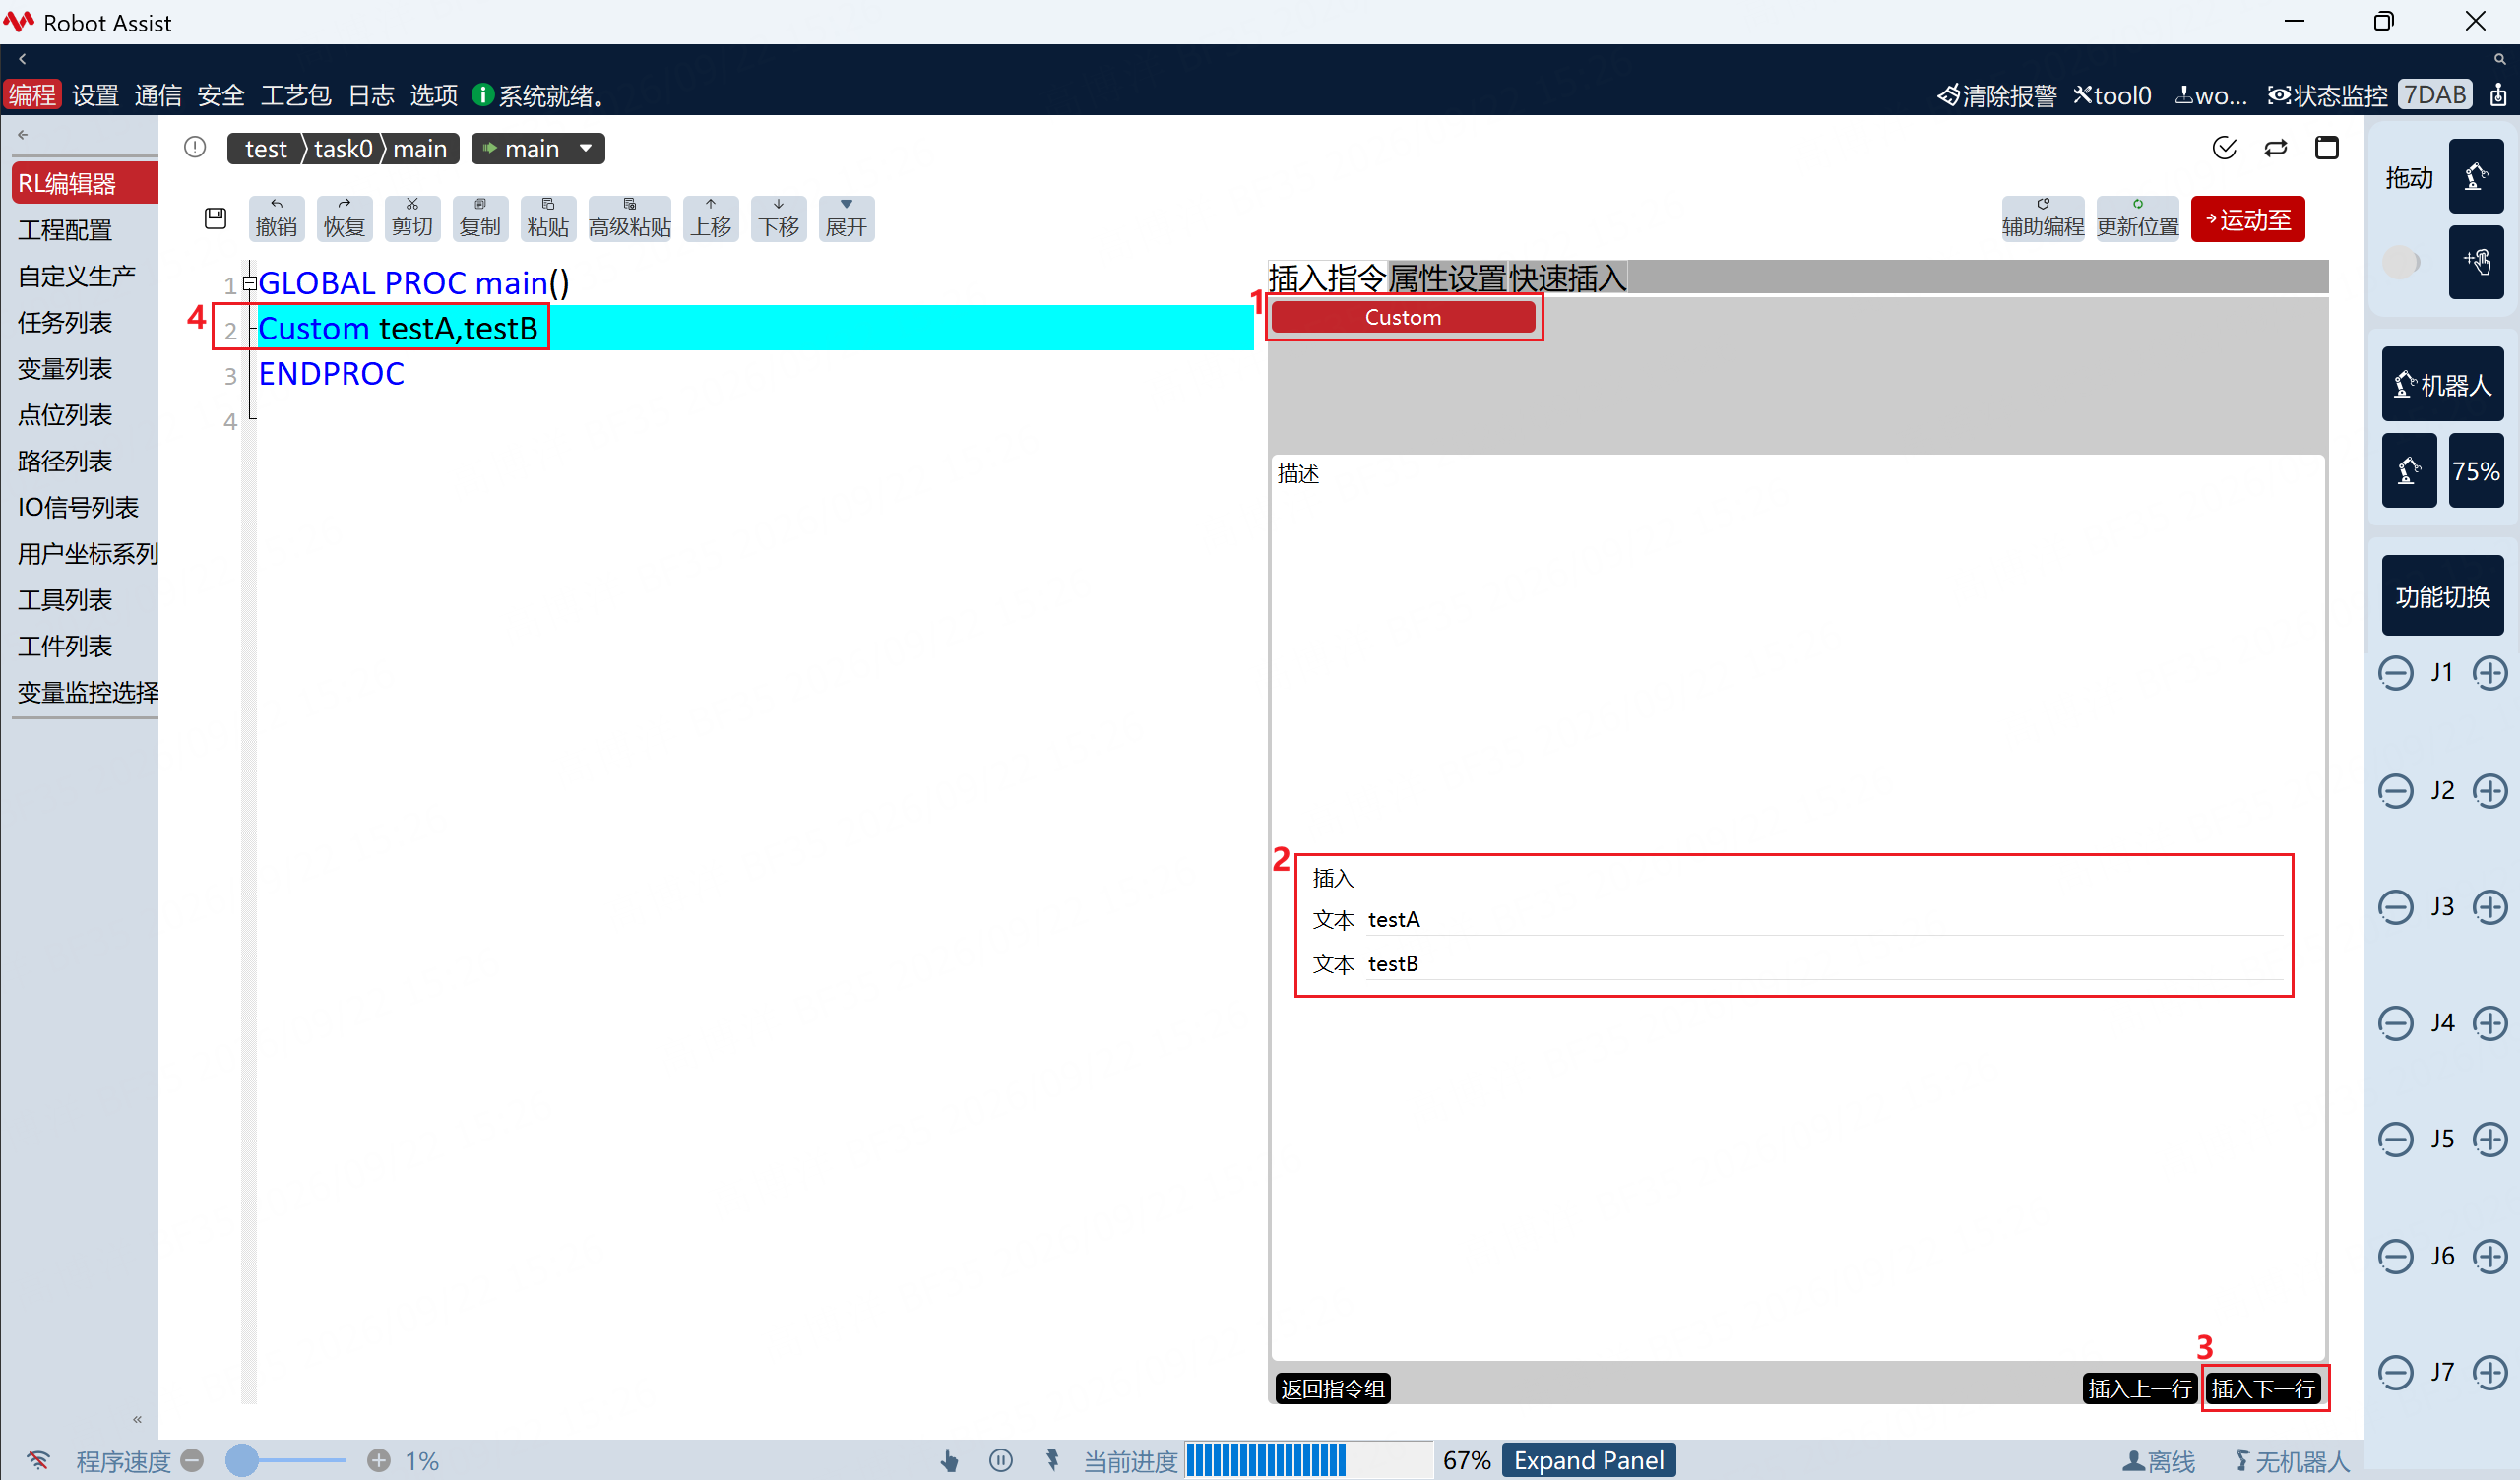
4.2 Insert a command
- After opening 演示分组, select Custom.
- Enter parameters in the insert pane (for example
testAandtestB). - Click 插入下一行.
- The editor adds the matching line (for example
Custom testA, testB).
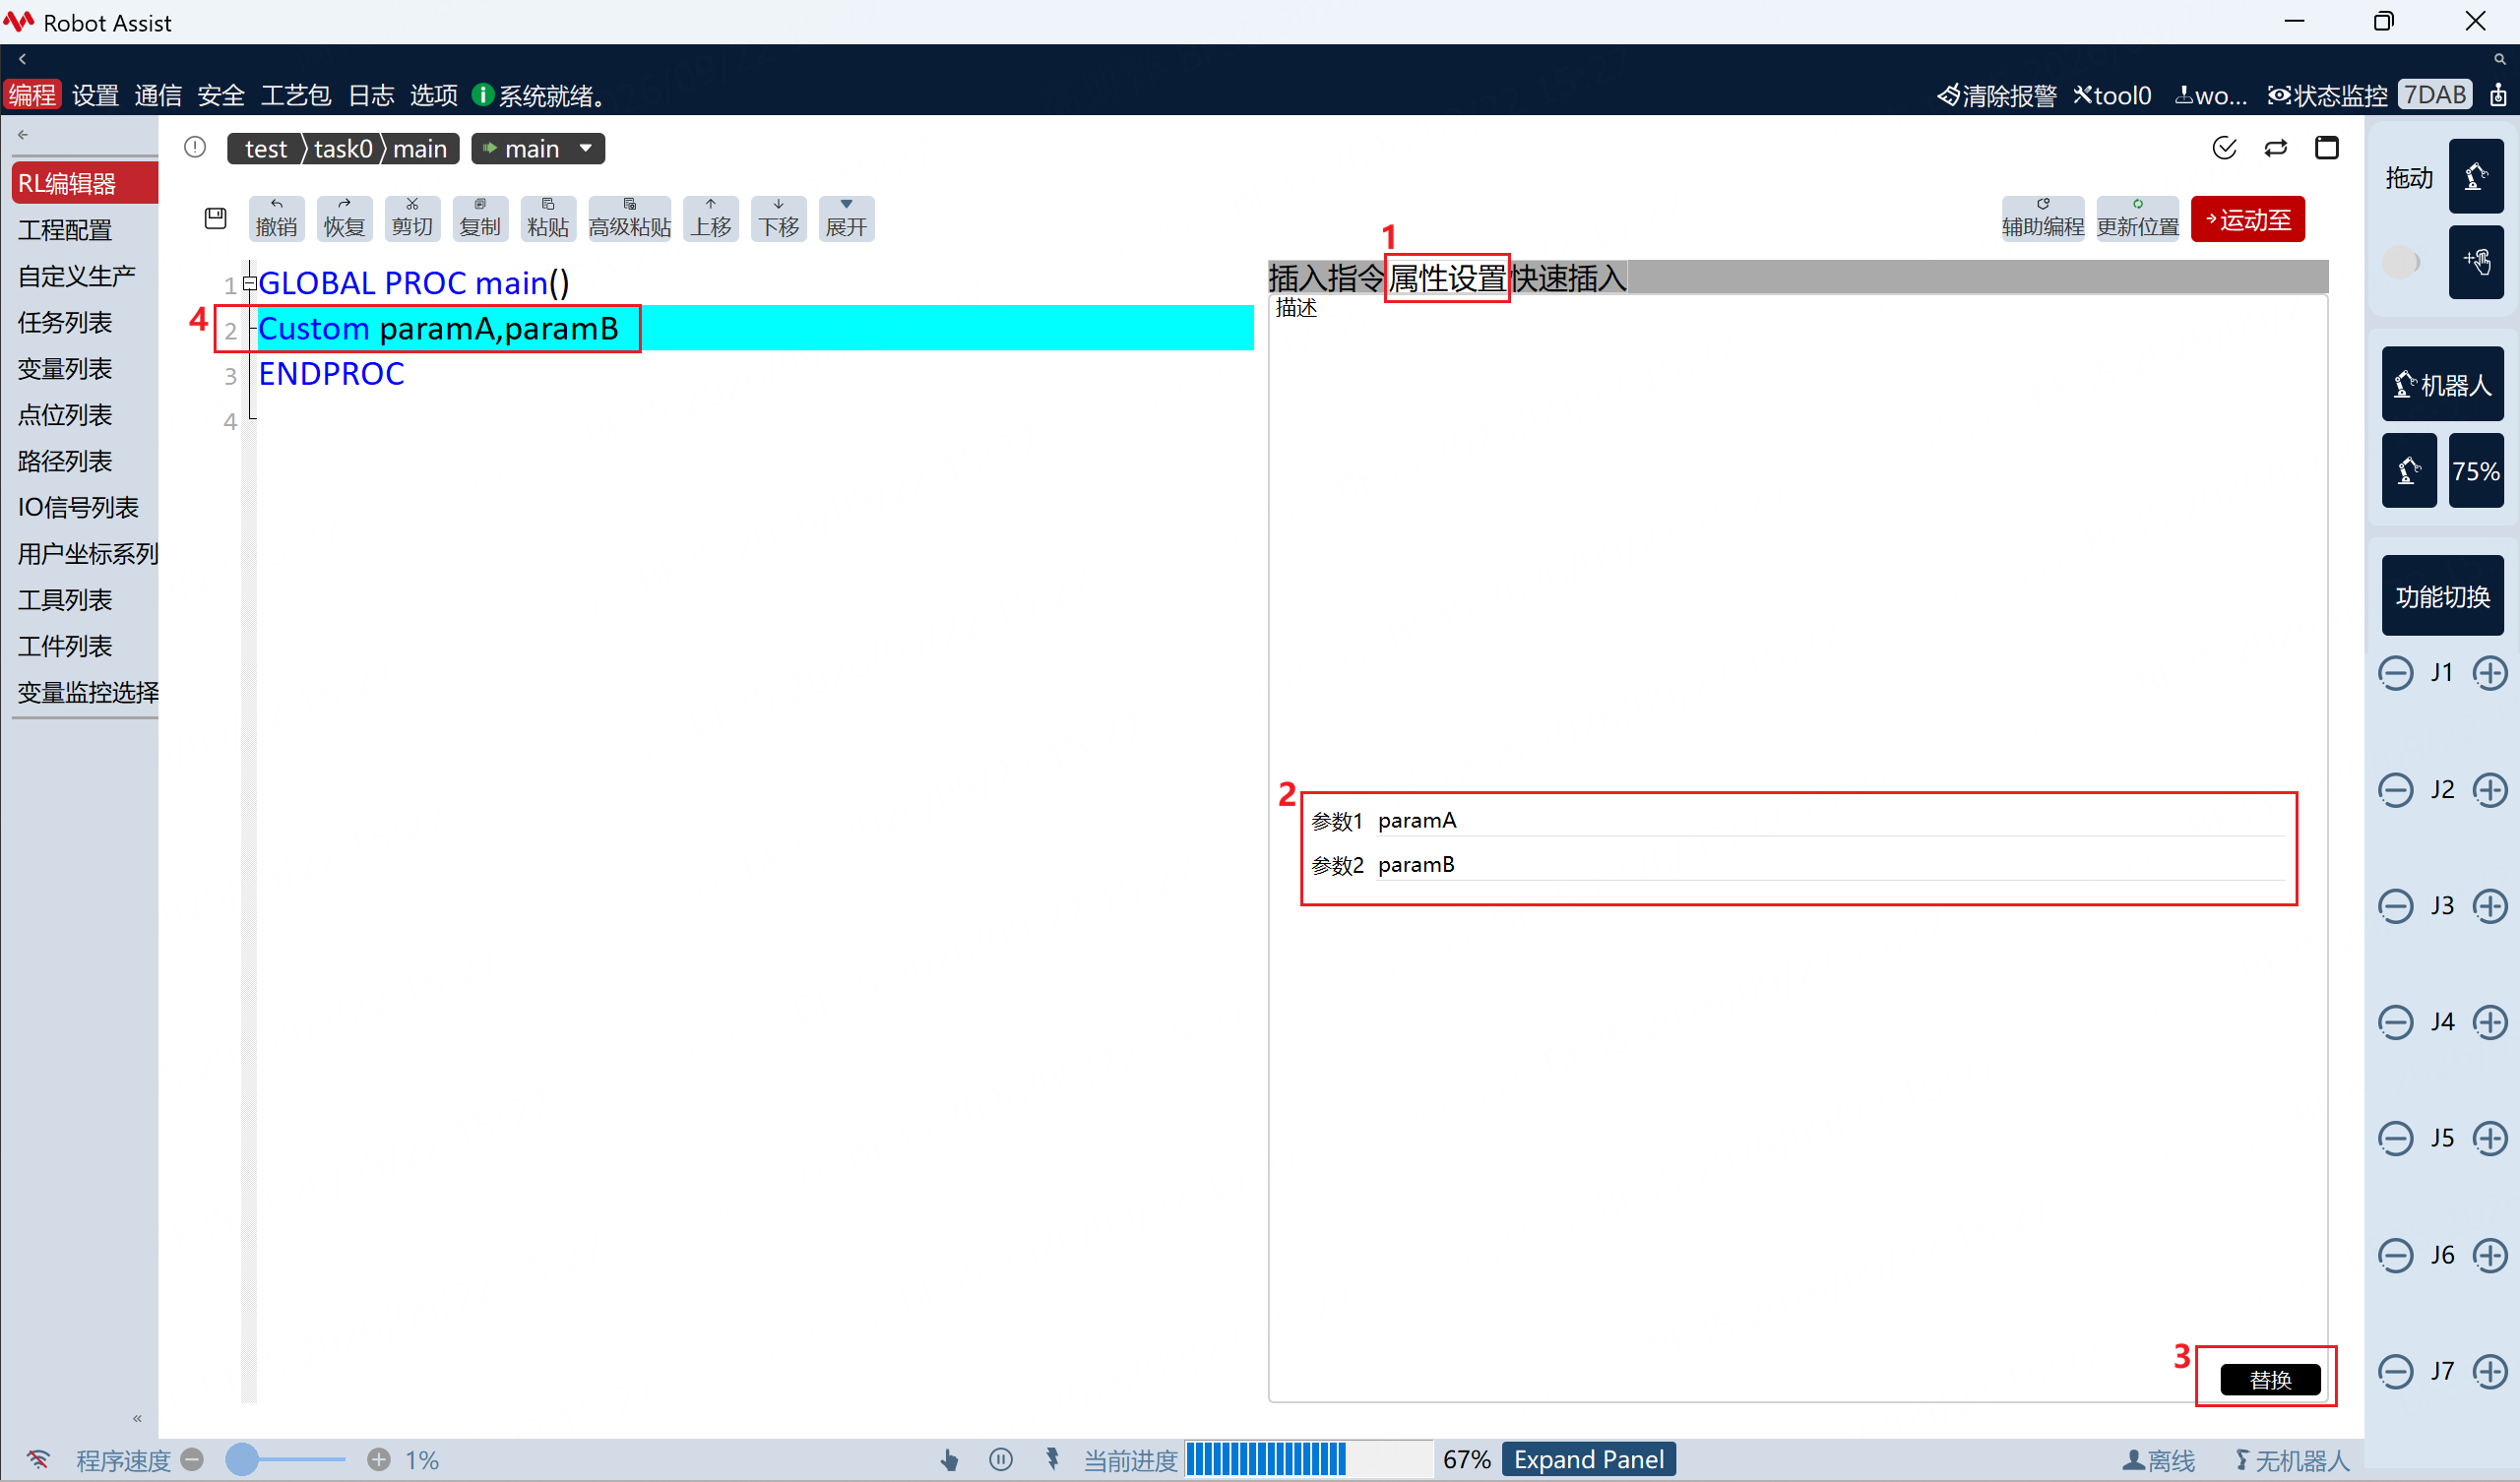
4.3 Replace parameters
- In the editor, select the inserted Custom line.
- Open 属性设置.
- Change the parameters (for example
paramAandparamB). - Click 替换. The selected line is updated (for example
Custom paramA, paramB).
To inspect or extend the implementation, see registration in afterInit() in xplugindemo.cpp (RLManager); insert and property widgets are under rl/. For detailed API descriptions, see: API Reference — RL Auxiliary Programming.