Client Plugin Description (electricclawplugin-hmi)
Development Environment
| Environment | Toolchain |
|---|---|
| Windows | Qt 5.15.2, MSVC 2015 64-bit |
| linux X86 | GNU Compiler Collection 9.4 |
| linux aarch64 | gcc-linaro-6.3.1-2017.05-x86_64_aarch64-linux-gnu |
Project Structure
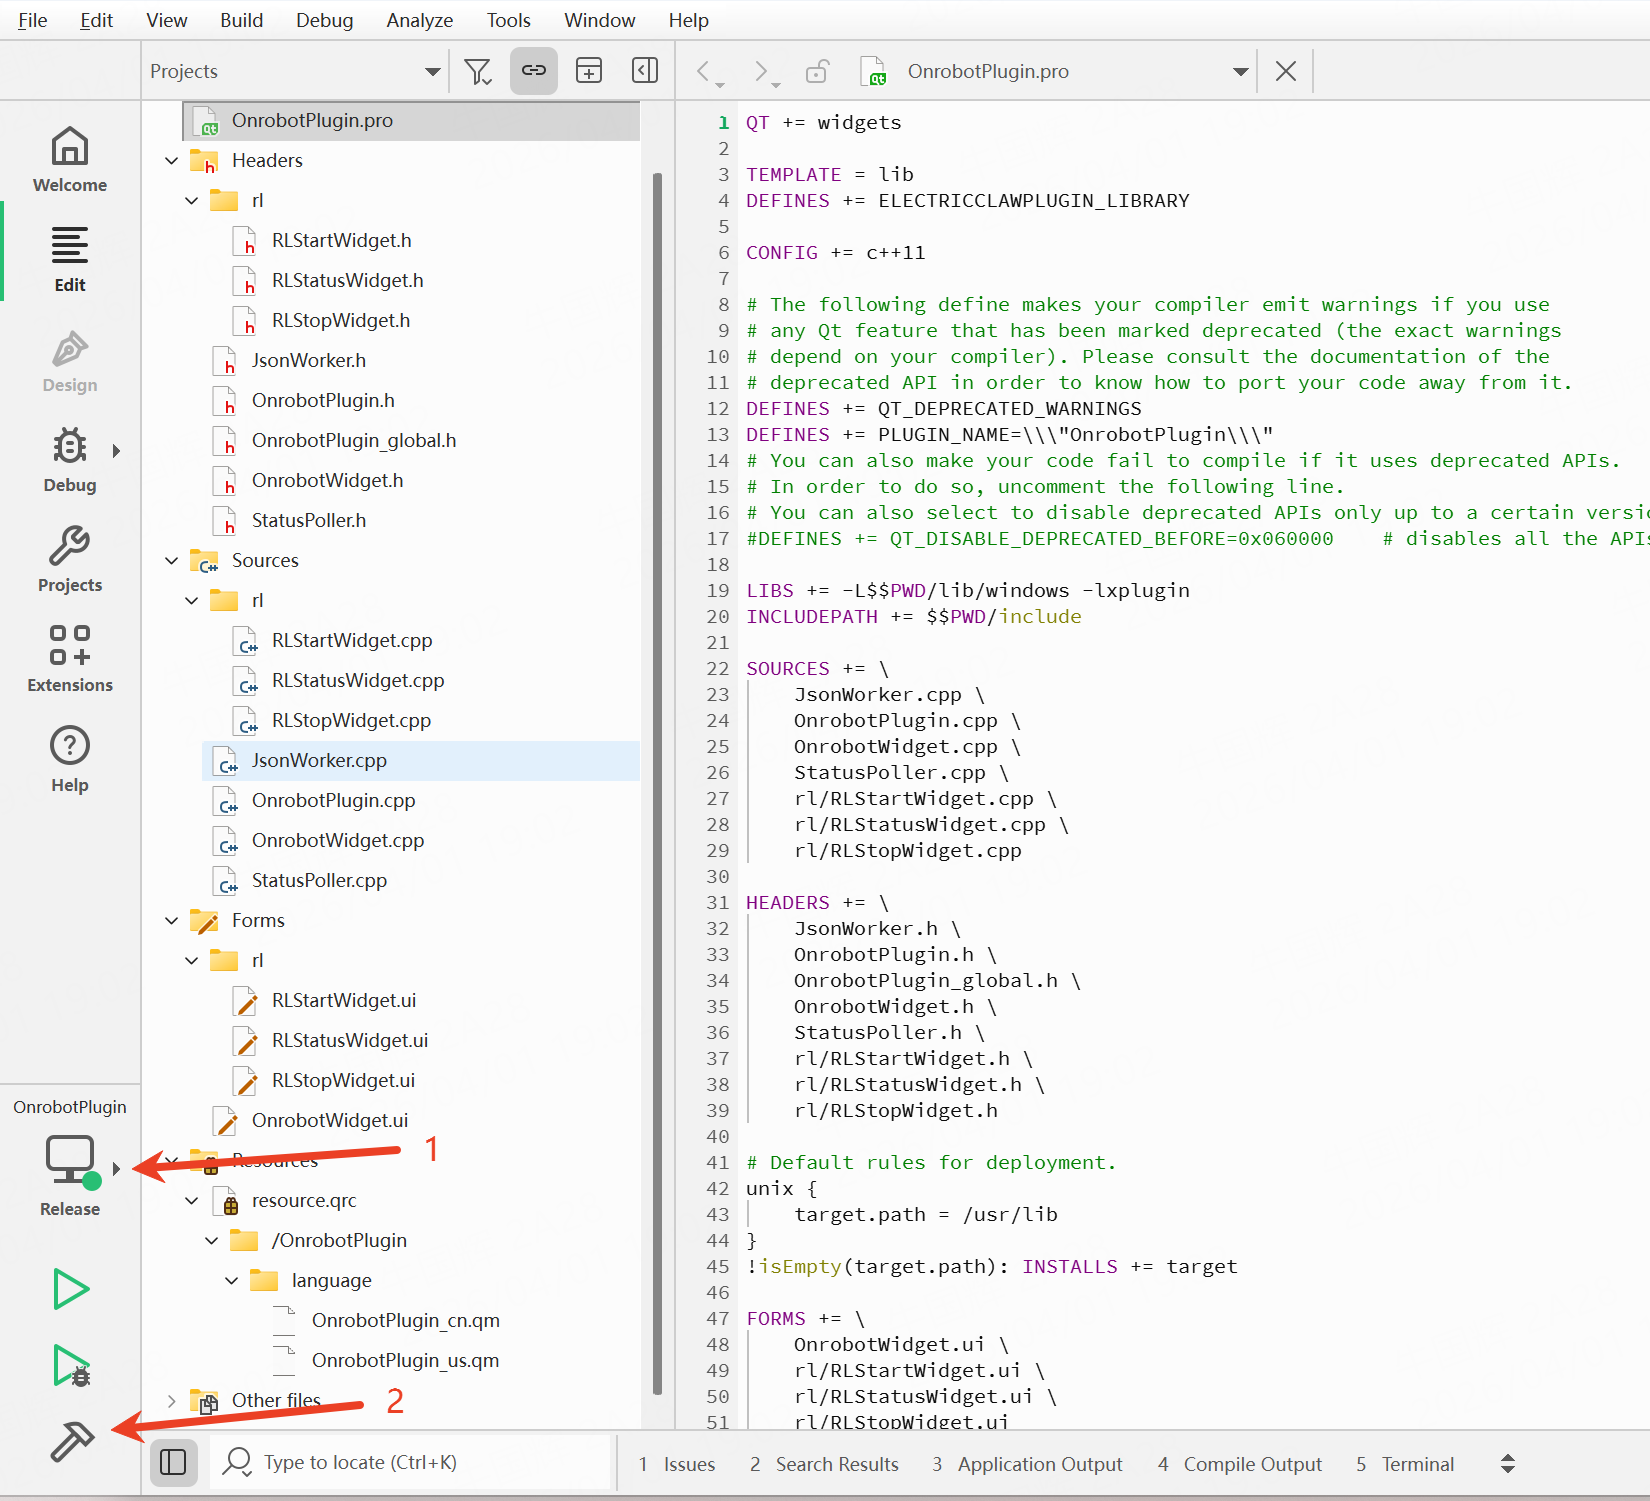
The code folder contains include and lib folders that provide the plugin environment support and necessary tools. Open the .pro project in Qt Creator and you will see the following project structure.
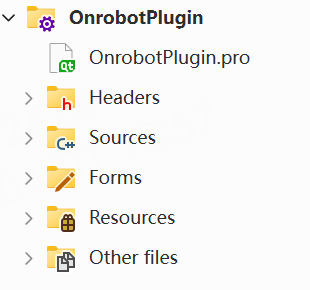
Description of each part:
| Component | Description |
|---|---|
| Configuration file (.pro) | Qt compilation configuration file (can be understood as the Qt version of CMake); key configuration below |
| UI files (.ui) | Qt Designer visual layout files; ui_*.h files are generated after building for UI component binding |
| Code files (.cpp/.h) | Declaration and implementation of UI classes, business logic classes, and the plugin entry class |
| Resource files (.qrc/.ts) | Files related to control text translation |
Key .pro Configuration

Key configurations in the Electric Claw project .pro related to plugin development:
TEMPLATE = lib                          # Build as a shared library (.dll/.so)
DEFINES += ELECTRICCLAWPLUGIN_LIBRARY   # Control export/import symbols
DEFINES += PLUGIN_NAME=\\\"OnrobotPlugin\\\"  # Plugin registration name, used for plugin registration
LIBS += -L$$PWD/lib/windows -lxplugin   # Link the plugin SDK (xplugin)
INCLUDEPATH += $$PWD/include            # SDK header file search path
For general qmake configurations such as QT += widgets, CONFIG += c++11, FORMS, TRANSLATIONS, and RESOURCES, see Create a Simple HMI Plugin.
Code File Composition
| File/Module | Responsibility |
|---|---|
| OnrobotPlugin.h/.cpp | Plugin entry class ElectricClawPlugin: plugin registration, process package UI creation, RL instruction registration |
| OnrobotWidget.h/.cpp/.ui | Process package main UI class ElectricClawWidget: UI generation, signal-slot binding, init/run/stop control |
| StatusPoller.h/.cpp | Status polling class: queries the claw status at a 200 ms cycle in a child thread and notifies the UI to refresh |
| JsonWorker.h/.cpp | JSON instruction worker class: sends plugin instructions asynchronously in the thread pool to avoid blocking the UI |
| rl/RLStartWidget, RLStopWidget, RLStatusWidget | RL instruction UI classes: generate specific RL scripts from the data of units in the window |
| OnrobotPlugin_global.h | Export symbol macro definition (ELECTRICCLAWPLUGIN_EXPORT) |
Core Code Logic
Plugin Registration
Plugin registration is declared via a macro in OnrobotPlugin.cpp (PLUGIN_NAME is the OnrobotPlugin defined in the .pro file). After declaration, the plugin class is automatically initialized when the plugin is loaded, and the plugin initialization functions init() and afterInit() are executed in sequence:
XPLUGIN_REGISTER(PLUGIN_NAME, ElectricClawPlugin)
Plugin Entry and UI Registration
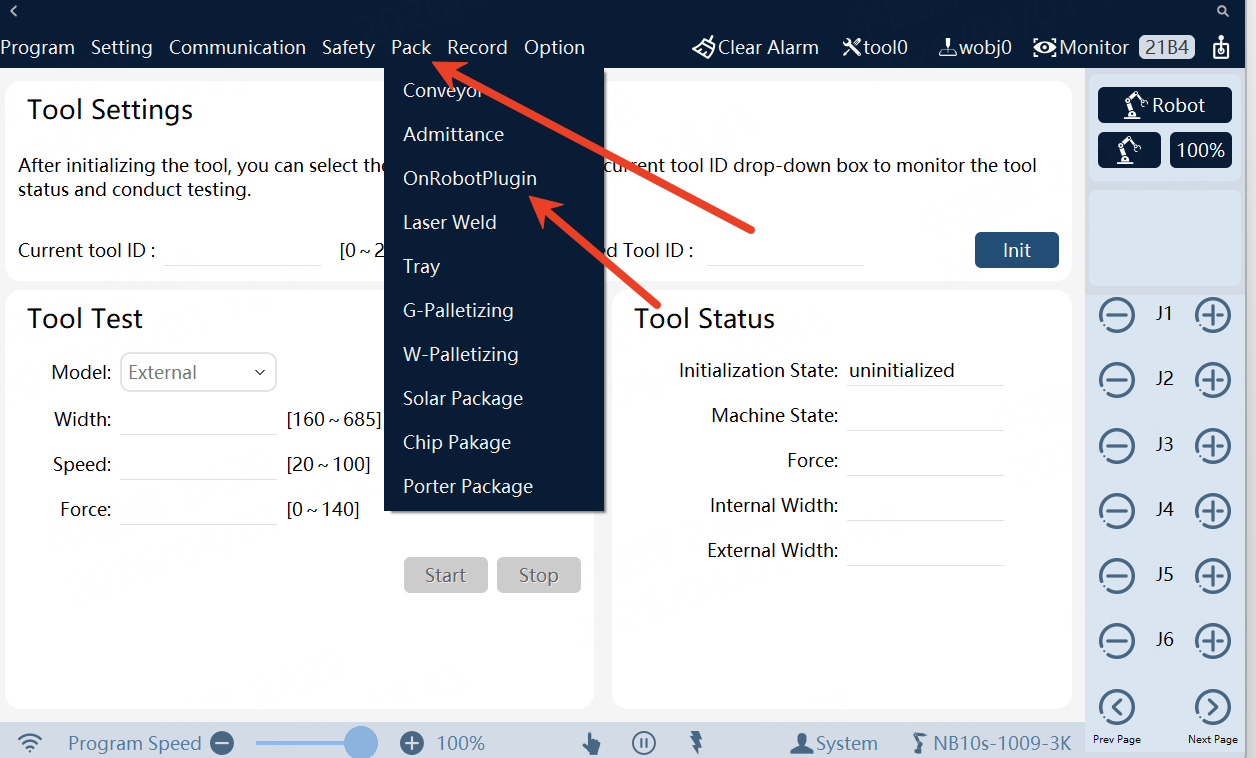
In init(), the process package main UI ElectricClawWidget is created and registered as the center widget via CreateCenterWidget:
void xplugin::ElectricClawPlugin::init()
{
    m_widget = new ElectricClawWidget;
    xplugin::CreateCenterWidget(PLUGIN_NAME, m_widget);
}
Process Package UI (ElectricClawWidget)
Signal-slot binding and status monitoring startup are completed in the ElectricClawWidget constructor:
- Creates a
QThreadchild thread and moves theStatusPollerinto it; status polling at a 200 ms cycle starts once the thread starts; - The polling result signal
statusUpdatedis bound to the UI refresh slot via a queued connection (Qt::QueuedConnection), updating the four display fields: status, force, internal width, and external width; - Sets
QIntValidatorrange limits on each input field (device ID 0–255, force 0–140, speed 20–100, width 160–685).
Button click logic:
| Button | Logic |
|---|---|
| Init | Clamps input values first, then sends a stop instruction to the device as a "handshake" check; on success, records the device ID and enables the run/stop buttons and all parameter input fields; on failure, disables them and clears the status display |
| Run | Clamps input values, then packs the UI parameters (mode, width, force, speed) and sends a start instruction |
| Stop | Clamps input values, then packs and sends a stop instruction |
In addition, the UI overrides showEvent/hideEvent to start the polling timer when the process package page is shown and stop it when hidden, avoiding unnecessary background polling.
clampLineEdit() clamps input field values to the valid range: non-numeric input is reset to the minimum, and out-of-range values are clamped to the boundaries.
JSON Instruction Sending/Receiving (JsonWorker)
All UI requests are issued through sendRequest(): a JsonWorker (inheriting QObject + QRunnable) is constructed and submitted to the global thread pool for asynchronous execution; when finished, the finished signal calls back to the UI via a queued connection, avoiding UI thread blocking:
void JsonWorker::run()
{
    QJsonArray result = xplugin::xPluginInterface().commandCustomData(nullptr, m_json);
    emit finished(result);
}
The JSON protocol sent corresponds one-to-one with the plugin instructions registered by the controller plugin (see Controller Plugin Description):
| Operation | JSON Sent | Response |
|---|---|---|
| Stop / init handshake | {"ElectricClawPlugin":{"stop":{"slave_id":1}}} | {"return":true} |
| Start | {"ElectricClawPlugin":{"start":{"slave_id":1,"mode":1,"width":400,"force":50,"speed":50}}} | {"return":true} |
| Status polling | {"ElectricClawPlugin":{"get_status":{"slave_id":1}}} | {"status":...,"external_width":...,"internal_width":...,"force":...,"return":true} |
Status Polling (StatusPoller)
StatusPoller runs in the child thread. startPolling() creates a QTimer that triggers pollStatus() every 200 ms:
- If the device is not initialized (
m_is_init == false), it returns directly without sending a request; - It packs a
get_statusinstruction and queries viacommandCustomData, parses theElectricClawPlugin → get_statusnode in the returned array, and emitsstatusUpdatedto the UI thread to refresh the display.
RL Instruction Registration
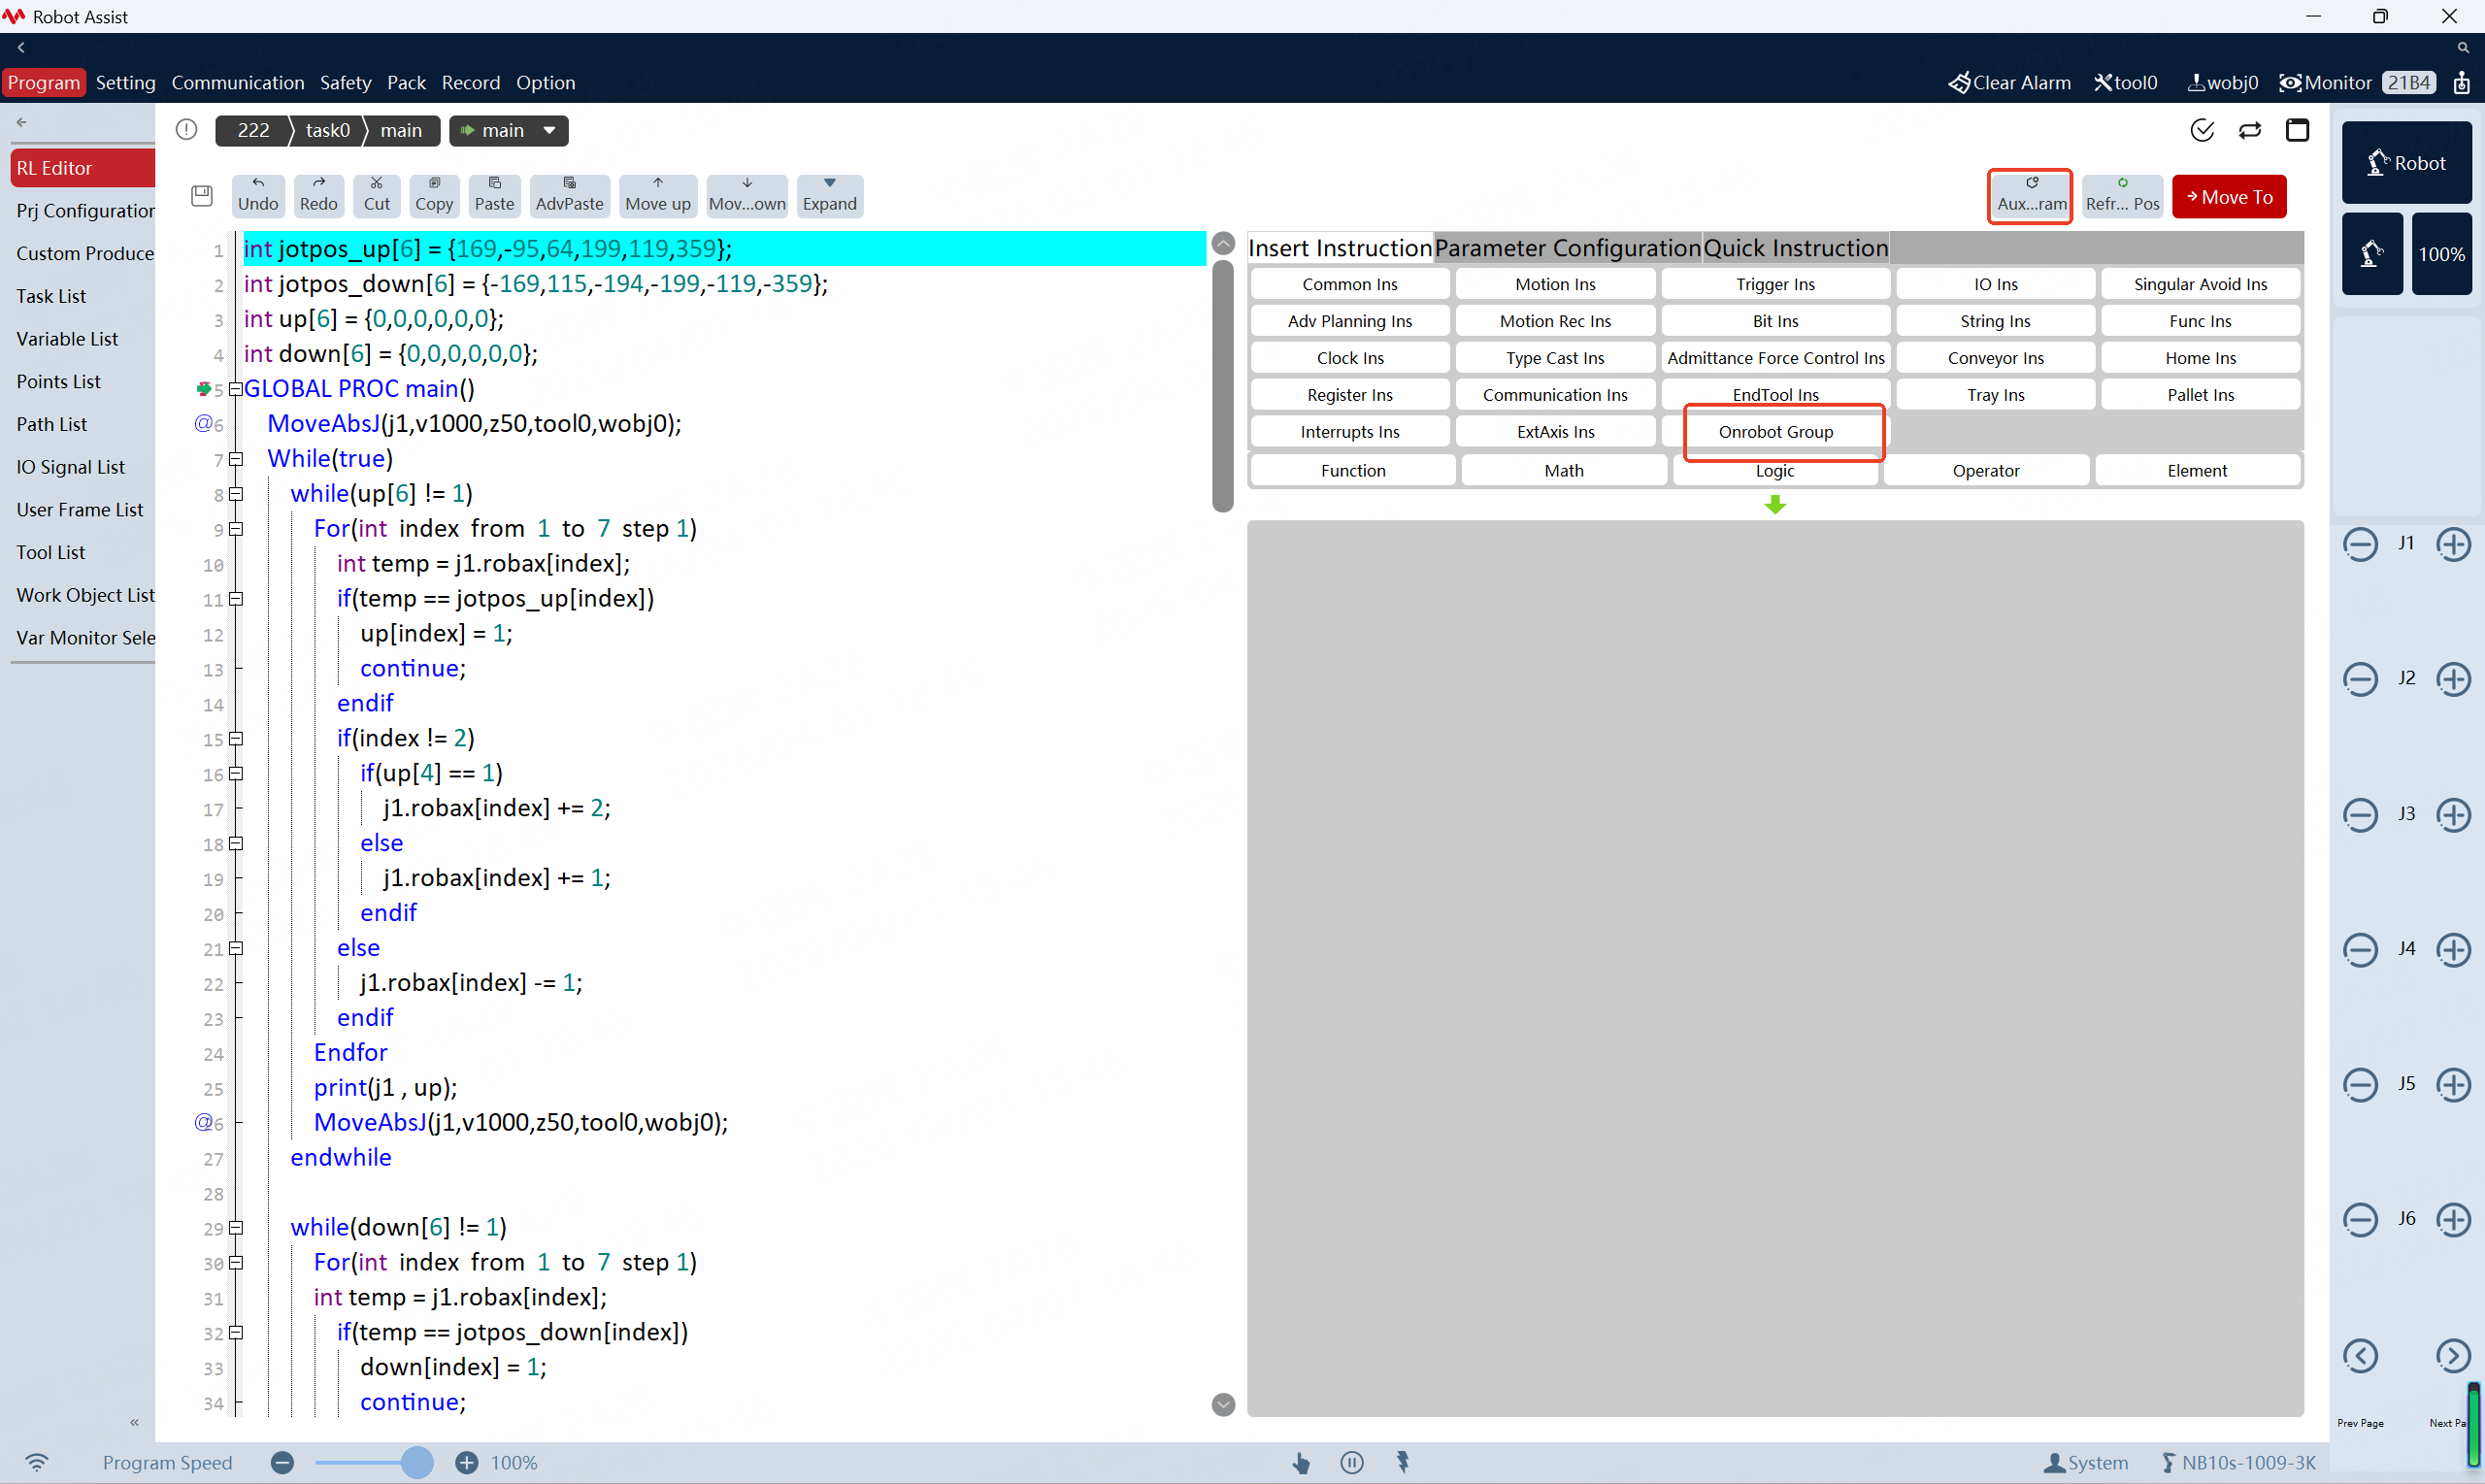
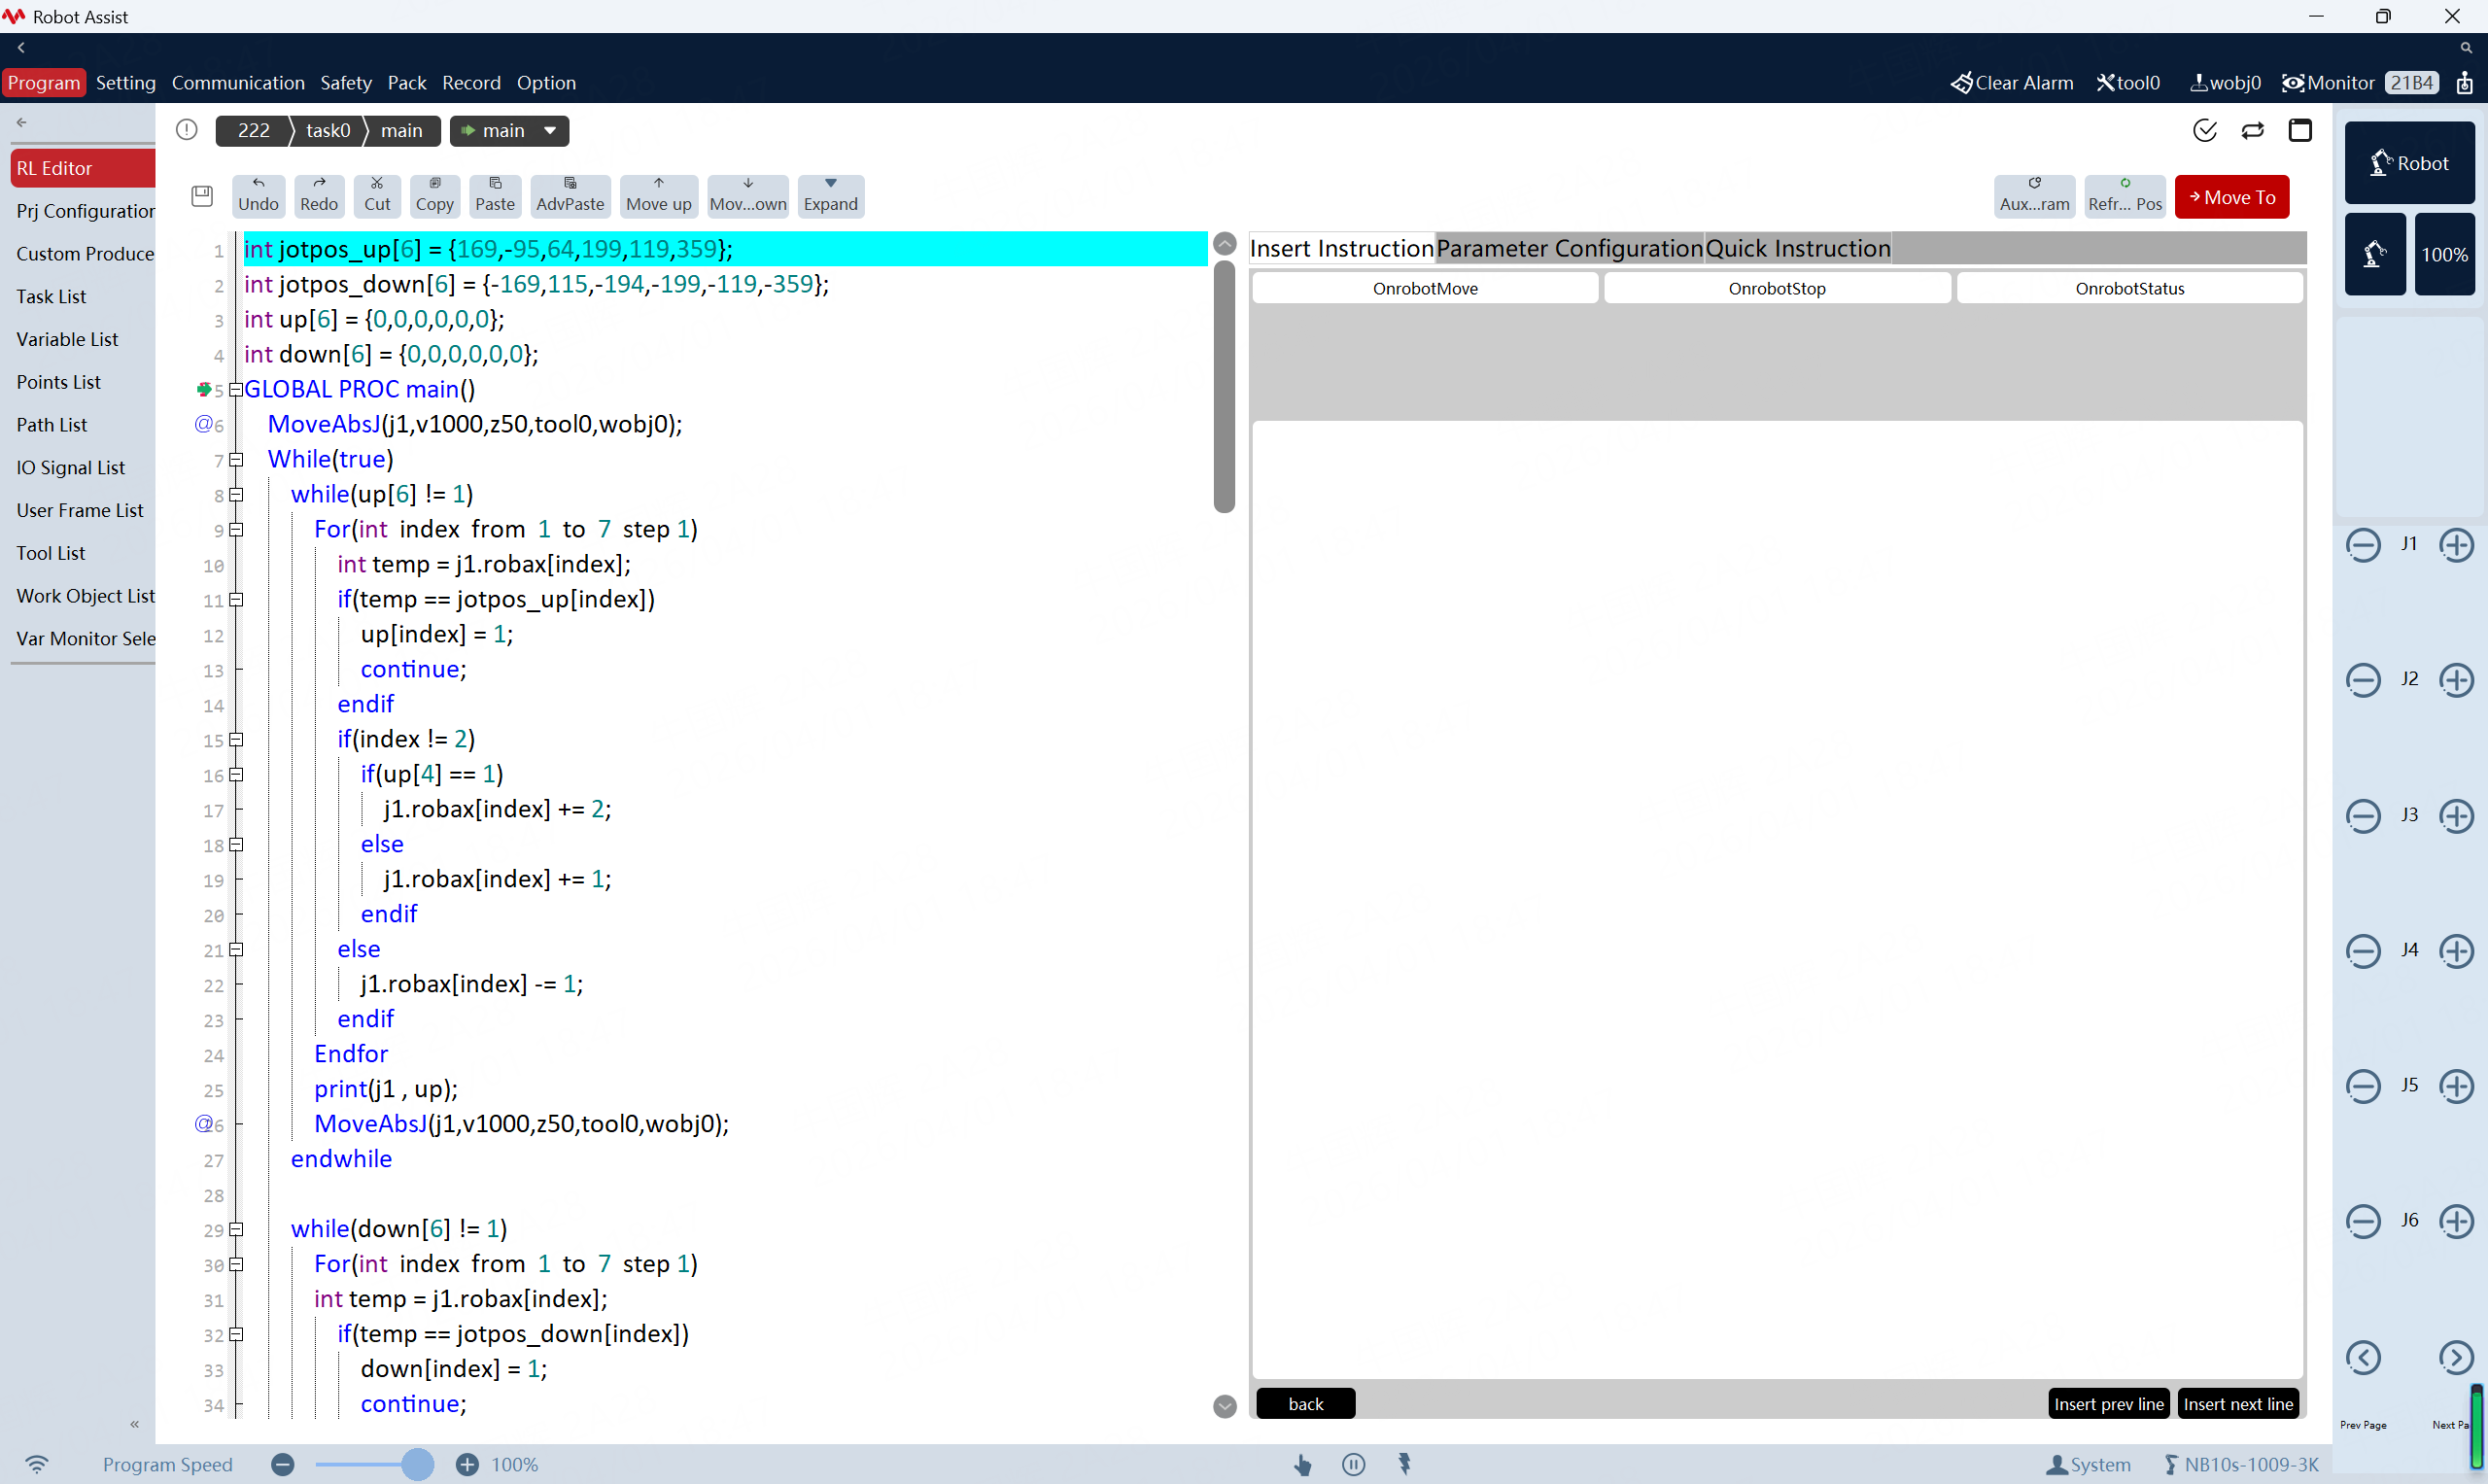
RL editor instructions (OnrobotMove, OnrobotStop, OnrobotStatus) are registered in the afterInit() function via RLManager. Five items are registered for each instruction:
m_rlManager->createTypeKey("OnrobotMove");                 // Instruction type key
m_rlManager->createSkeleton("OnrobotMove", "OnrobotMove"); // Instruction skeleton
m_rlManager->createInsDescribe("OnrobotMove", tr("..."));  // Instruction description
m_rlManager->createPattern("OnrobotMove", "^\\s*...$");    // Matching regex
m_rlManager->createInsertWidget("OnrobotMove", [](){       // Editing widget for insertion
    return new xplugin::RLStartWidget("OnrobotMove");
});
Finally, createTypeToGroup groups the three instructions under OnrobotPlugin, and createGroups sets the group display title.
What is registered here is only simplified RL writing logic for assisted programming, which does not include RL execution logic; the RL execution logic is implemented in the controller plugin, see Controller Plugin Description.
RL Instruction UI Classes
RL instruction UI classes inherit RLContentBase and need to implement three interfaces:
| Interface | Purpose |
|---|---|
ToString() | Converts UI control parameters into an instruction string (called when generating the RL script) |
FillWith(str) | Fills the UI in reverse from an instruction string (this example only prints a debug log; no parsing) |
CheckInsert() | Determines whether it can be inserted as an output value (this example always returns true) |
Example of RLStartWidget::ToString() — reads each control value and concatenates them in the form instruction_name param1,param2,...:
Output forms of the three UI classes:
| UI Class | Corresponding Instruction | ToString Output Example |
|---|---|---|
| RLStartWidget | OnrobotMove | OnrobotMove 1,1,400,50,50 (ID, mode, width, force, speed) |
| RLStopWidget | OnrobotStop | OnrobotStop 1 (ID) |
| RLStatusWidget | OnrobotStatus | OnrobotStatus 1,s,e,i,f (ID + 4 combo box texts) |
Compilation and Packaging
- Open Qt Creator and select the build type (Release is recommended for distribution).
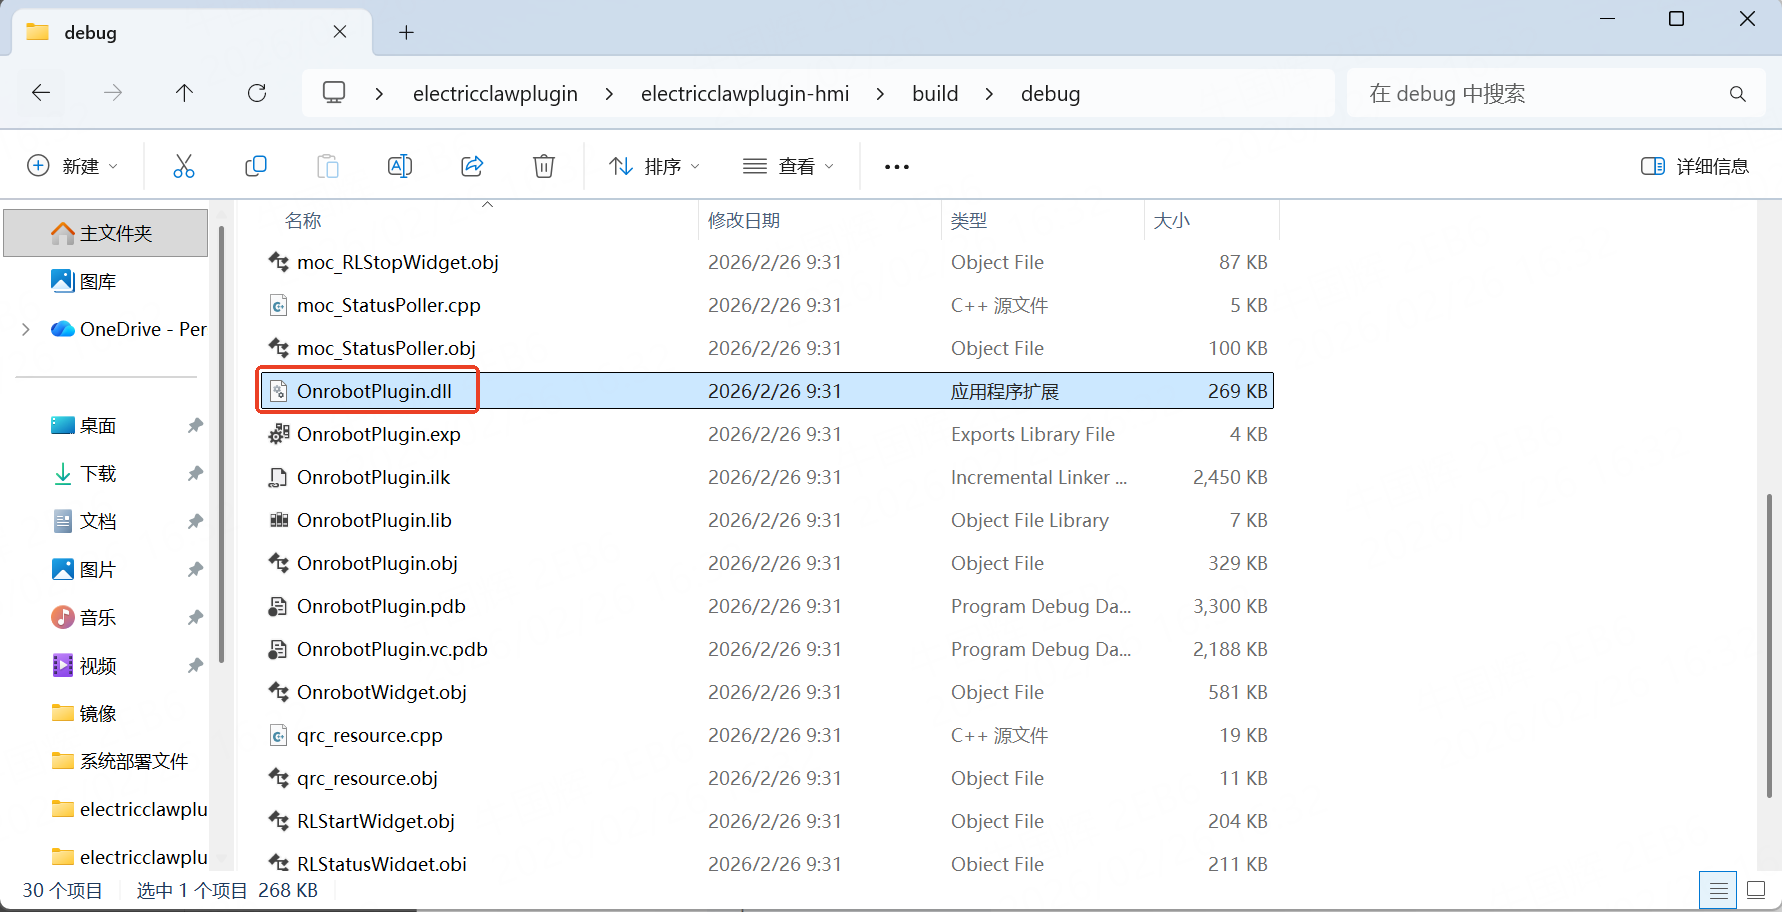
- Compilation process: qmake parses the .pro file to generate the Makefile → jom/make executes compilation → the dynamic library (.dll) is generated.
- After the build completes, the generated dynamic library can be found in the build directory.
For packaging specifications and the general process, see Creating the Plugin Package. You can also use the PluginPackage packaging script directly.