Create a Simple HMI Plugin
This page shows how to create the simplest client plugin from scratch on Windows with Qt Creator.
Complete the Client plugin (Windows) steps in Environment Overview first.
Goal
| Plugin name | Build output |
|---|---|
| MyPlugin | MyPlugin.dll |
1. Create the project
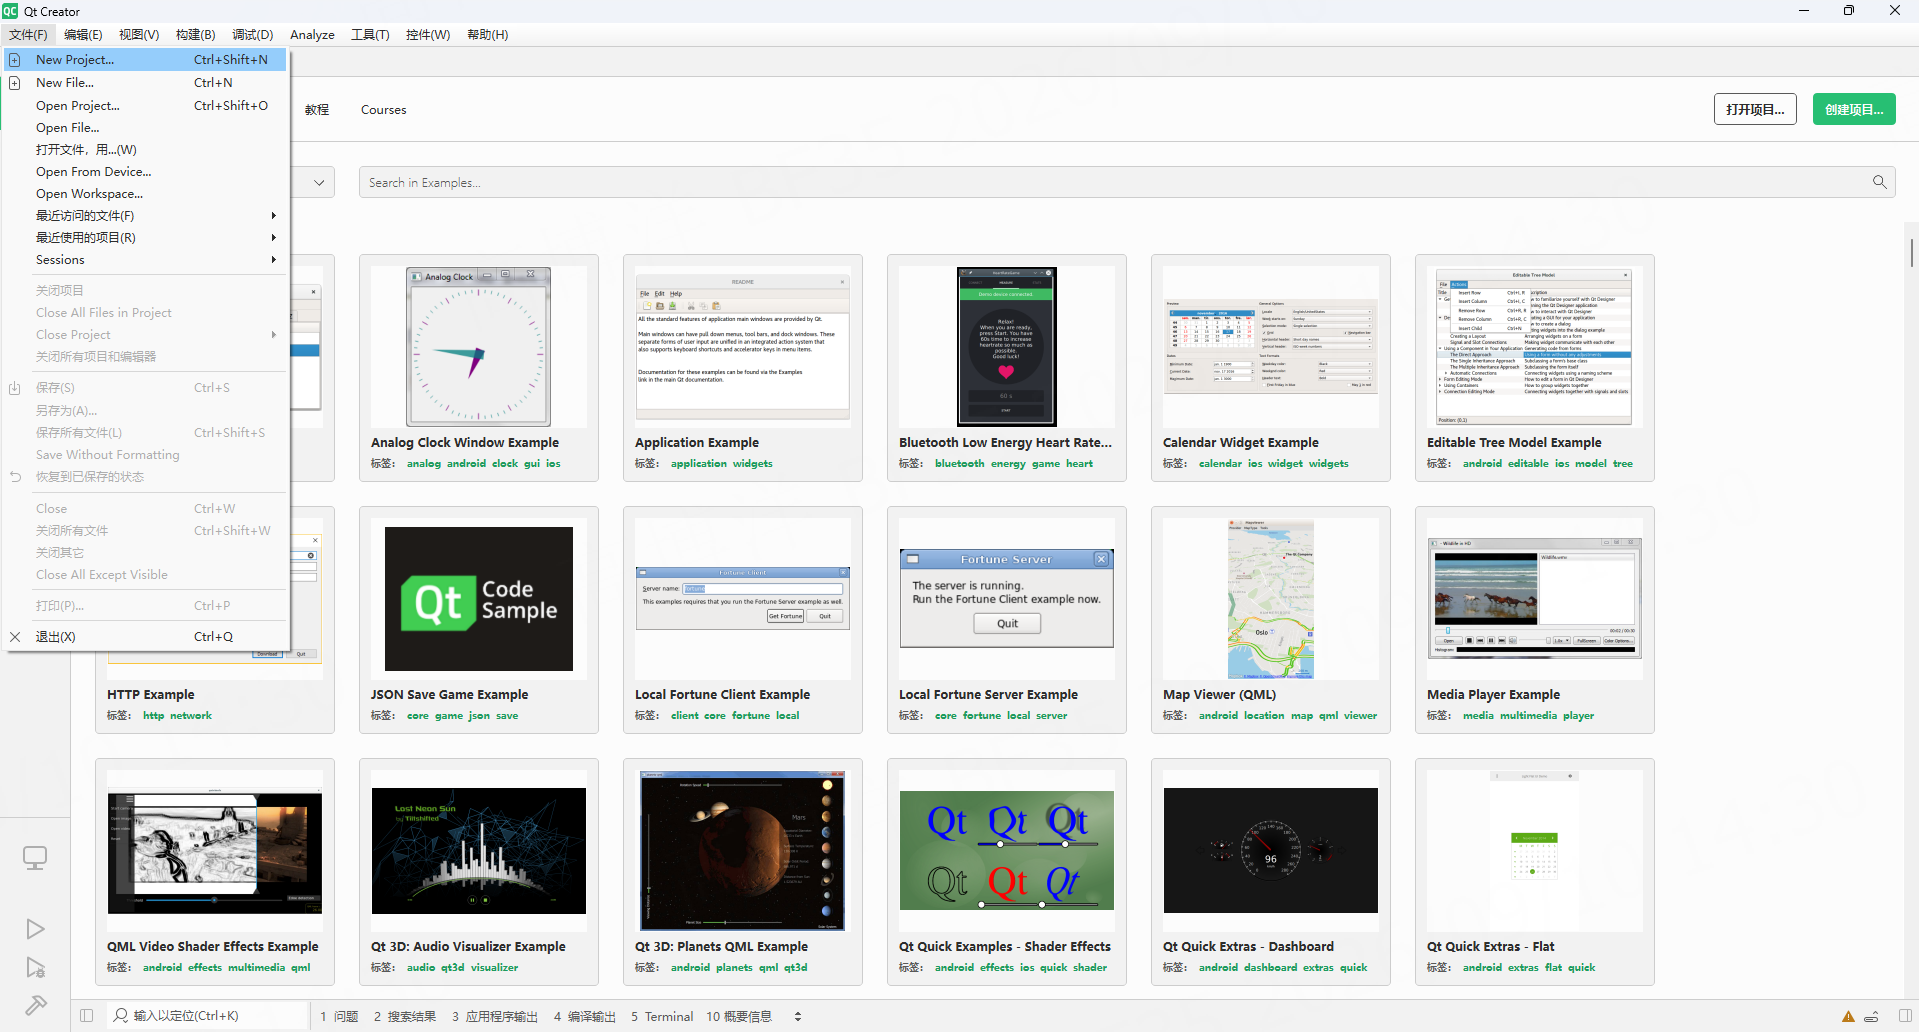
1. Open the New Project wizard
Start Qt Creator and choose File → New Project....
2. Select the template
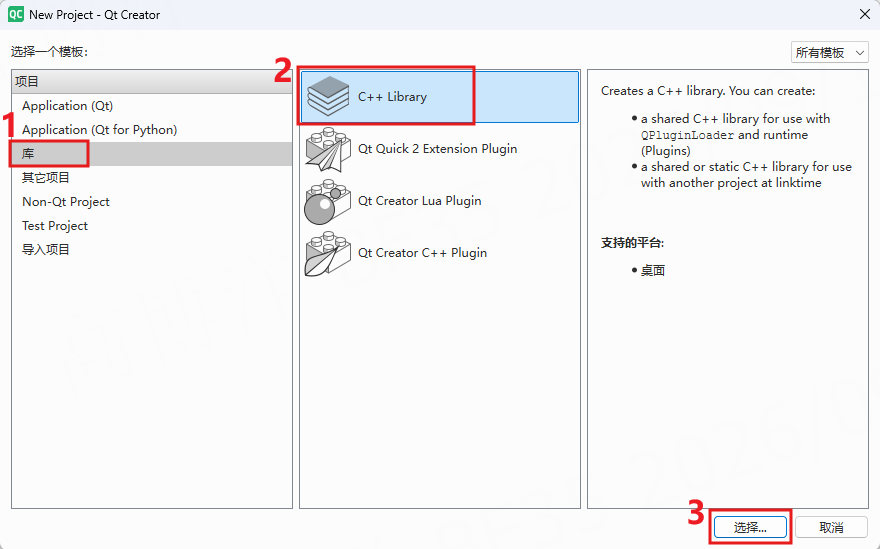
Select Library on the left, then C++ Library, and click Choose... to continue.
3. Set the project location
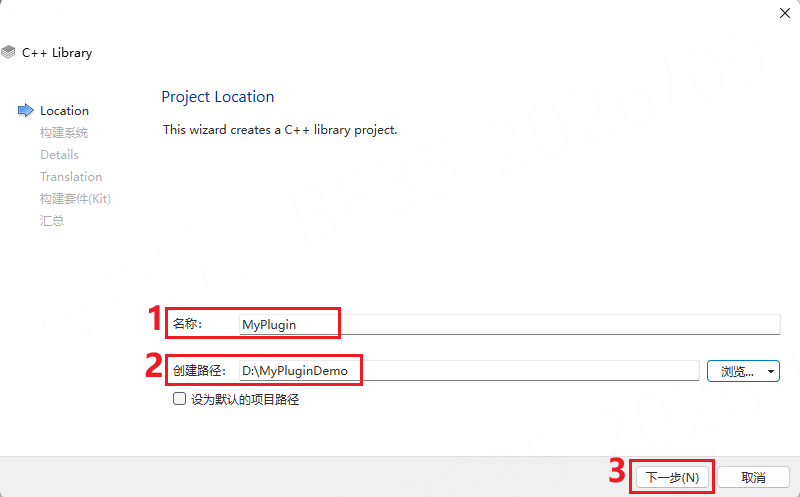
Set Name to MyPlugin. Choose Create in according to the actual requirement, then click Next.
4. Select the build system
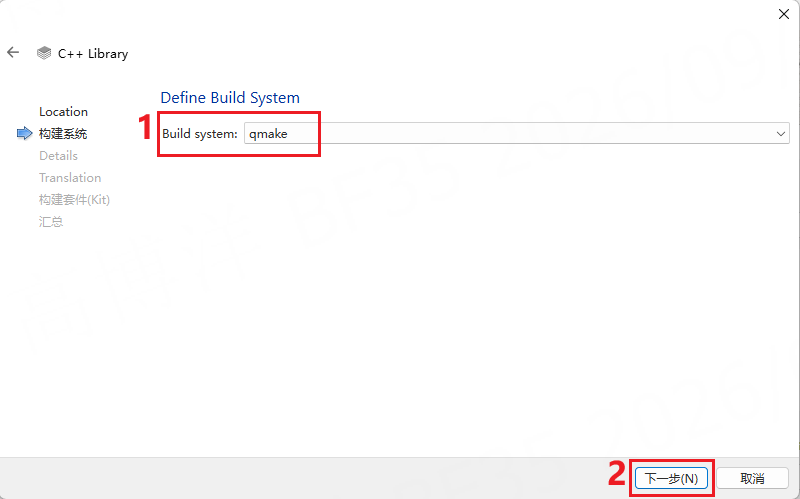
Set Build system to qmake, then click Next.
5. Select the Qt module
Change Qt module to Widgets and leave the remaining fields at their defaults, then click Next.
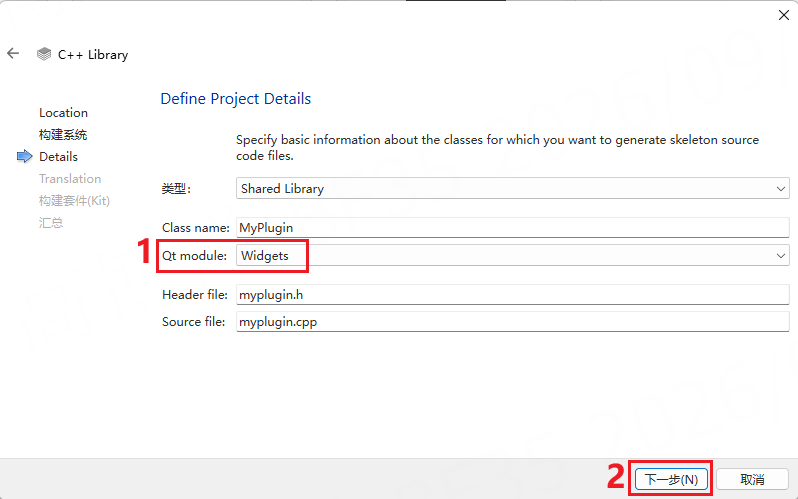
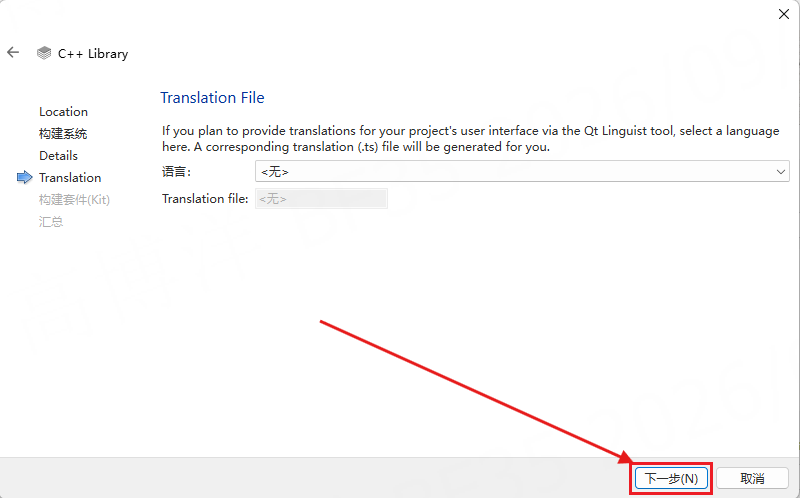
6. Click Next
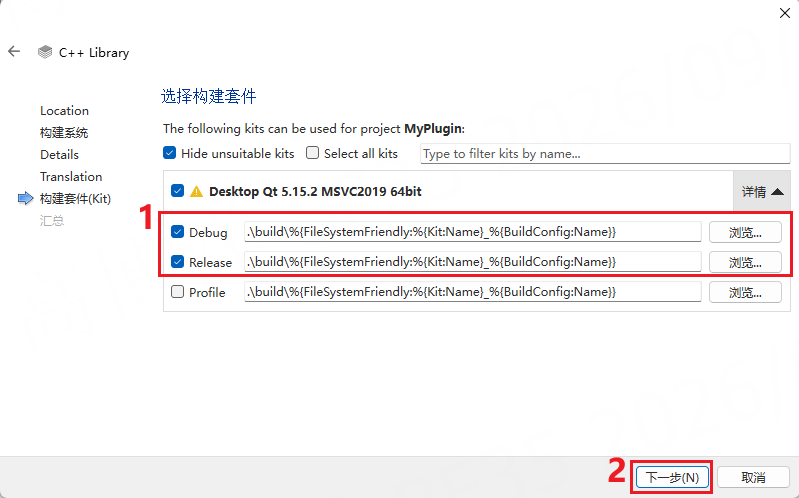
7. Select the kit
Select the configured Desktop Qt 5.15.2 MSVC2019 64bit kit (or an equivalent MSVC 64-bit kit). Enable Debug and Release. Click Next.
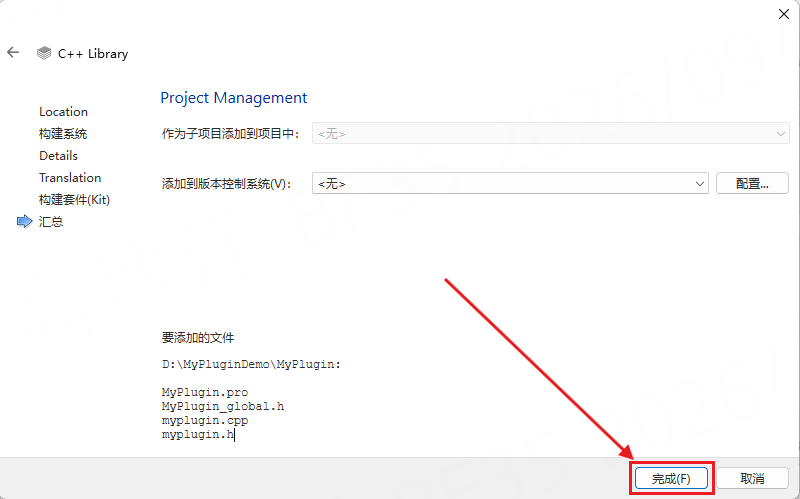
8. Click Finish
2. Edit the project files
The wizard project cannot be built as a client plugin until the .pro file, header, and source are replaced as follows.
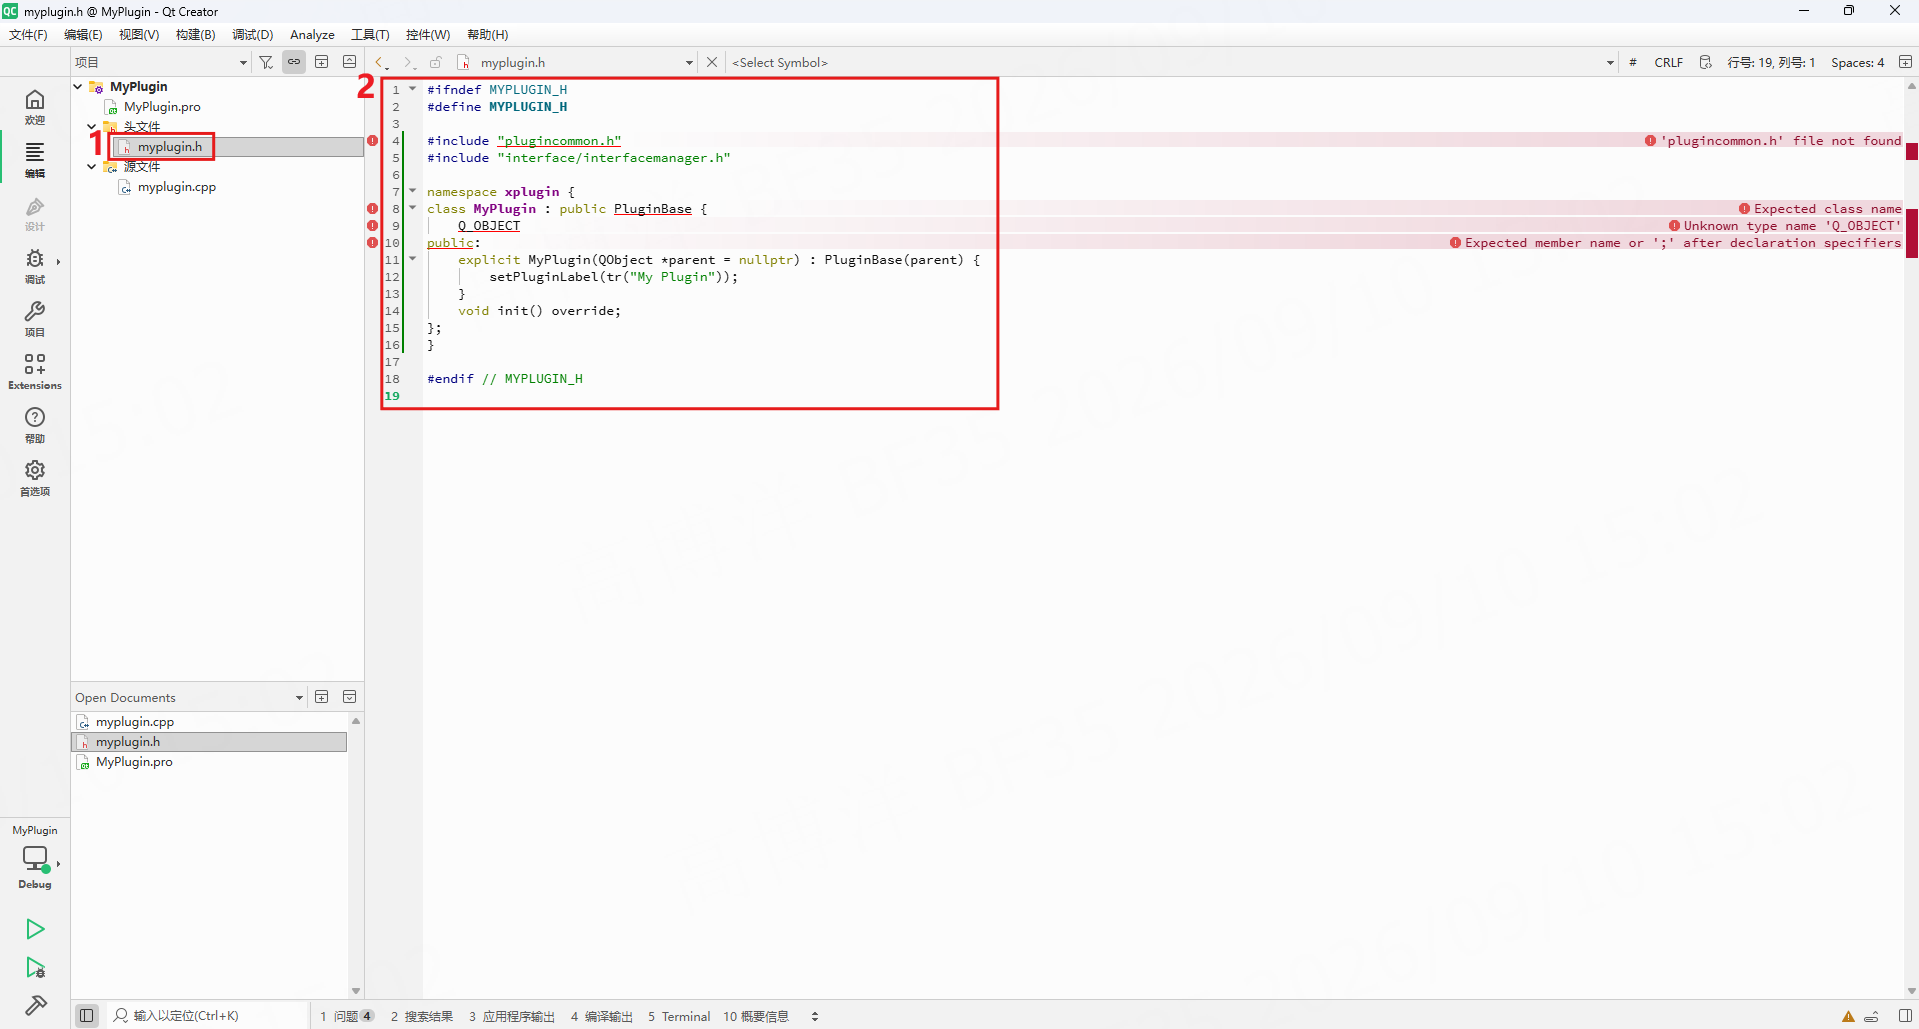
Until the development package is copied, the editor may report that plugincommon.h cannot be found. That is expected; it is resolved after Step 3 and Run qmake.
1. Edit MyPlugin.pro
Open MyPlugin.pro and replace its contents with:
QT += widgets
CONFIG += c++11 plugin no_plugin_name_prefix
TEMPLATE = lib

DEFINES += PLUGIN_NAME=\\\"MyPlugin\\\"
#Enable log module
DEFINES += LOG_MIN_FILE_LEVEL=XPLUGIN_LOG_LEVEL_DEBUG

INCLUDEPATH += $$PWD/include

LIBS += -L$$PWD/lib/windows -lxplugin
#Use this configuration on ARM
#LIBS += -L$$PWD/lib/aarch64 -l:xplugin.so

HEADERS += myplugin.h
SOURCES += myplugin.cpp
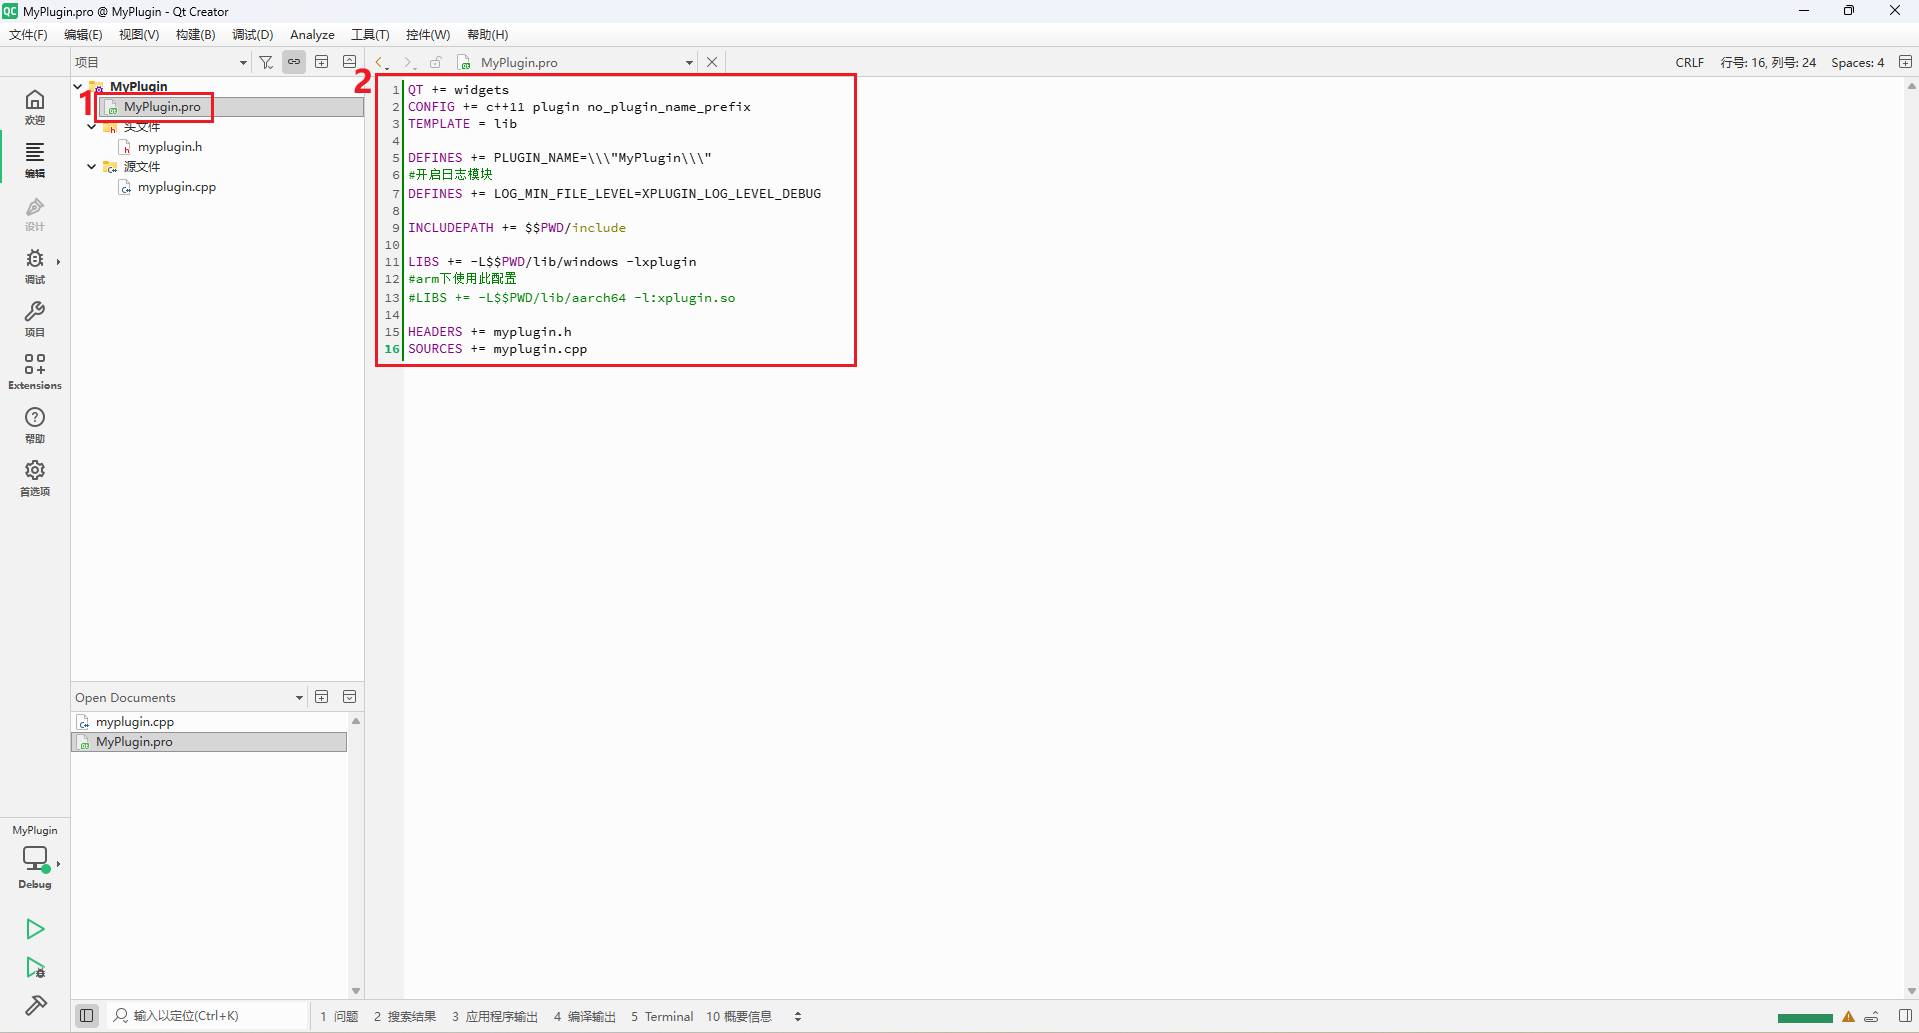
On teach-pendant Linux / ARM, comment out the Windows link line and enable the lib/aarch64 line.
2. Edit myplugin.h
Open myplugin.h and replace its contents with:
#ifndef MYPLUGIN_H
#define MYPLUGIN_H

#include "plugincommon.h"
#include "interface/interfacemanager.h"

namespace xplugin {
class MyPlugin : public PluginBase {
    Q_OBJECT
public:
    explicit MyPlugin(QObject *parent = nullptr) : PluginBase(parent) {
        setPluginLabel(tr("My Plugin"));
    }
    void init() override;
};
}

#endif // MYPLUGIN_H
3. Edit myplugin.cpp
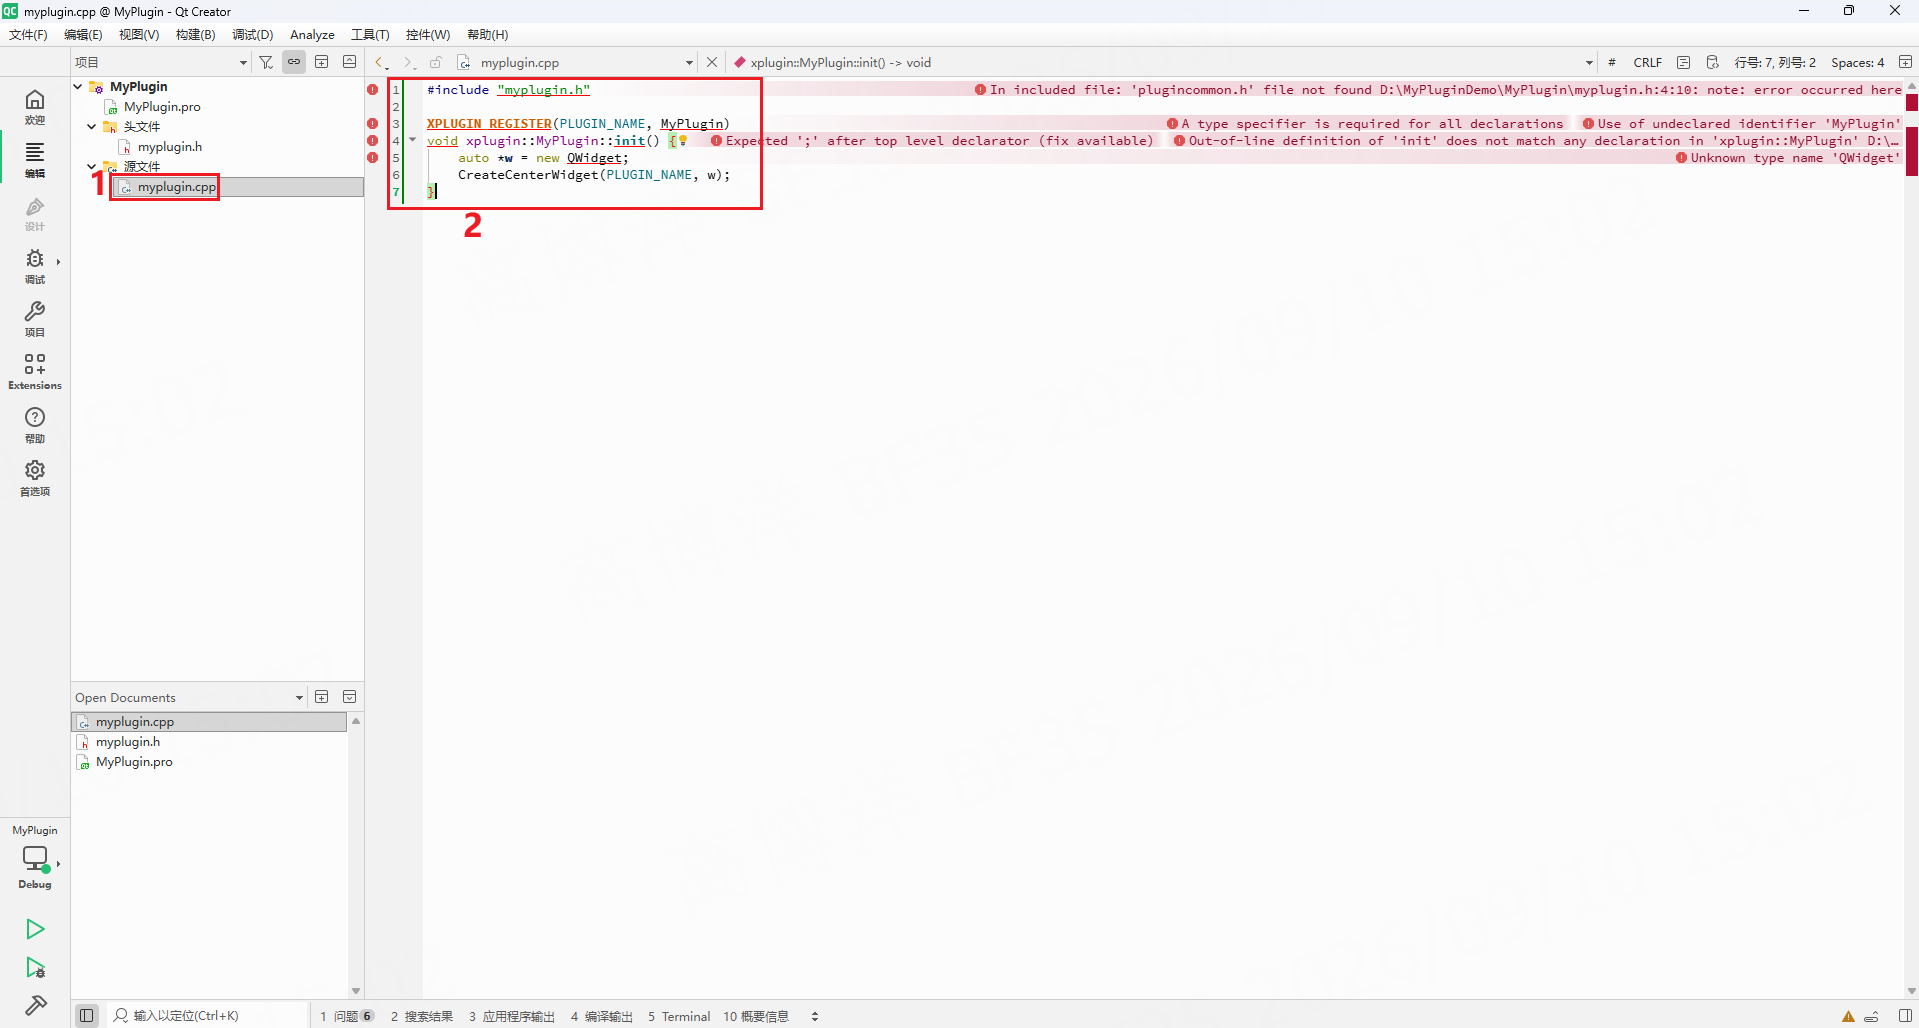
Open myplugin.cpp and replace its contents with:
#include "myplugin.h"
#include <QWidget>

XPLUGIN_REGISTER(PLUGIN_NAME, MyPlugin)

void xplugin::MyPlugin::init() {
    auto *w = new QWidget;
    CreateCenterWidget(PLUGIN_NAME, w);
}
Notes:
- XPLUGIN_REGISTER(PLUGIN_NAME, MyPlugin) registers the plugin in the
xpluginnamespace, so MyPlugin must be defined in that namespace. - PLUGIN_NAME must match
DEFINES += PLUGIN_NAME=...in the .pro file. When packaging, the name field in the configuration file and the plugin file name must also match; see Creating the Plugin Package.
3. Copy headers and libraries from the development package
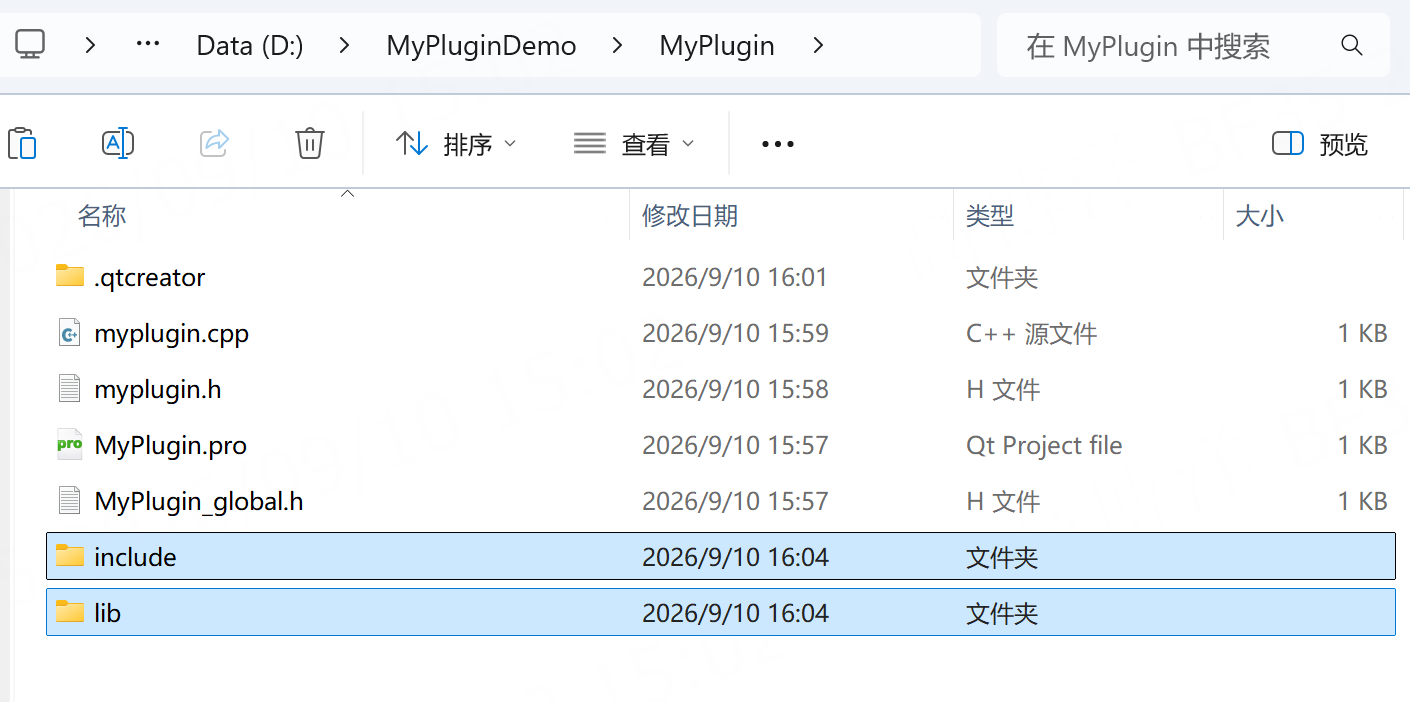
From the client plugin development package, copy the include and lib directories into the same folder as MyPlugin.pro (D:\MyPluginDemo\MyPlugin in this walkthrough).
The package folder name varies by version. The screenshot uses xCorePlugin_v1.0.2.7 as an example; use the package actually obtained.
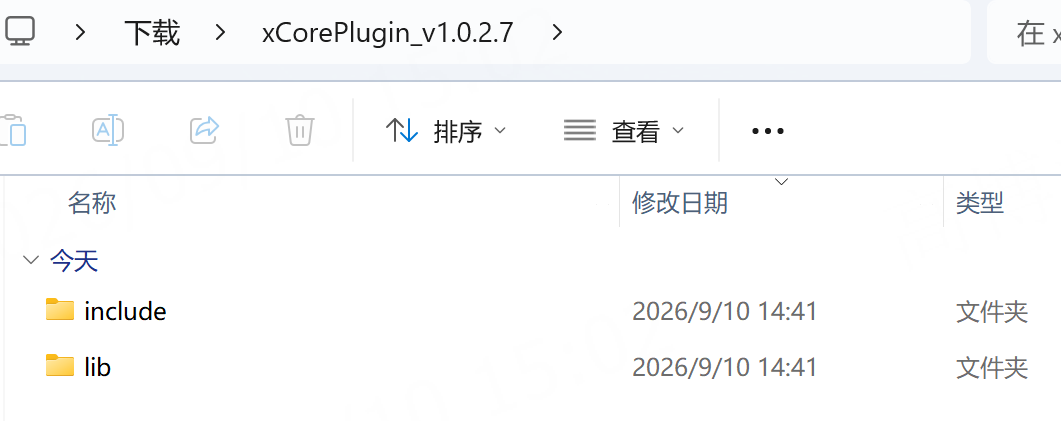
After copying, the project directory should contain both the source files and the development-package folders:
4. Run qmake and build
1. Run qmake
Choose Build → Run qmake.
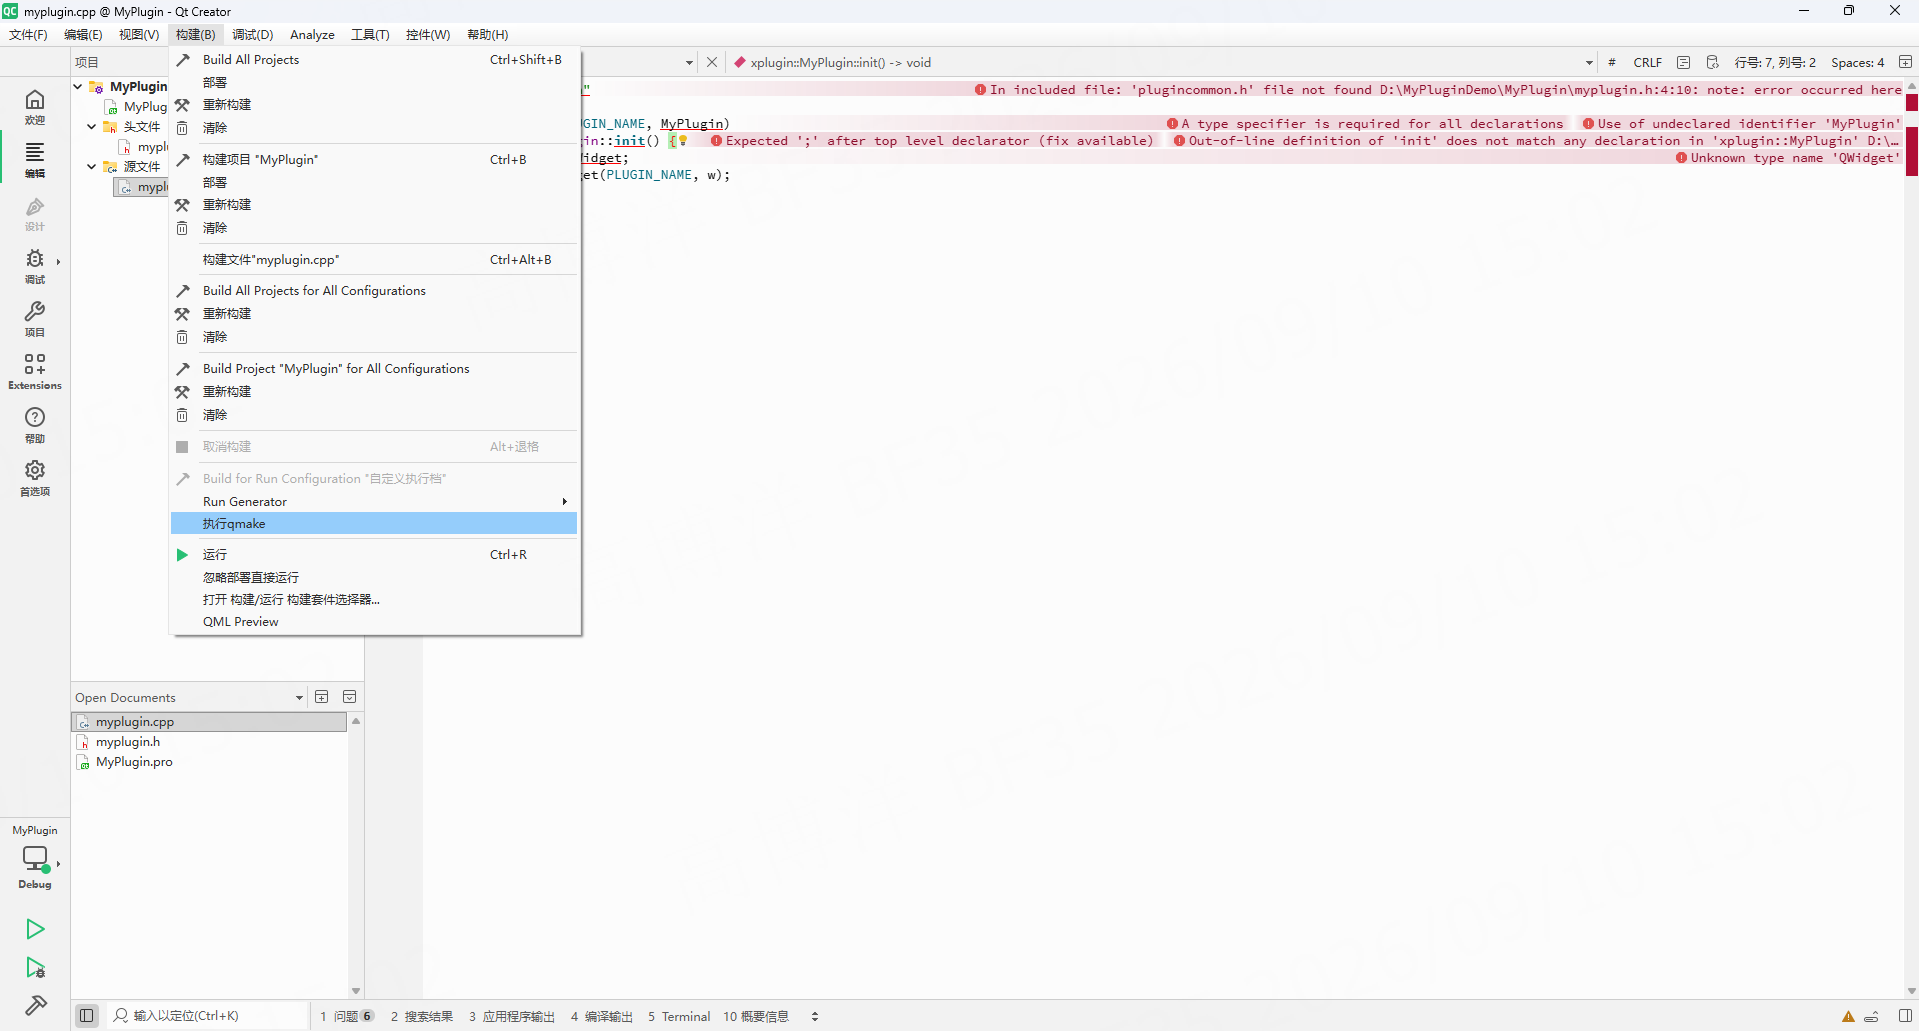
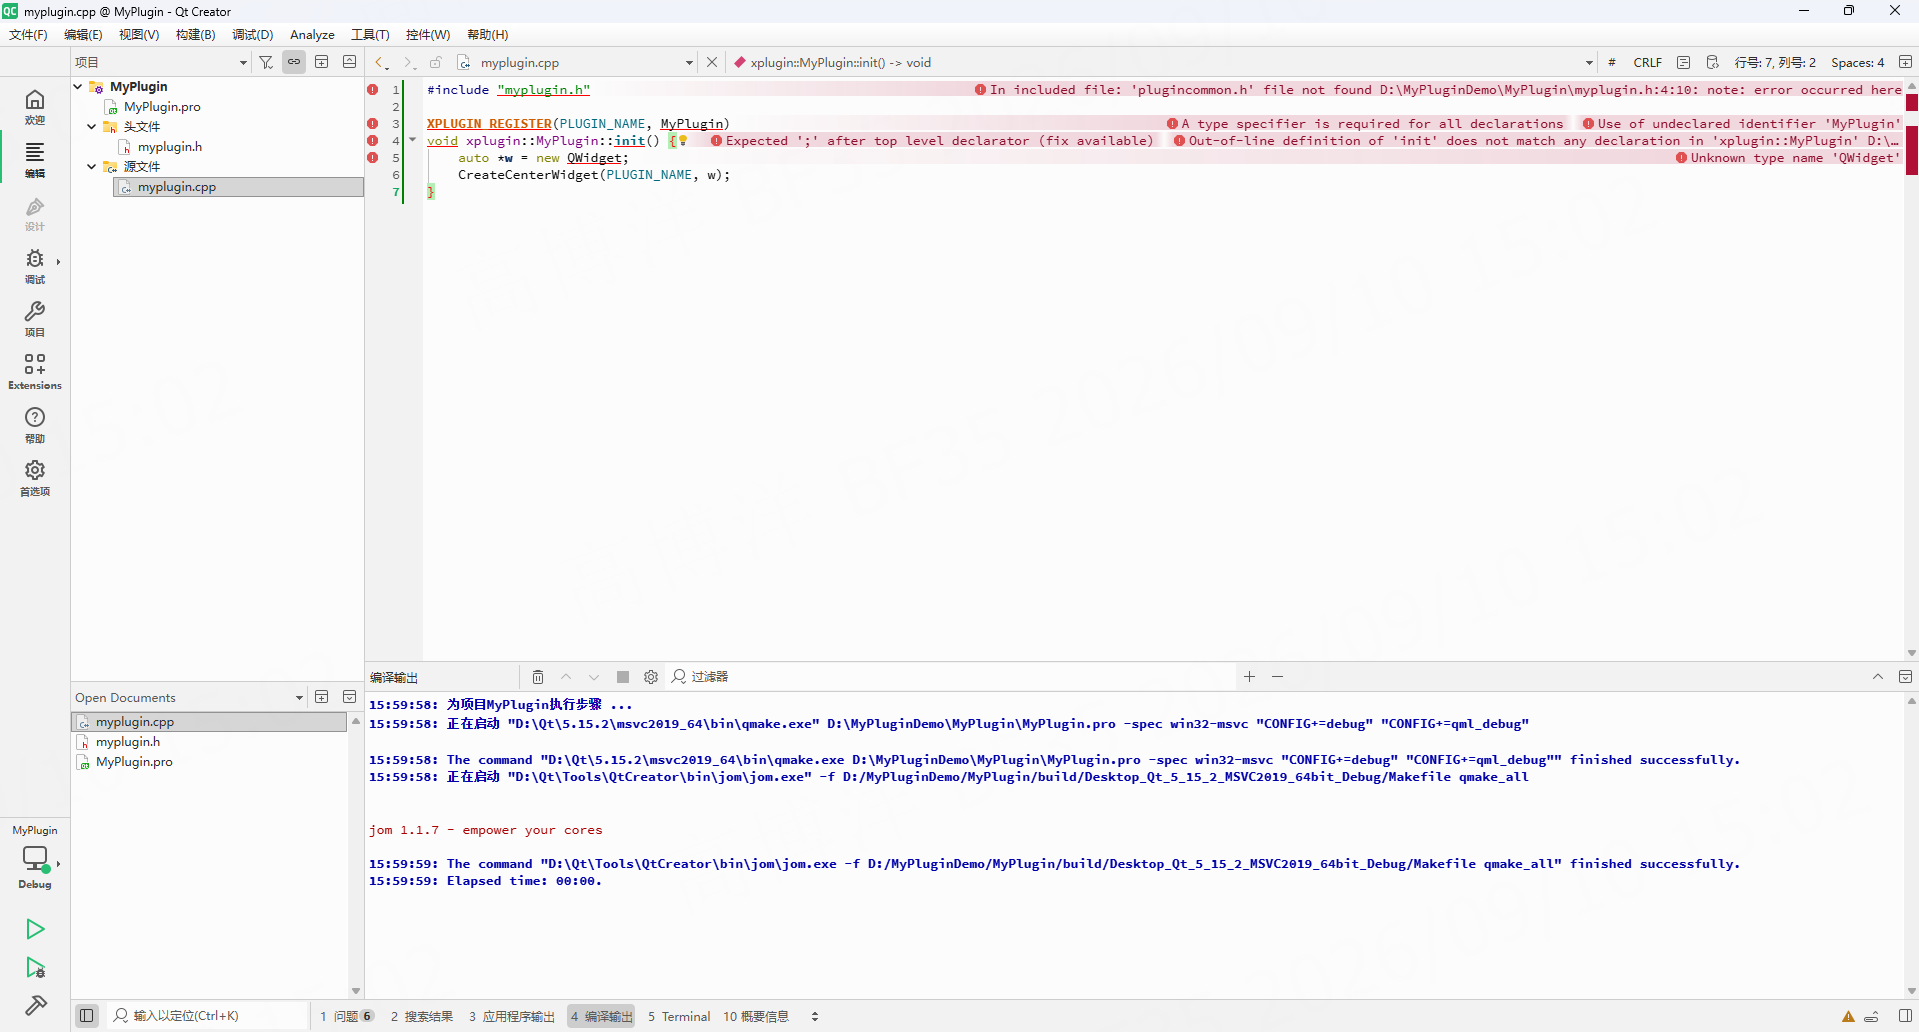
When the Compile Output pane reports that qmake / jom finished successfully, continue with the build. Red markers in the editor may remain briefly; that is expected.
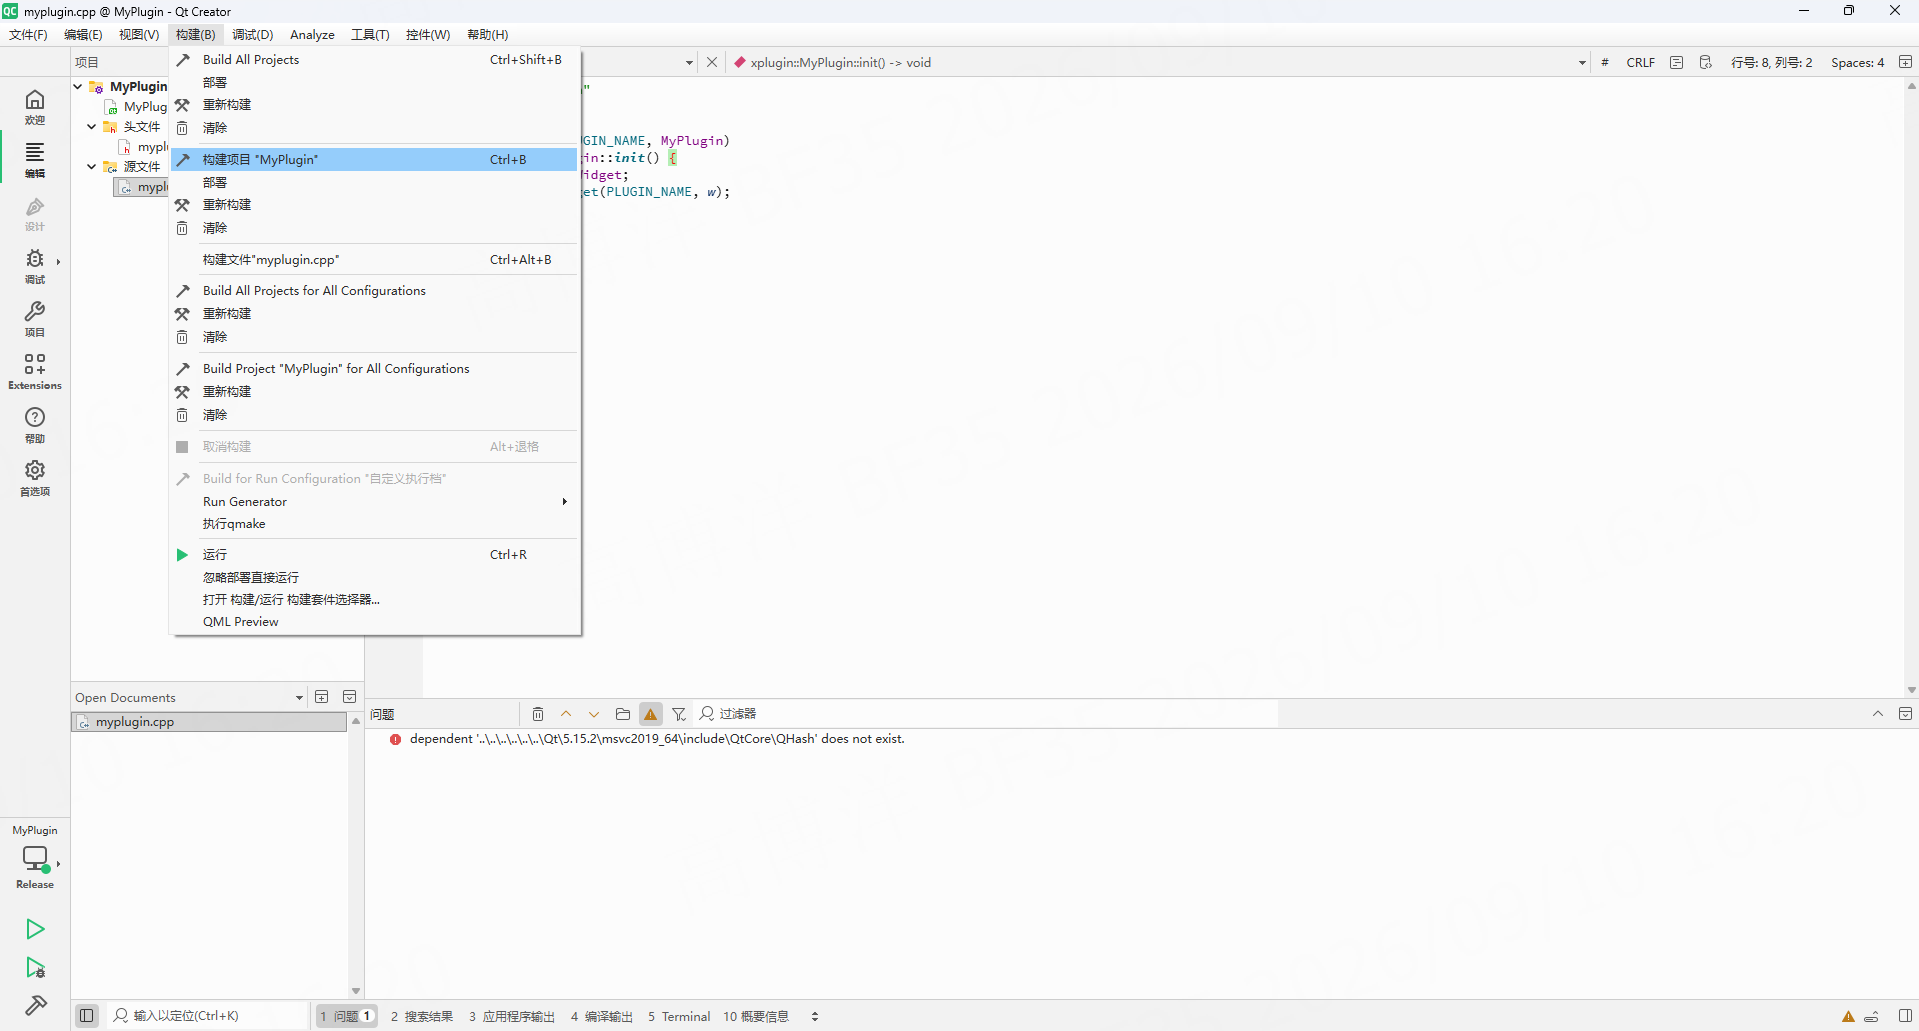
2. Build the project
Choose Build → Build Project "MyPlugin" (or press Ctrl+B).
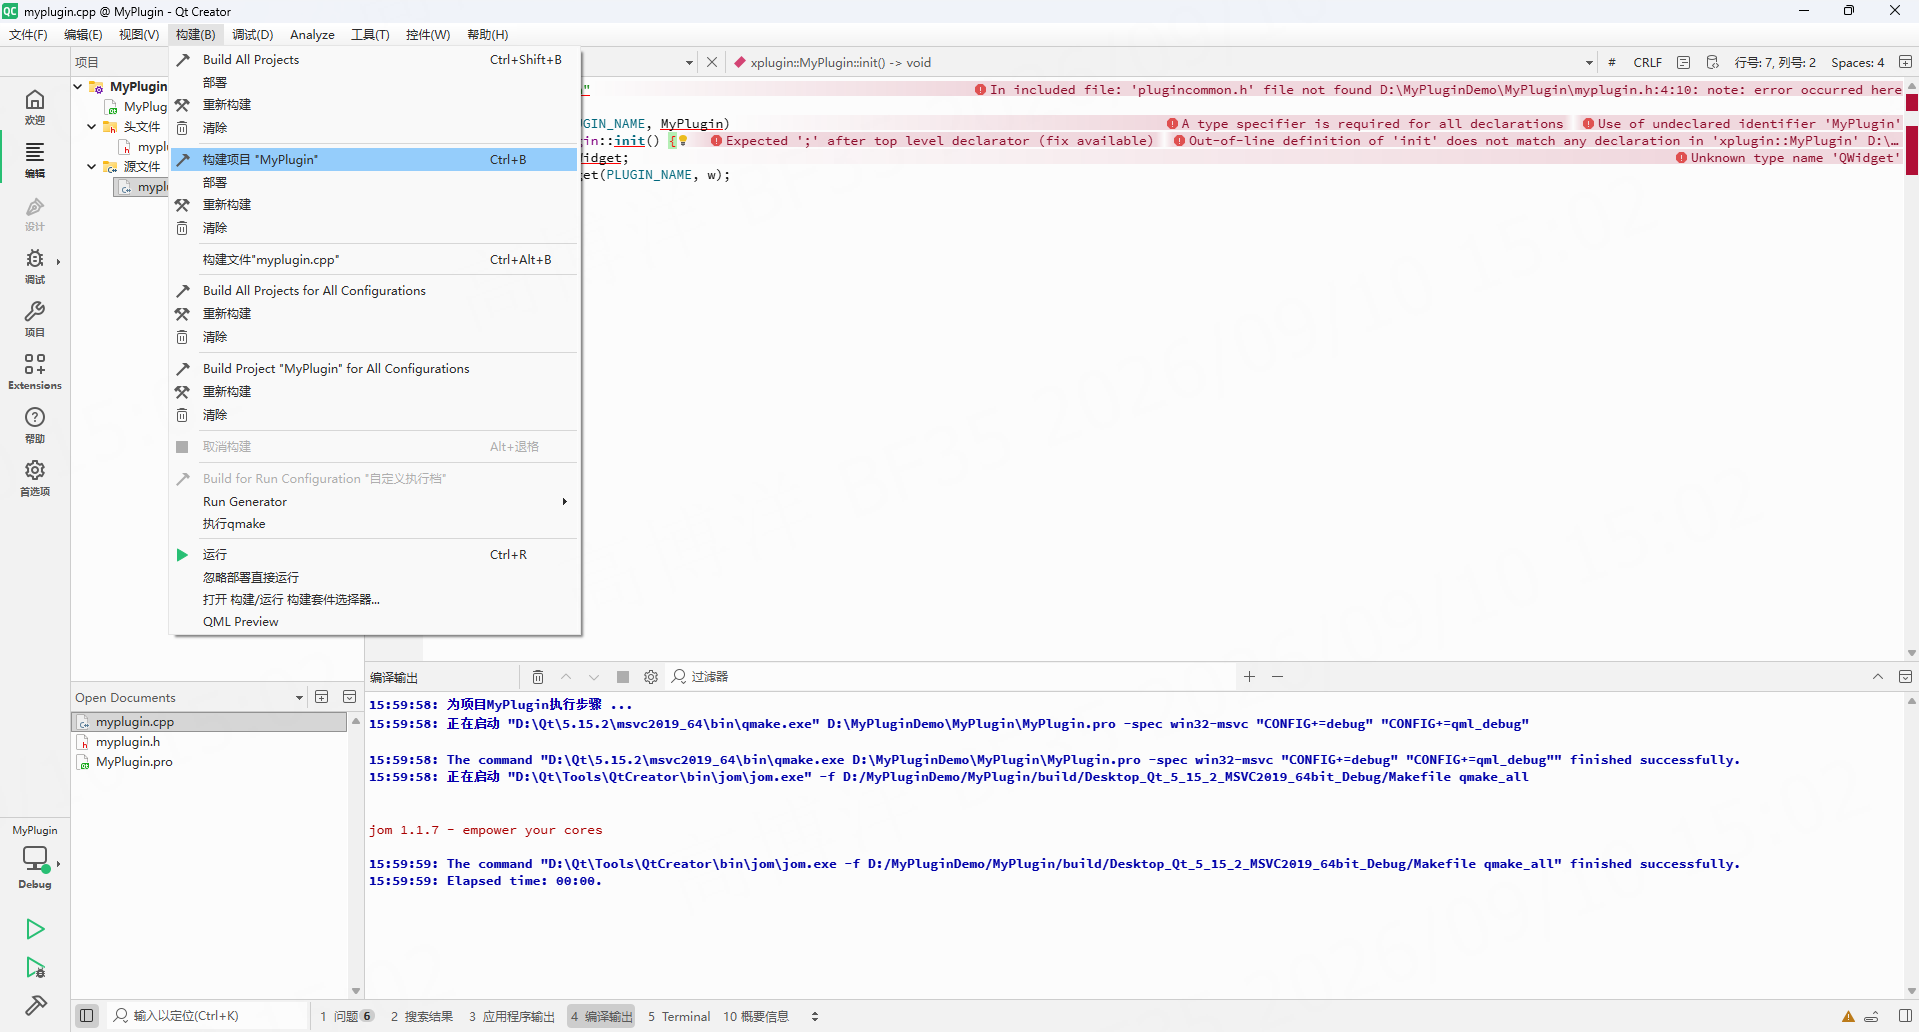
If the build succeeds, skip items 3 and 4 in this section and go to the output files.
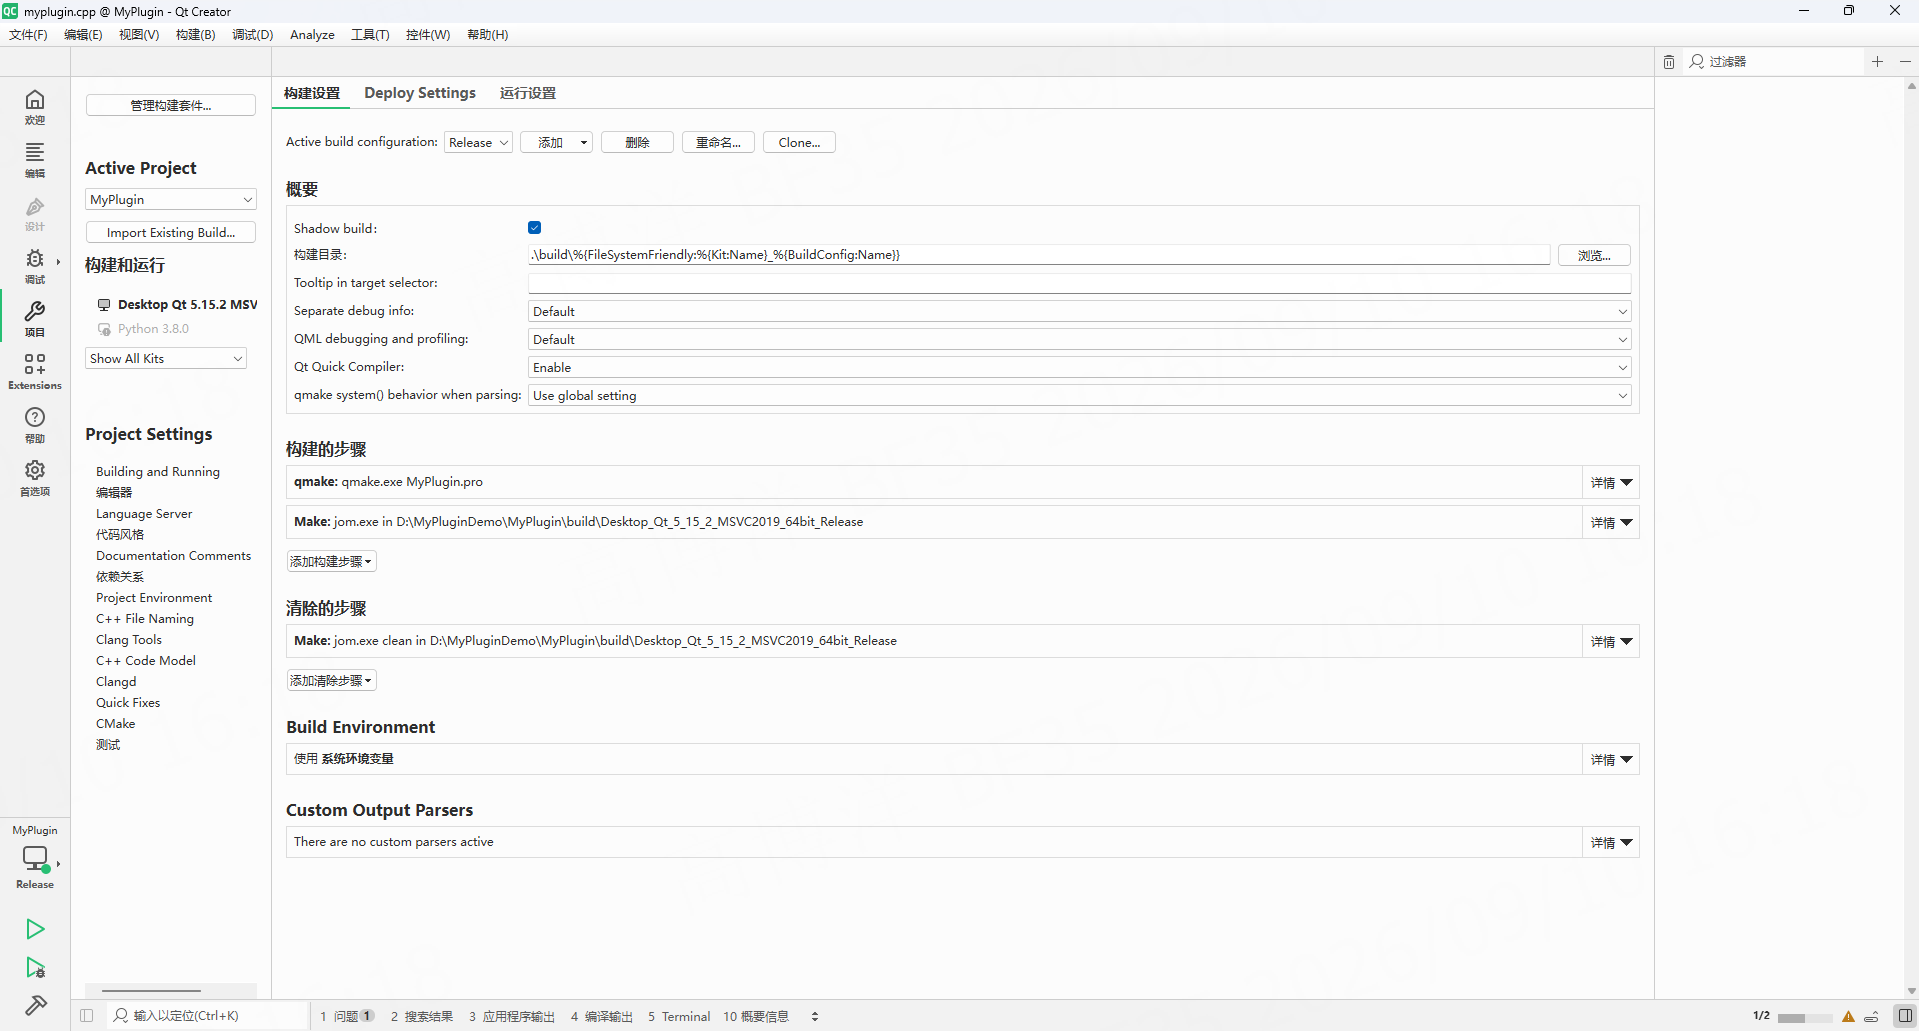
3. Change the build directory (if the build fails)
If the Issues pane shows a message similar to the following, the default shadow-build directory often cannot resolve Qt headers via relative paths:
dependent '...\Qt\5.15.2\msvc2019_64\include\QtCore\QHash' does not exist
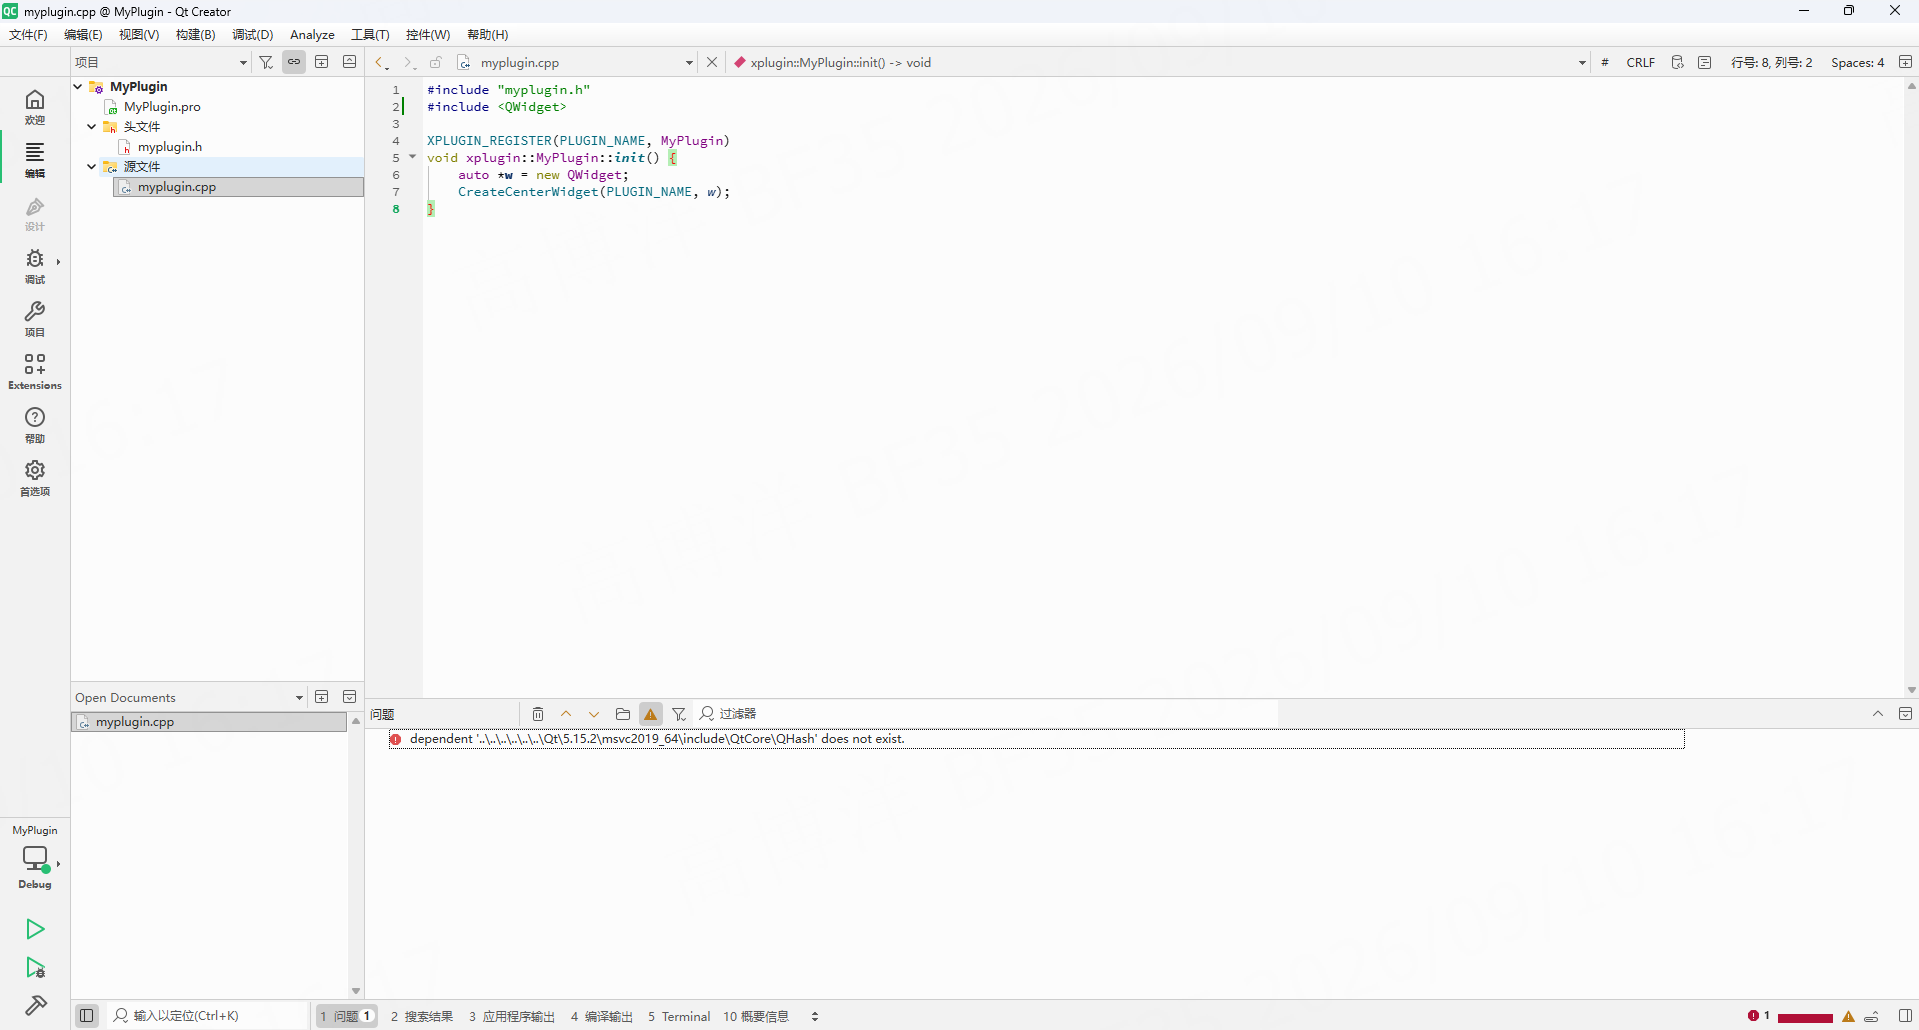
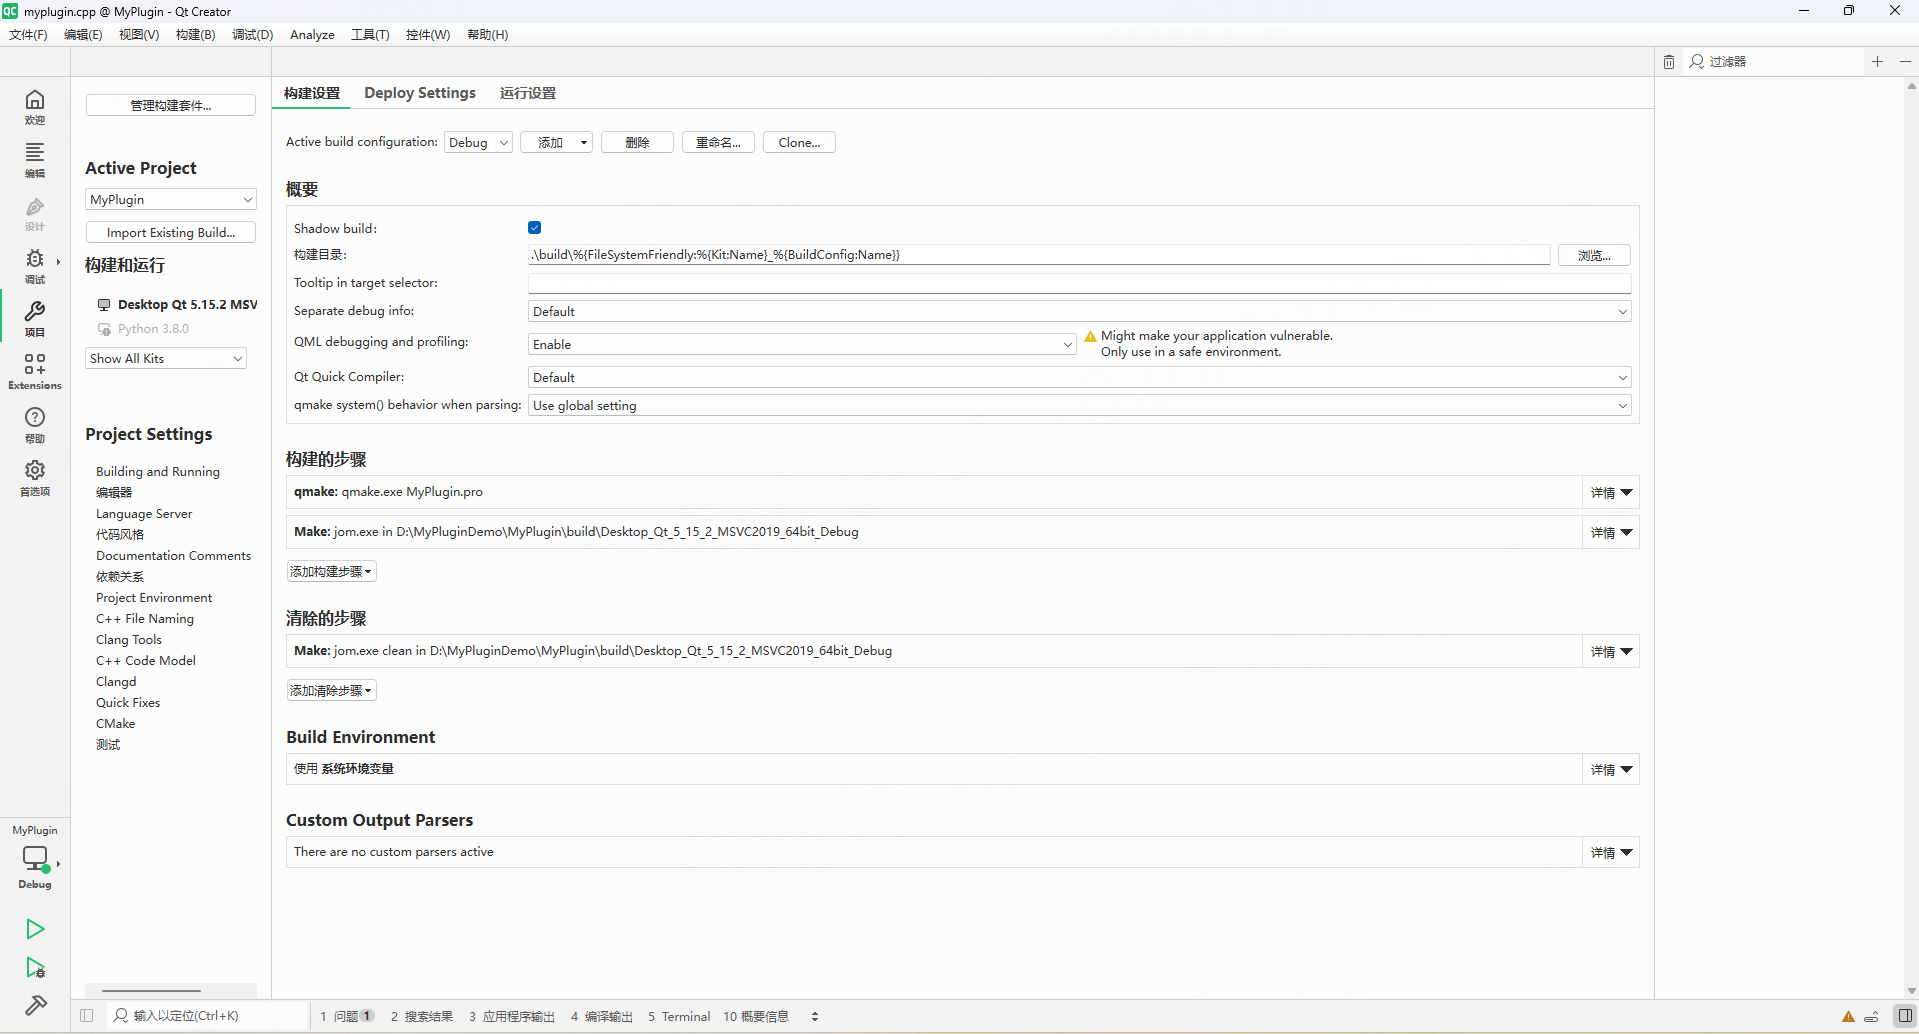
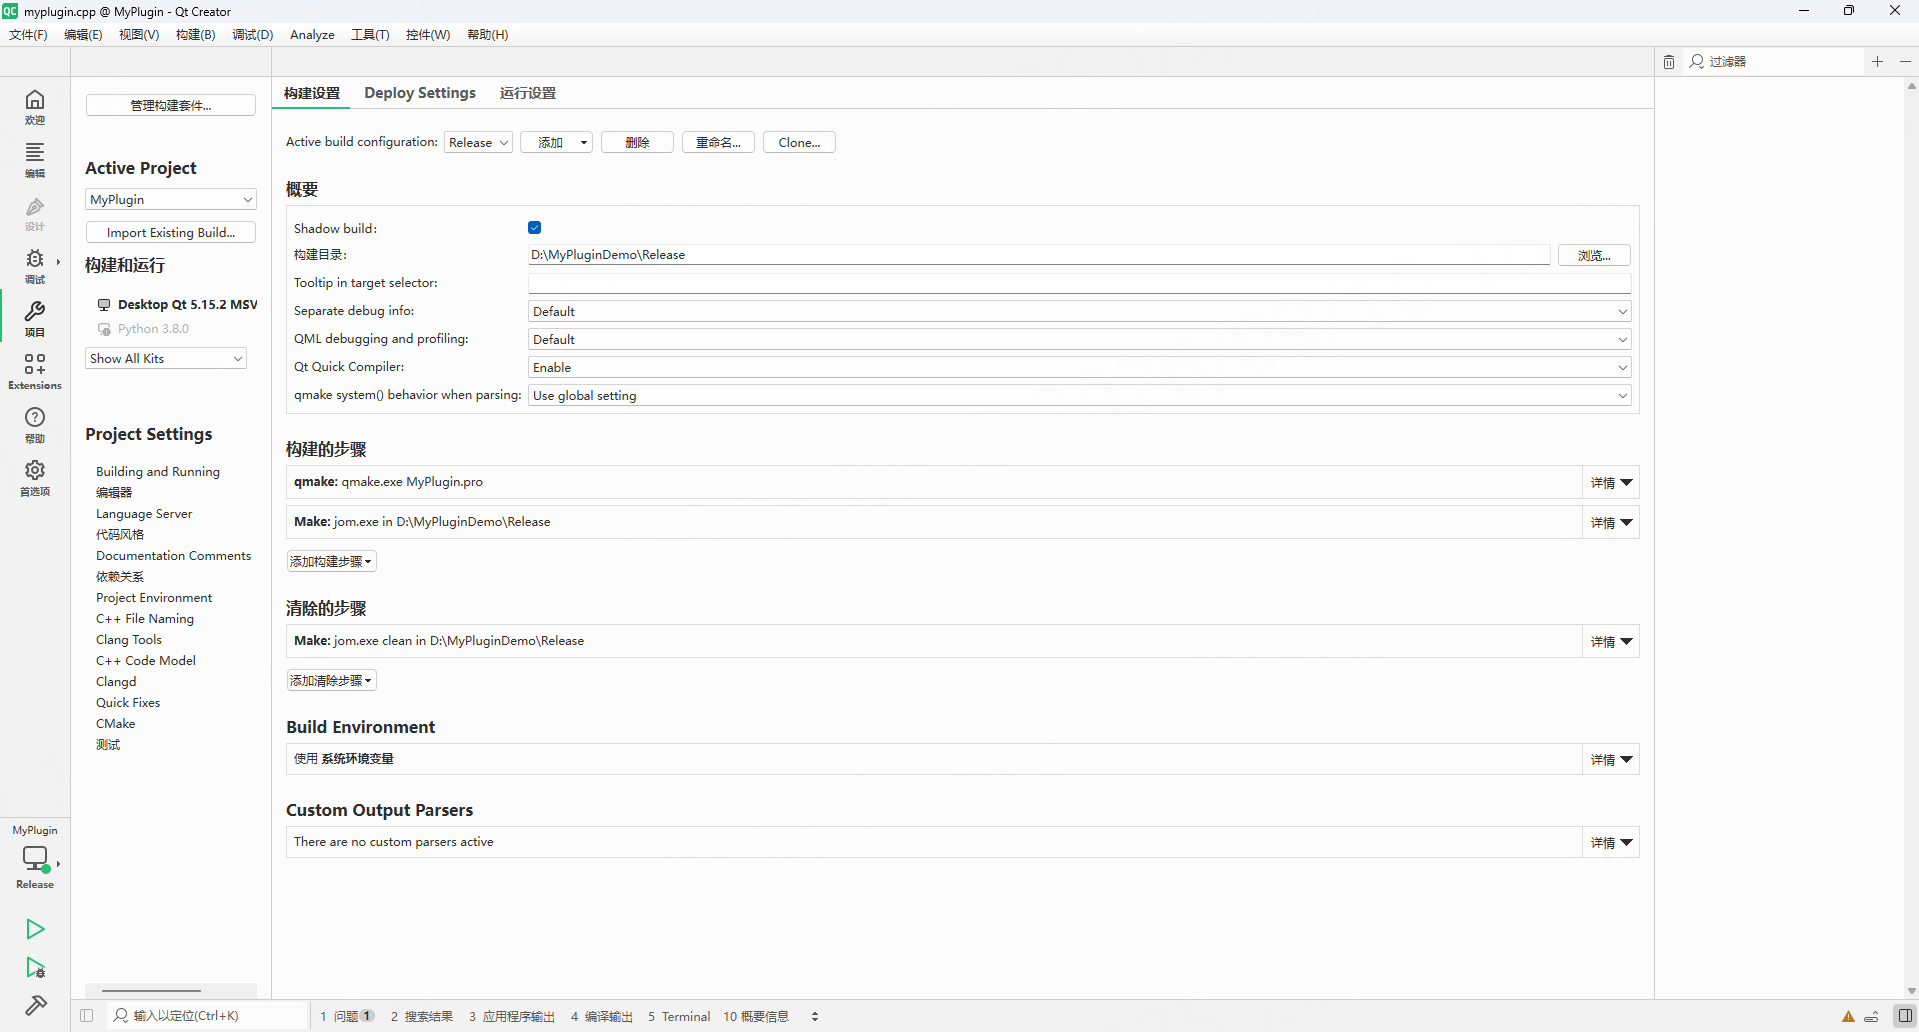
Change the Debug and Release build directories to short paths next to the project, for example D:\MyPluginDemo\Debug and D:\MyPluginDemo\Release.
- Open Projects on the left and open Build Settings for the current kit.
- Set Active build configuration to Debug and change Build directory to
D:\MyPluginDemo\Debug.
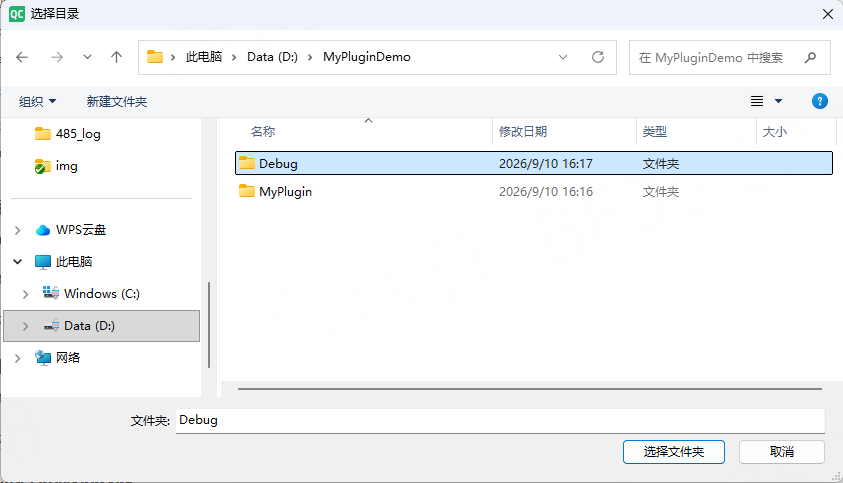
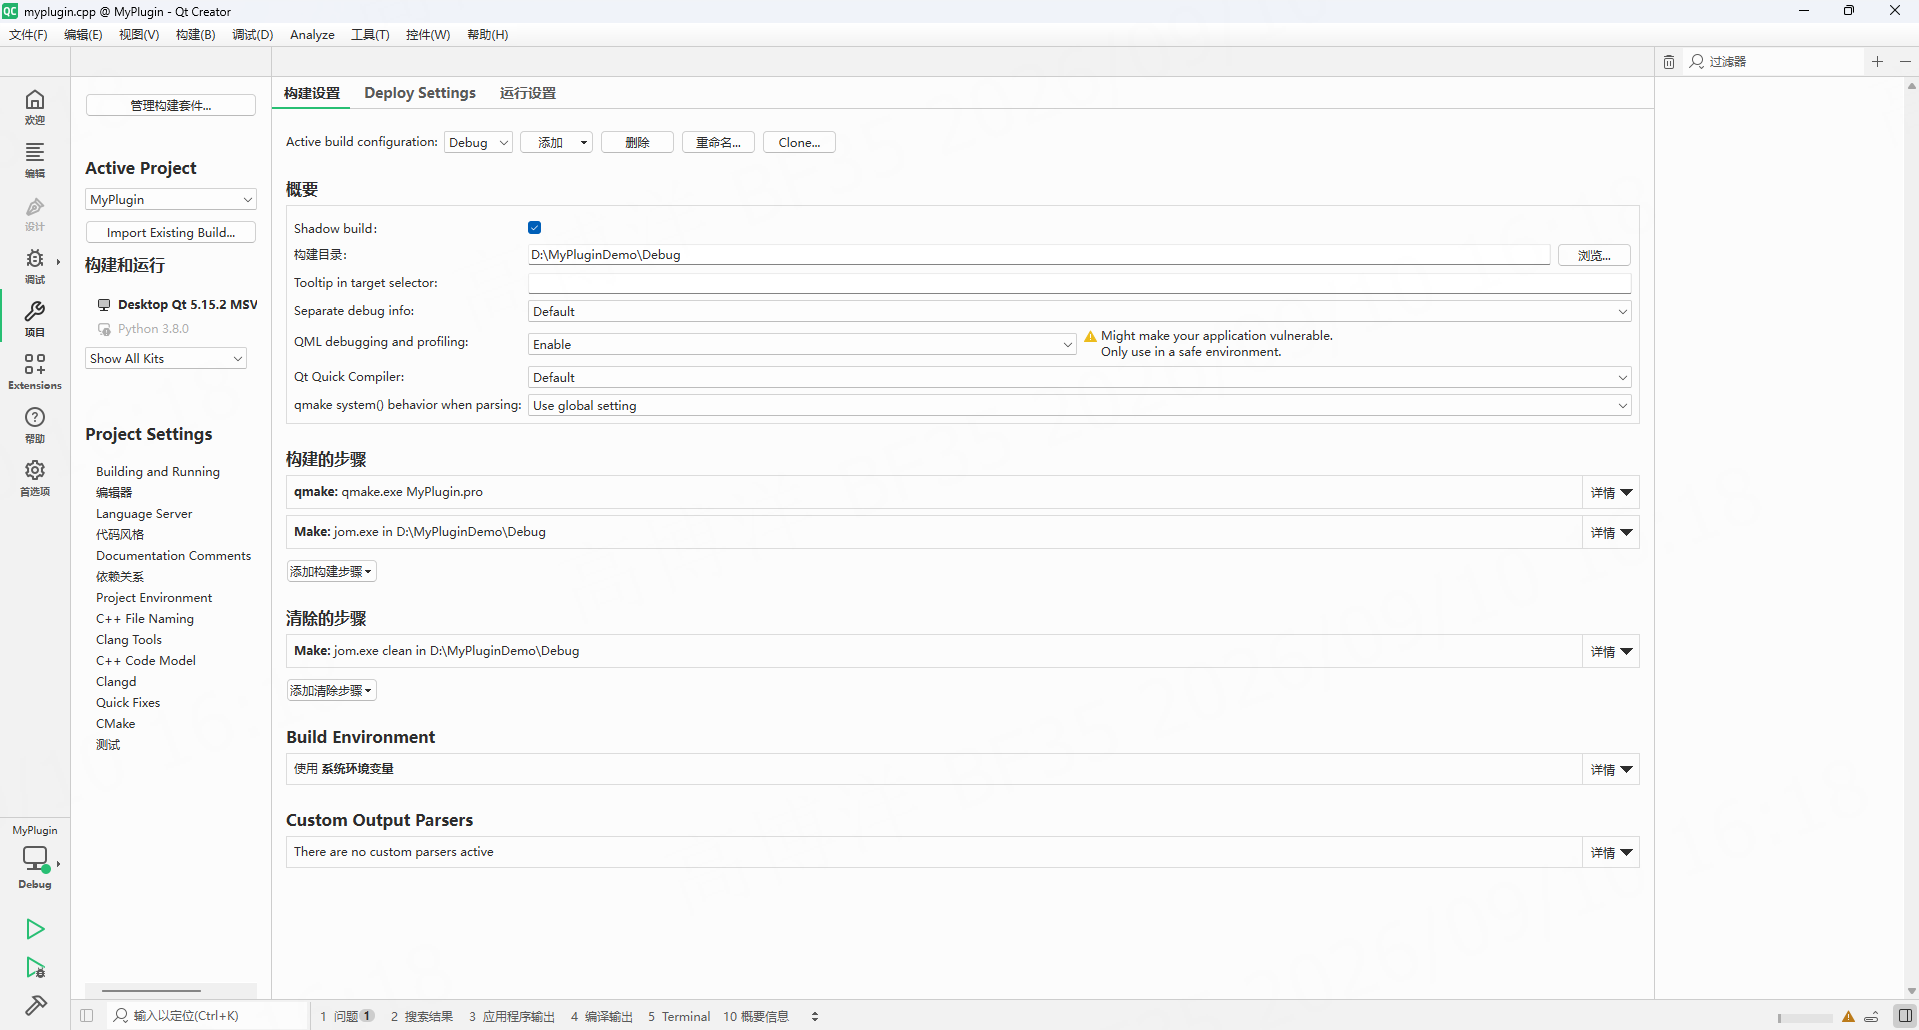
- Switch Active build configuration to Release and change Build directory to
D:\MyPluginDemo\Release.
4. Build again
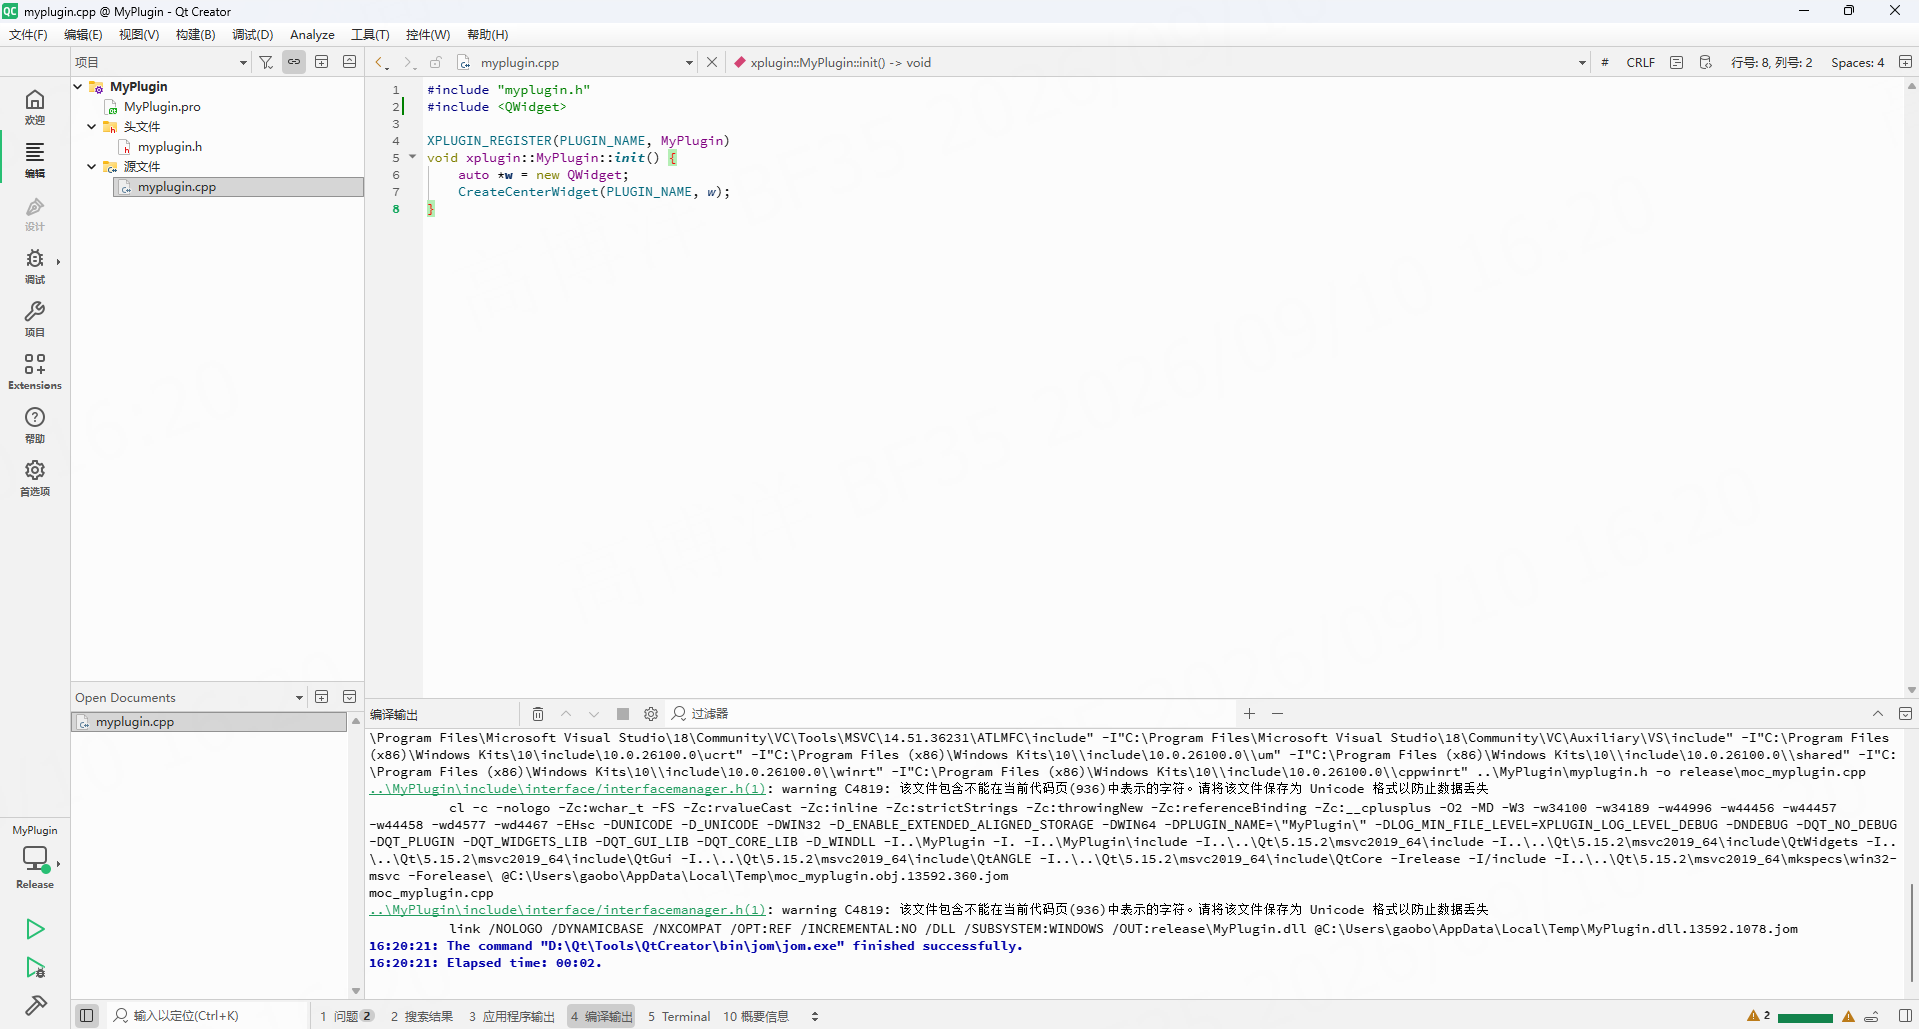
After changing the build directories, choose Build → Build Project "MyPlugin" again.
jom.exe finished successfully in Compile Output indicates a successful build.
5. Locate the build output
On Windows the output is MyPlugin.dll. After the build-directory change above, the Release binary is:
D:\MyPluginDemo\Release\release\MyPlugin.dll
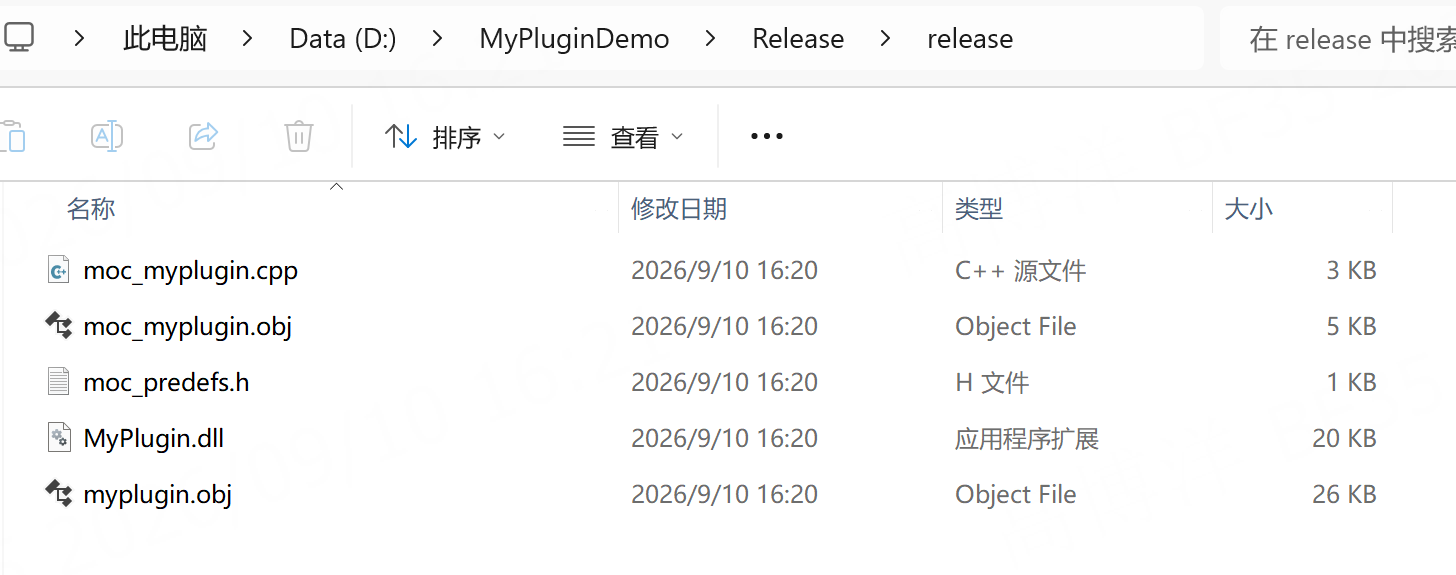
For Debug, the path is D:\MyPluginDemo\Debug\debug\. If the build directory was not changed, the file is in Qt Creator’s default shadow-build folder.
On teach-pendant Linux, the corresponding output is a shared library (.so).
6. Package and import
A successful build produces only the plugin library; it cannot be imported into the HMI yet. Continue with:
- Creating the Plugin Package to write the configuration file and package the plugin.
- Installation and Usage to import and enable the plugin.