Examples
This example demonstrates how to implement a client plugin and run it on the Rokae HMI.
The example is shown by creating a new project; you can also develop directly in the downloaded project and skip Steps 1 through 4.
(This guide uses Windows development as an example. It assumes Qt 5.12 or later is installed and basic C++ development skills.)
Step 1: Create a custom user project. Set the project output to a dynamic link library.
<br/>
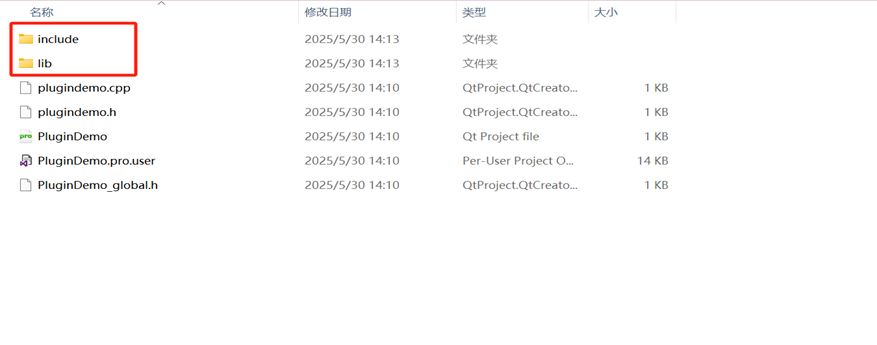
Step 2: Copy the lib and include folders from the downloaded plugin package into the new PluginDemo project.
<br/>
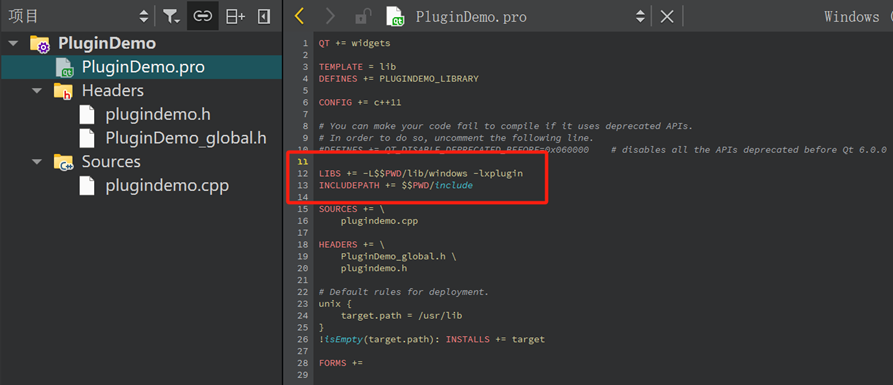
Step 3: Configure the dynamic library loading environment.
<br/>
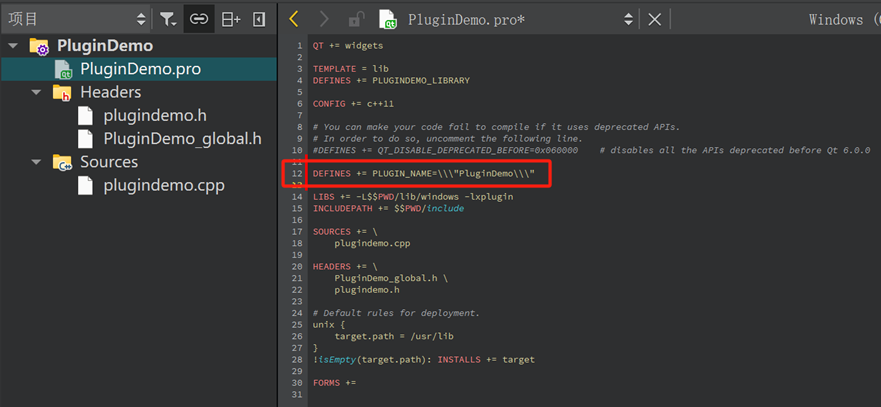
Step 4: Set the plugin name macro (the macro is used to support log file output).
<br/>
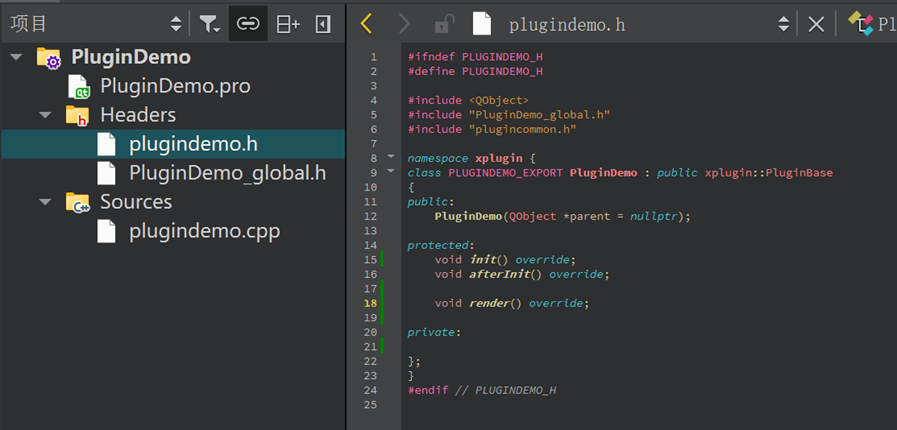
Step 5: In the created < plugindemo.h >, inherit the public base class < PluginBase > and implement the data initialization function. Include < plugincommon.h > from the base library. Place PluginDemo in the xplugin namespace.
<br/>
Step 6: Initialize the plugin
Call the XPLUGIN_REGISTER macro to initialize the plugin. Parameter 1 is the plugin name; parameter 2 is the plugin class name.
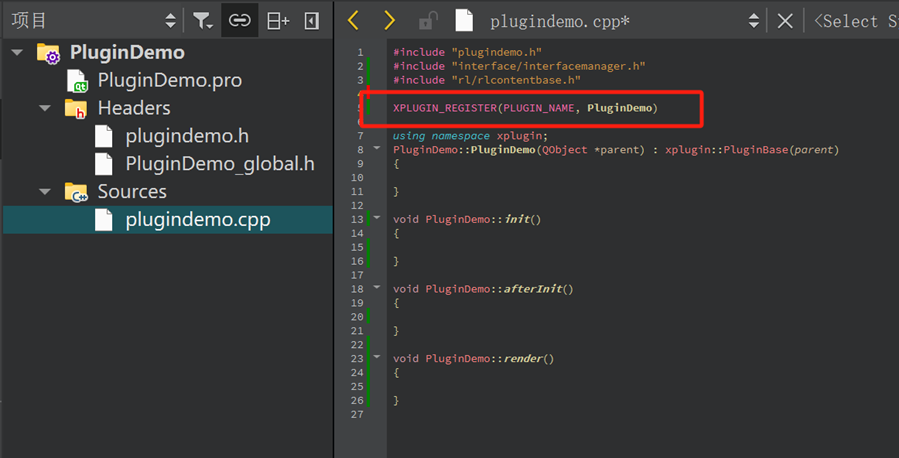 Plugin construction is complete. After a successful build you obtain PluginDemo.dll and PluginDemo.lib.
<br/>
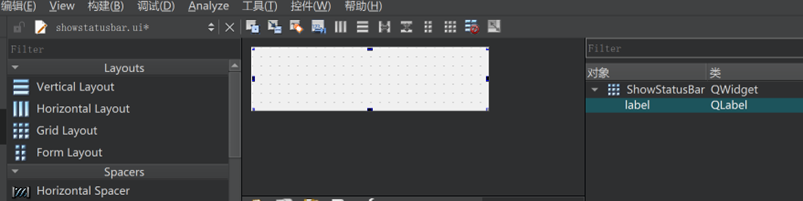
Step 7: Create two custom windows: ShowWidget and ShowStatusBar
ShowWidget window layout (used as the center window):
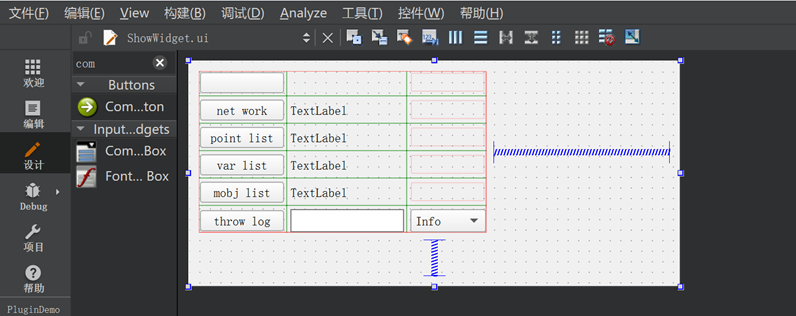
ShowStatusBar window layout (used for the bottom status bar):
<br/>
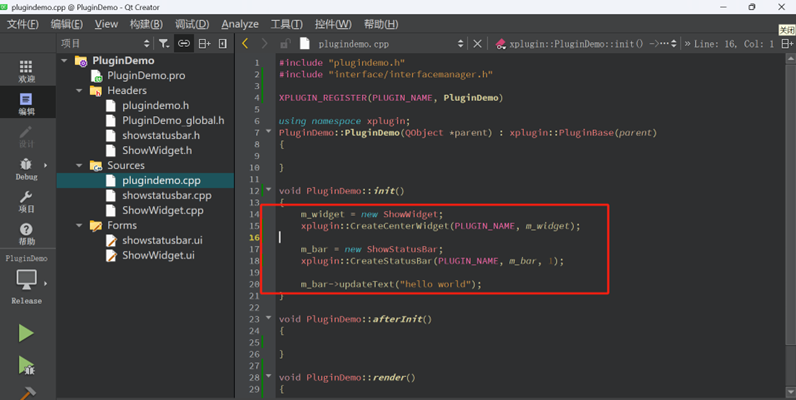
Step 8: Register the created windows to the center window.
xplugin::CreateCenterWidget() registers a window;
xplugin::CreateStatusBar() registers the bottom status bar
<br/>
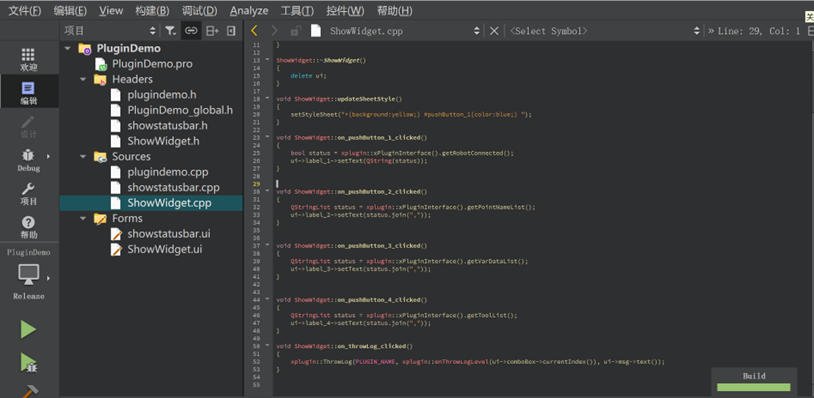
Step 9: Define data display interfaces
In the ShowWidget window, implement button click handlers and call different interfaces to fetch data.
<br/>
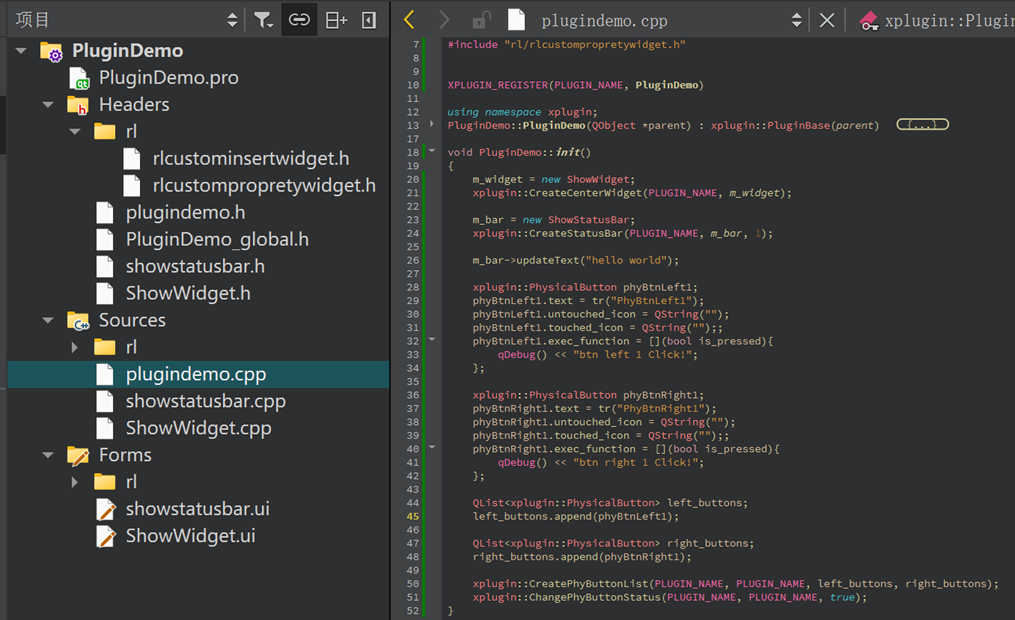
Step 10: Add physical key registration
You can register custom physical keys mapped to shortcut keys on the HMI.
<br/>
Step 11: Add custom auxiliary programming
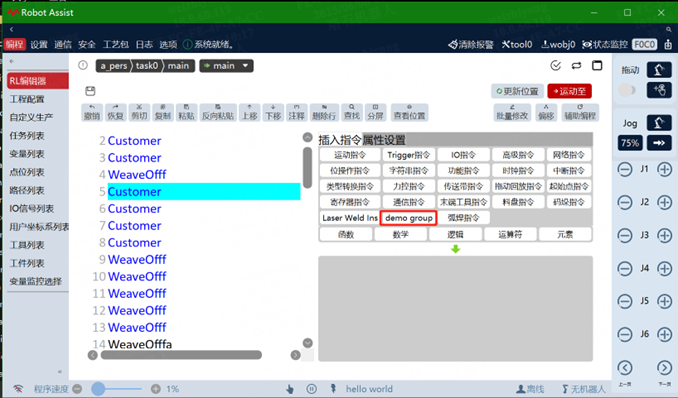
You can define custom programming instructions and insert them into the RL editor auxiliary programming area.
Usage example:
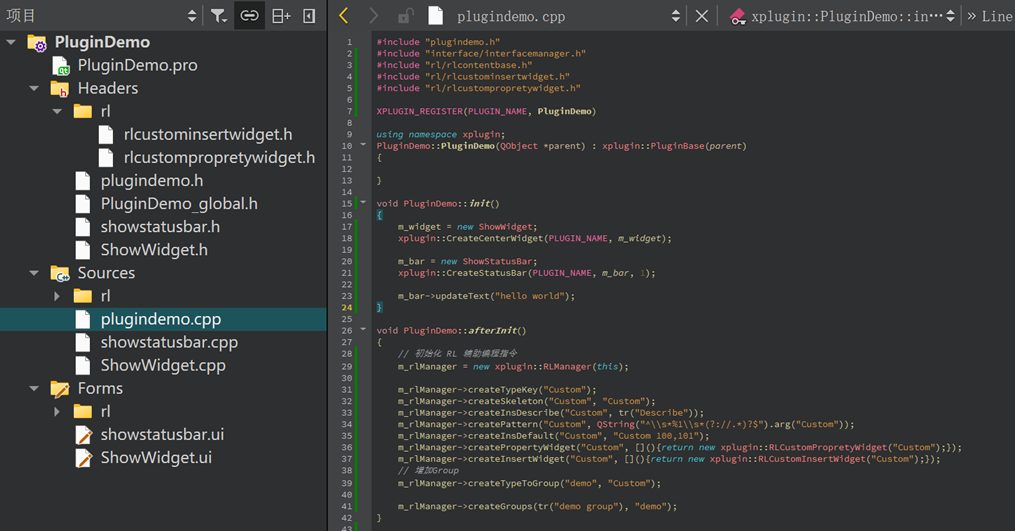
<br/> Workflow order:
1. Initialize RL manager

2. createTypeKey — create instruction keyword (required)

3. createSkeleton — parse string, display UI (optional)

4. createInsDescribe — description (optional)

5. createPattern — parse string, regex match (optional)

6. createInsDefault — default output instruction (optional)

7. createInsertWidget — insert window (optional)

8. createPropertyWidget — property window (optional)

9. createTypeToGroup — add keyword instruction to group (required)

10. createGroups — create instruction group (required)

The "insert window" and "property window" must inherit from base class "RLContentBase". Base class files are in the "include/rl" folder.
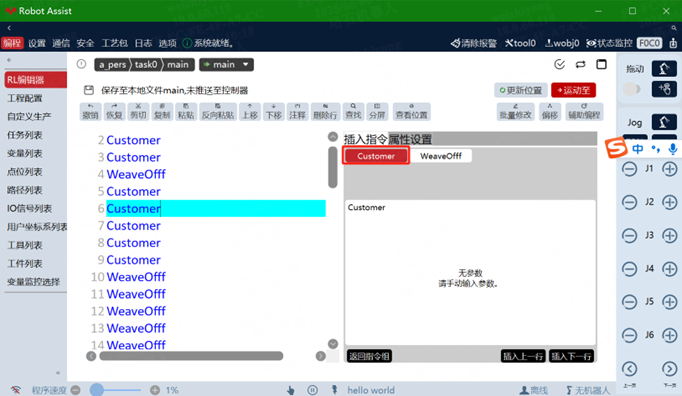
Step 12: Set up insert and property windows
Insert window example:
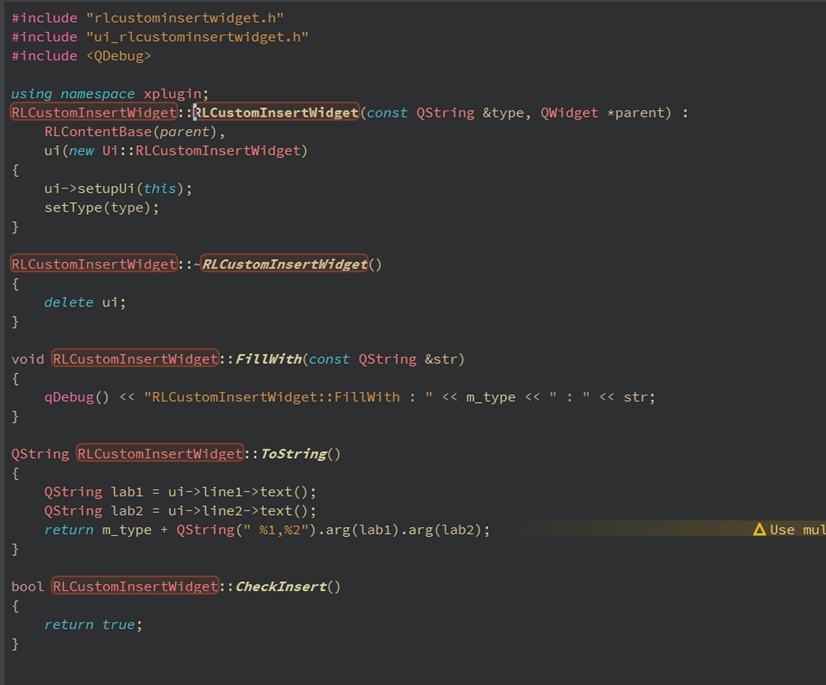
Key functions:
ToString — generate user-defined programming instruction

CheckInsert — define UI type "insert window"

FillWith — fill format; parse string into custom UI

setType — set keyword value
Property window example:
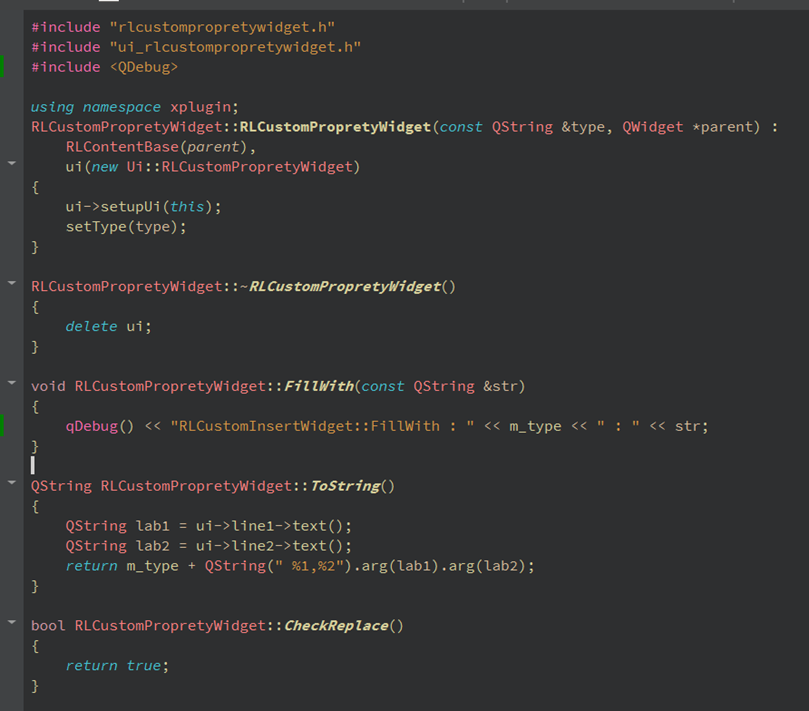
Key functions:
ToString — generate user-defined programming instruction

CheckReplace — define UI type "property window"

FillWith — fill format; parse string into custom UI

setType — set keyword value
Step 13: Set up language pack
You can configure language-pack translation for the UI. Follow the path shown to generate a Chinese language pack named pluginName_cn; it switches with the HMI main language.
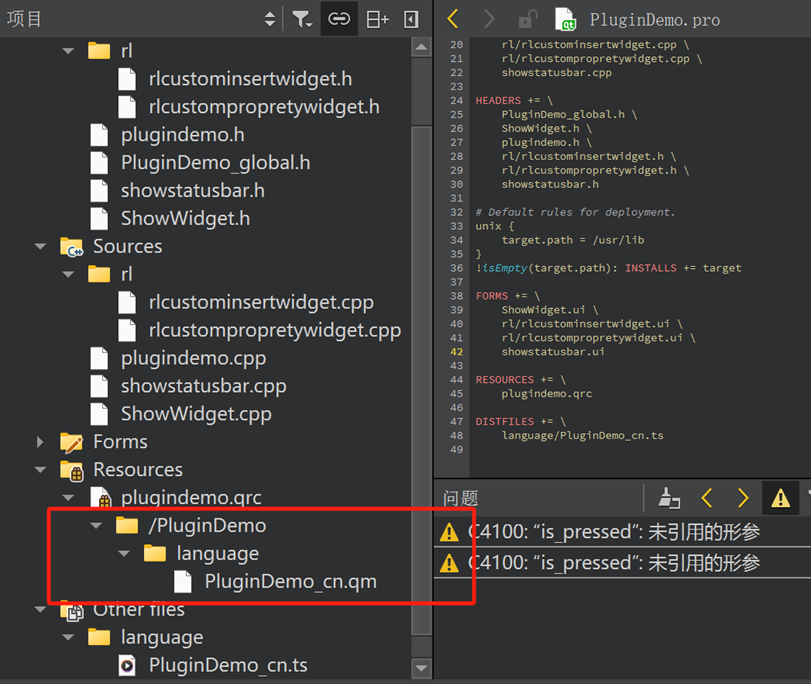
The plugin example is complete! Load it to use.
Display effect: